


What is a Splash Screen and How Should I Get One?
Published on:
1 September, 2026

By Chavi Chandani
Technical Content Writer
Table of contents
If you’ve ever opened an app and seen a short screen with a logo, brand name, or simple design before the main screen appears, you’ve already seen a splash screen.
It may only stay on your screen for a few seconds, but it's actually the first visual representation users get when they open your app. A good mobile app splash screen makes your app feel professional and connected to your brand from the very beginning.
But what is a splash screen? Why do apps use one, and what should a good splash screen design look like?
In this blog, we’ll describe what a splash screen is, why apps use it, and how you can easily add a splash screen to your own app using WebToNative.
What is a Splash Screen?
When you open your app, there’s usually a short moment before you can start using it. During this time, the app prepares in the background, such as loading content and setting up the first screen.
The Splash Screen fills that short gap with a simple, branded screen instead of leaving users staring at a blank or unfinished page.
A typical app splash screen might include the following:
- Your app logo
- App name
- Brand colors
- A simple background or image
- A short animation, if needed
The design doesn't need to be complicated. In fact, a clean splash screen design usually works better because users see it only briefly.
Why Do Apps Use Splash Screens?
There are three main reasons why apps use a splash screen:
1. Launch preview
Apps sometimes need a moment to load. Instead of showing users a blank screen, a splash screen gives them something simple to see while the app gets ready.
2. Brand Recognition
Your logo, app name, and brand colors can appear on the screen as the app opens. This helps users quickly recognize your app and remember your brand.
3. Welcome Experience
The splash screen is one of the first things users see when they launch your app. A clean, simple design can make the app feel more polished and professional right from the start.
How to Get a Splash Screen for Your App Without Coding
If you’re building an app the traditional way, setting up a splash screen can involve writing code and preparing image files in different sizes for Android and iOS separately. But if you’re using WebToNative to turn your website into an app, you can set up and customize your splash screen without writing any code.
Here are the splash screen options WebToNative offers:
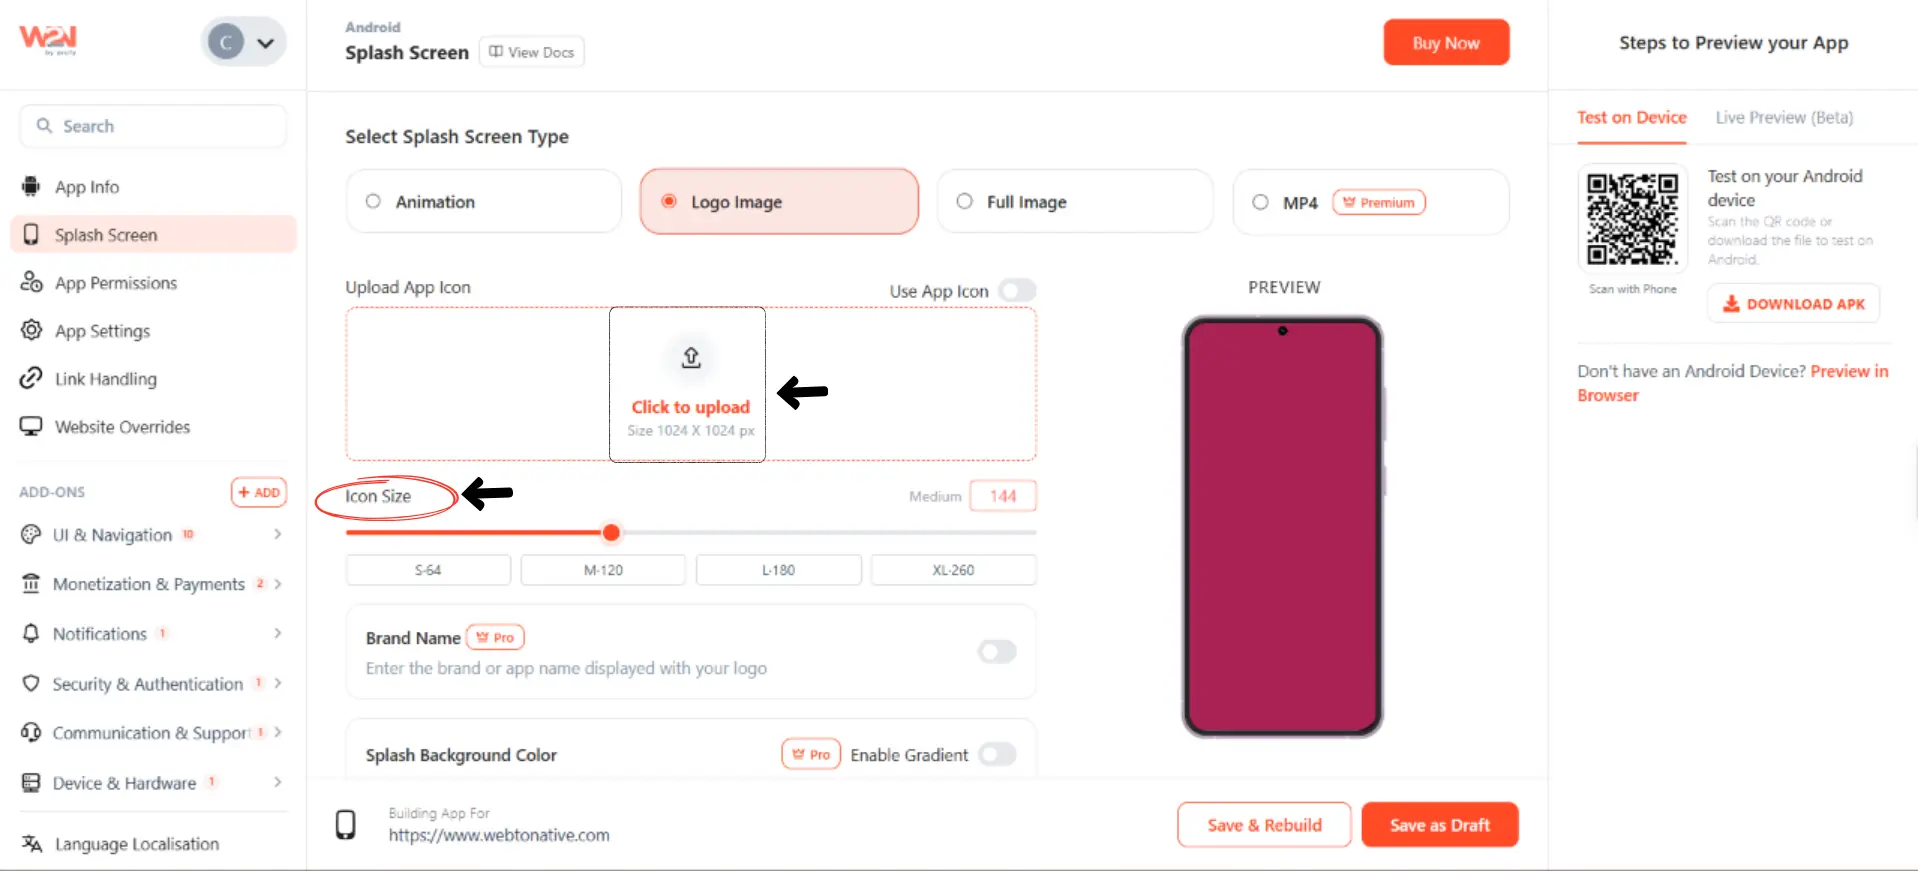
1. Splash Screen with Logo Image
- You can upload your app icon in 1024 × 1024 px and choose how large you want it to appear, including S, M, L, or XL. You can also turn the icon on or off.
- If you’re a Pro Plan user, you can add your brand name too. You can choose the text color, position it at the top, center, or bottom, and select a background color.
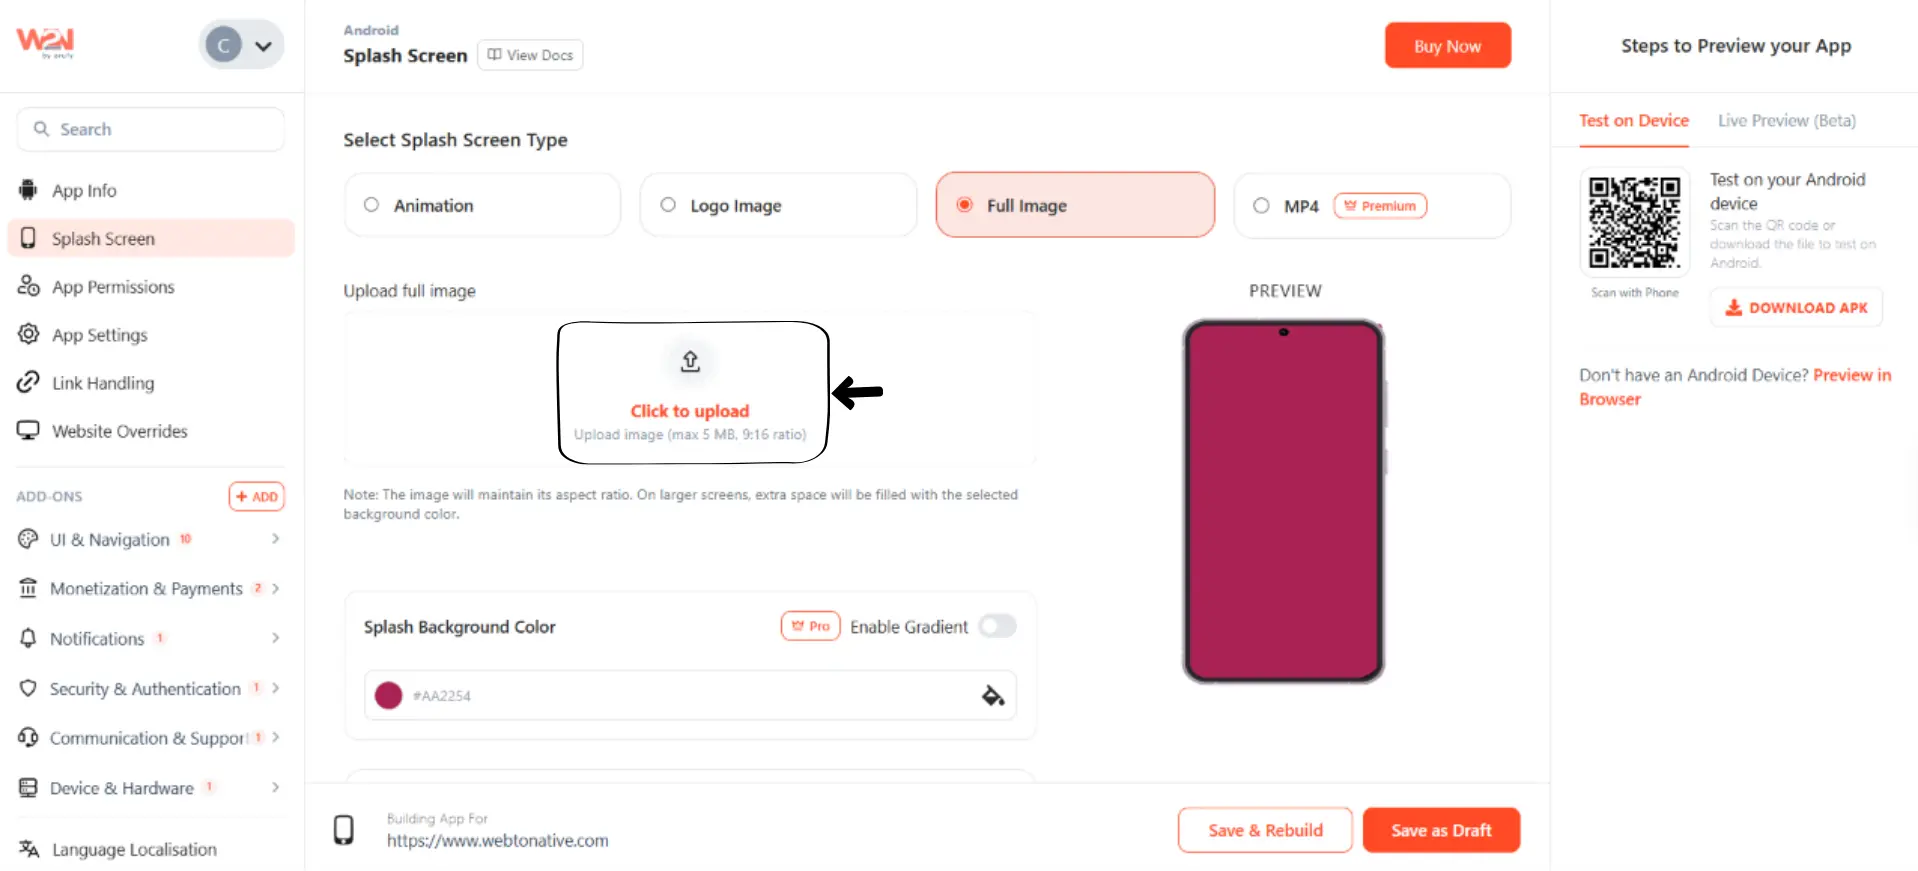
2. Splash Screen with Full Image
- Want something more than just a logo? You can upload a full branded image for your splash screen. The image can be up to 5 MB and should have a 9:16 ratio.
- WebToNative automatically adjusts it to fit mobile screens. You can also choose a background color.
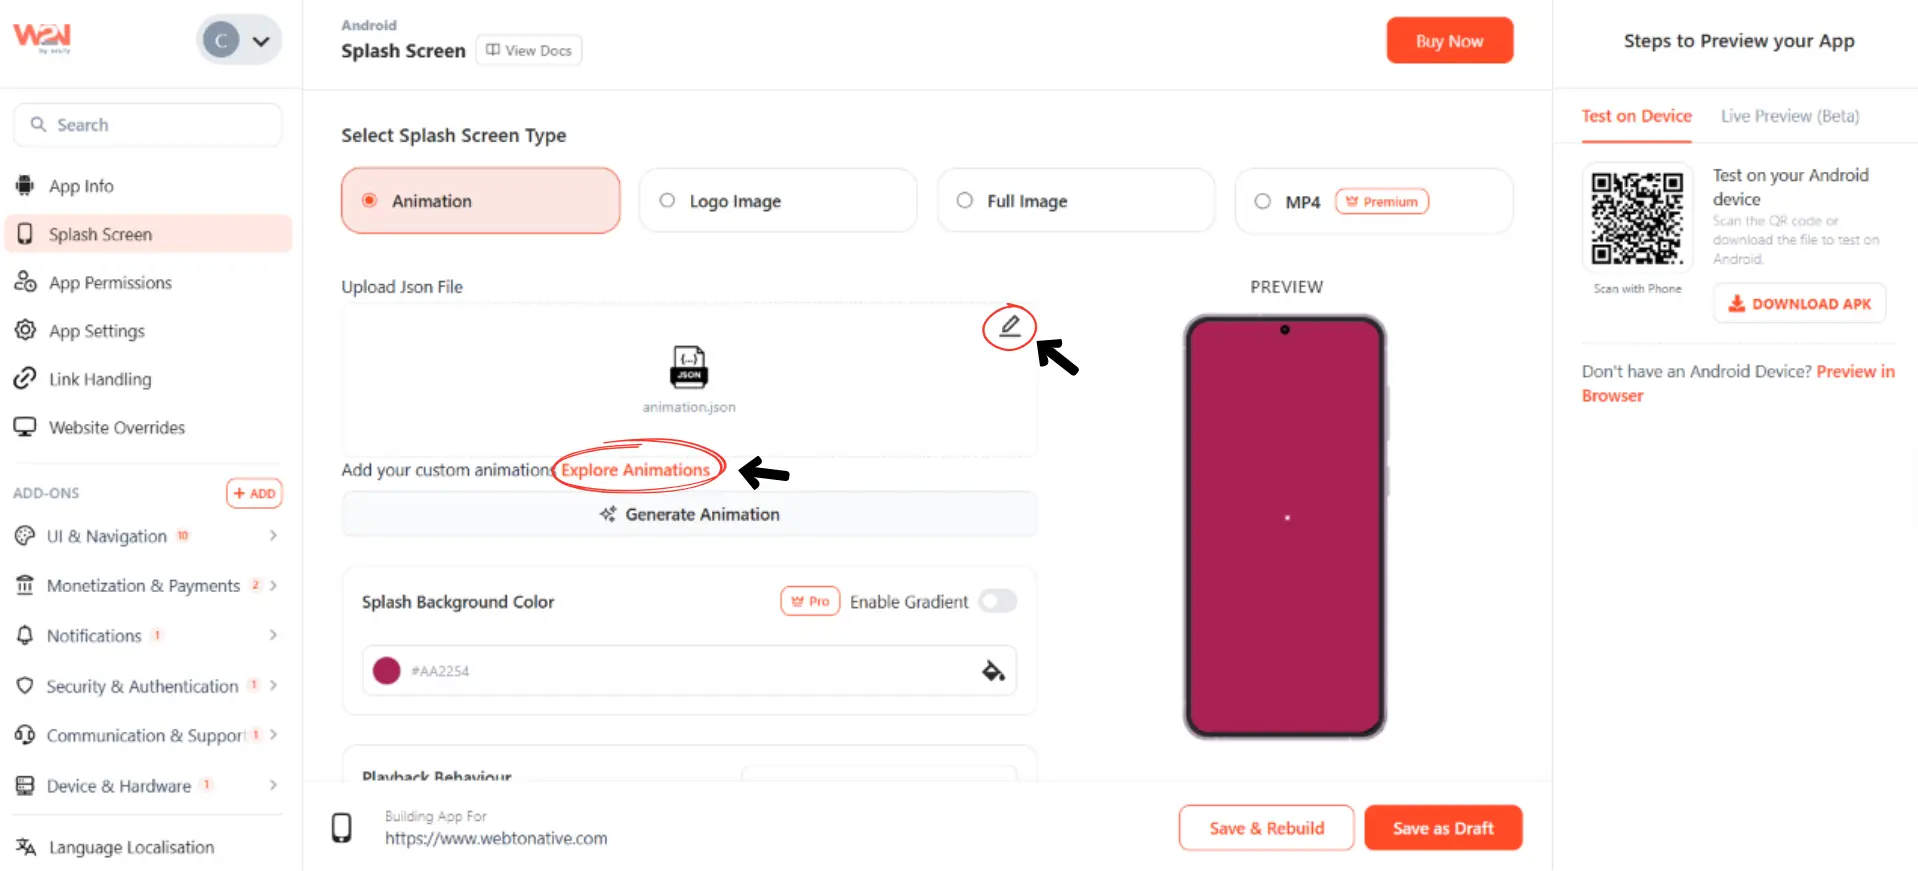
3. Splash Screen with Animation
- You can also use an animated splash screen to give your app a more dynamic opening experience. Choose from effects like bounce, scale, fade, or rotate to make your logo appear smoothly when the app starts.
- You can also add your app name and choose your brand and background colors to match your app’s look.
4. Splash Screen with MP4
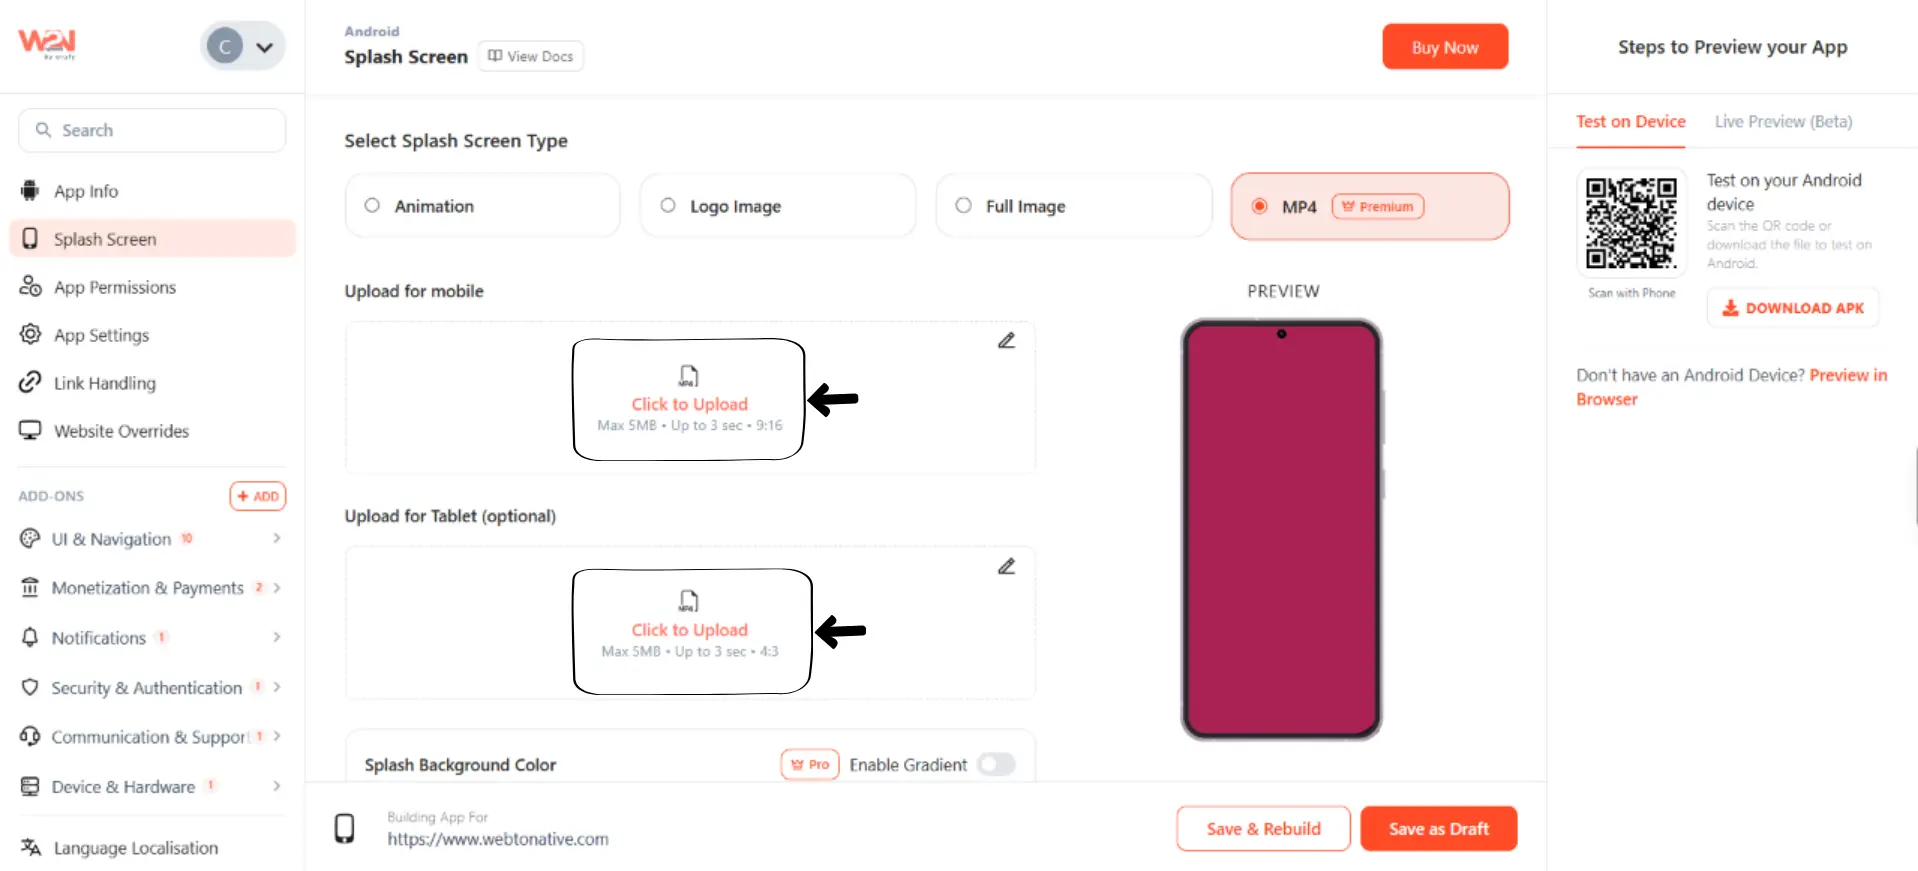
- Premium users can also use a short MP4 video as their splash screen for a more engaging app launch.
- For mobile apps, the MP4 video should be no larger than 5 MB, should be 3 seconds long, and should have a 9:16 aspect ratio. For tablets, the video can also be up to 5 MB and 3 seconds long, but it should follow a 4:3 aspect ratio.
- You can also choose a background color for the splash screen.
5. Splash Background Color
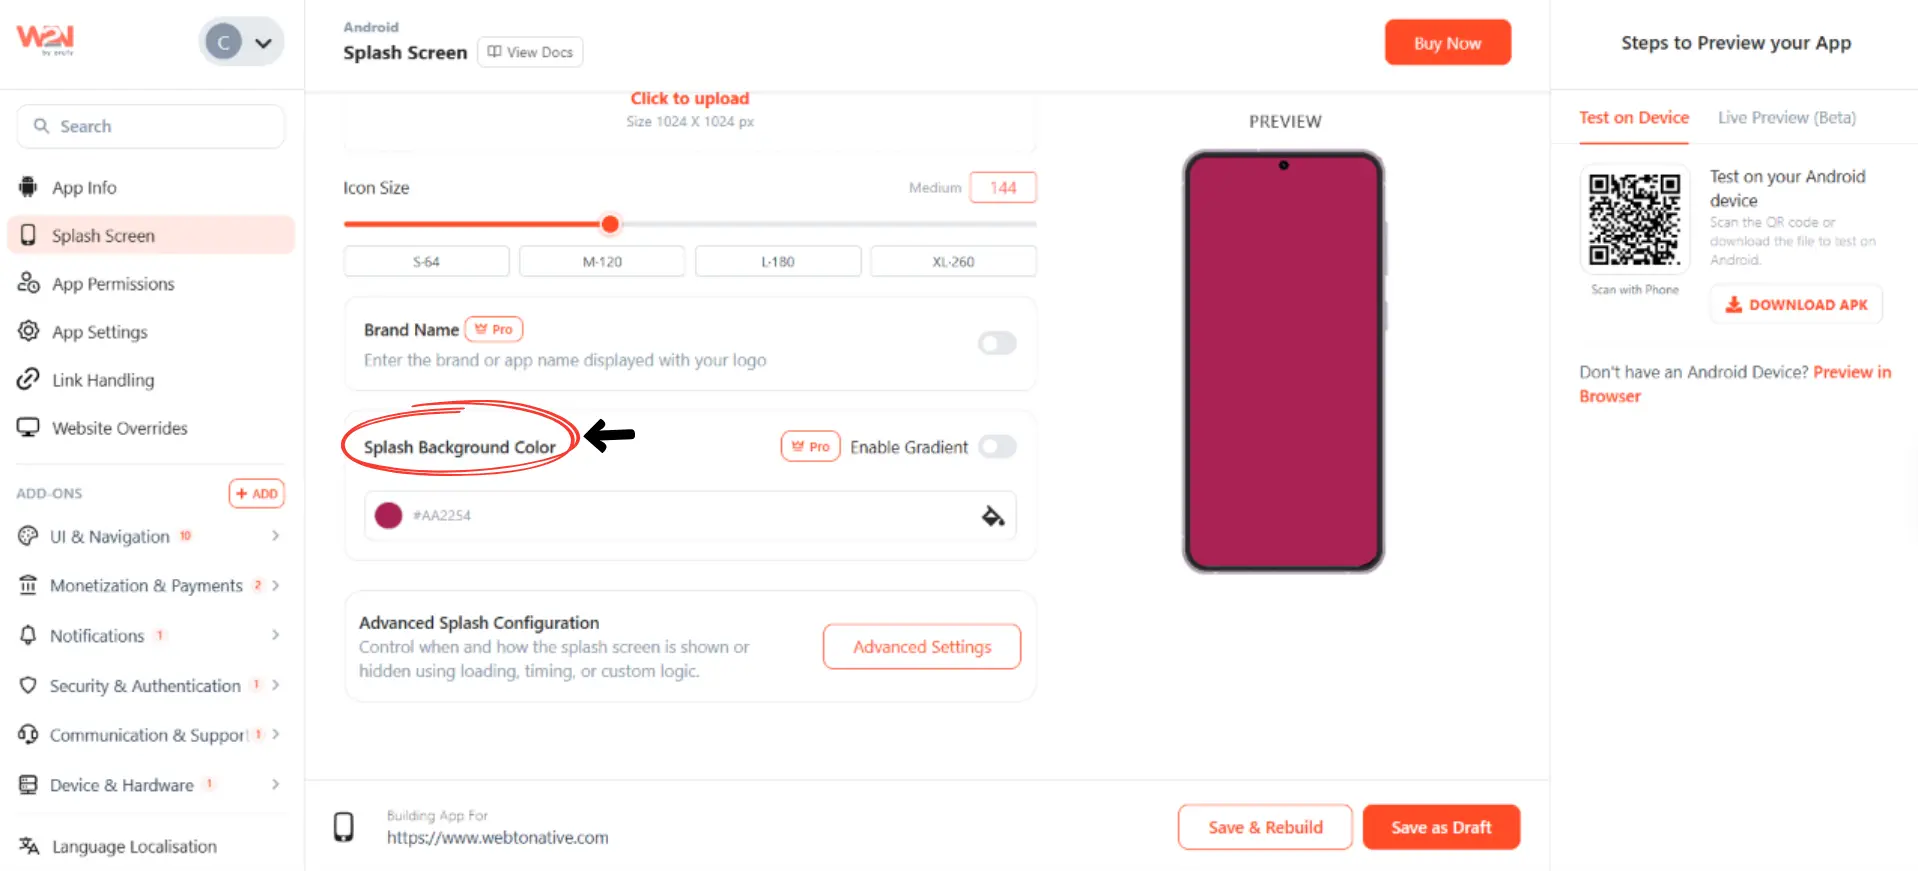
- You can choose a background color that matches your app or brand. You can also use a gradient with two or more colors for a more customized look
- You can also control how long the splash screen stays visible and how it plays using the playback settings.
6. Advanced Settings
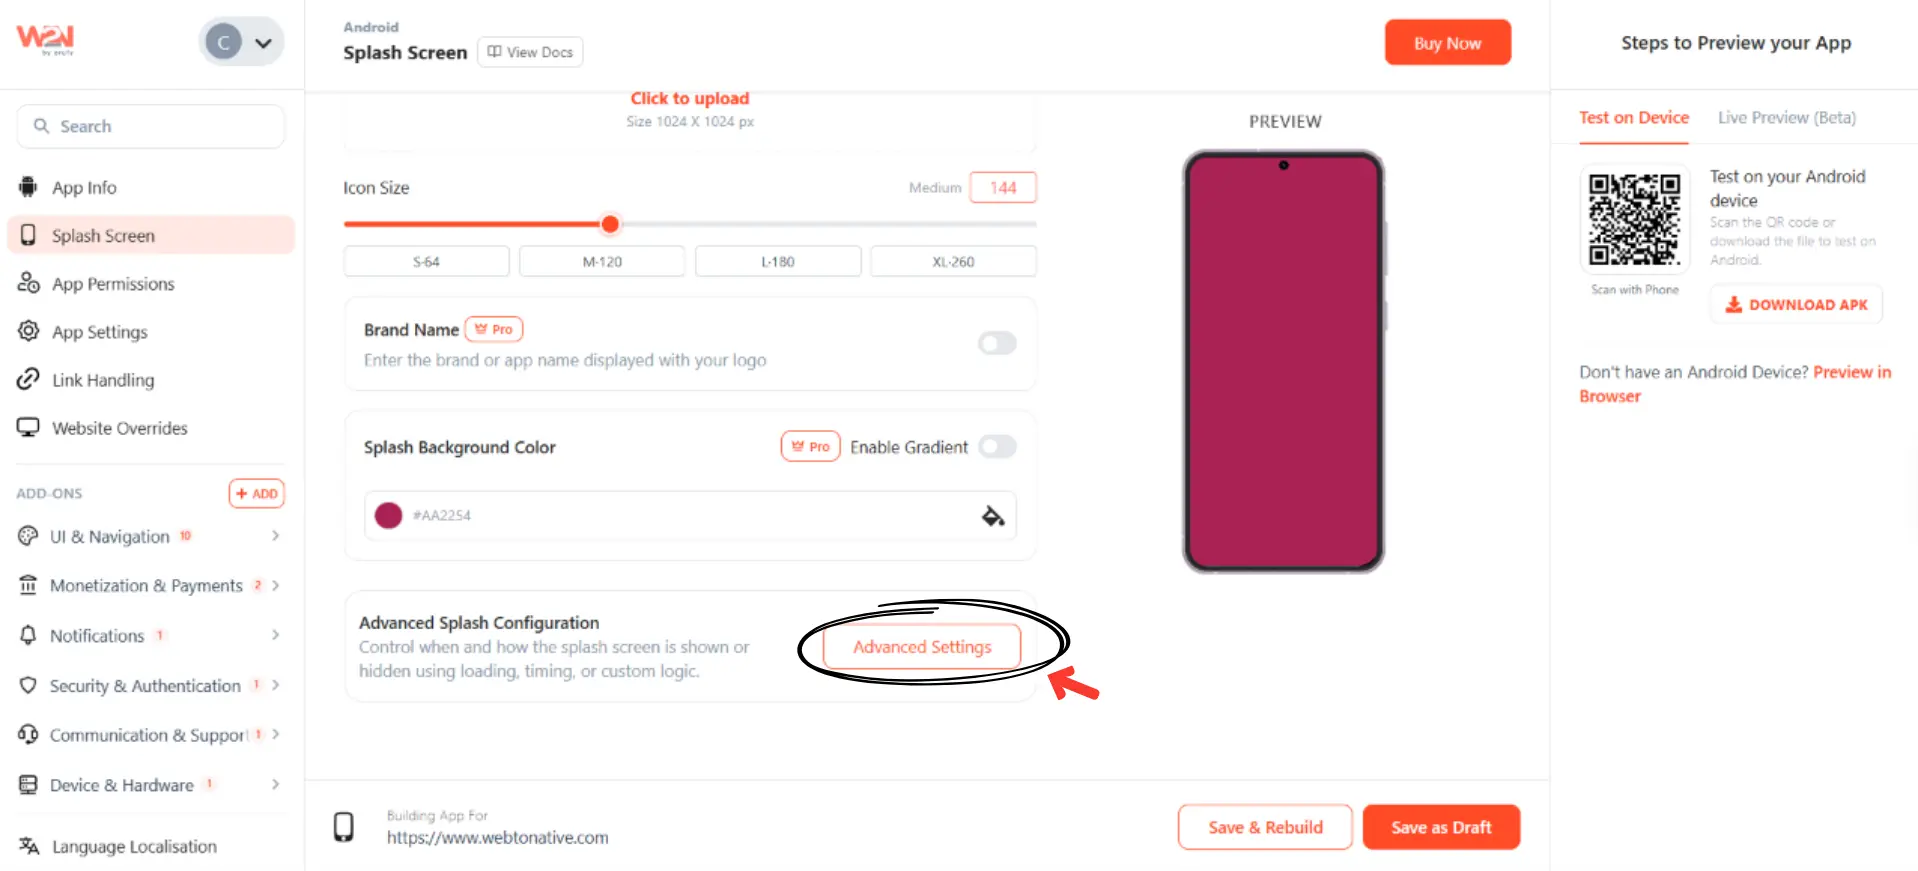
- If you want more control over how your splash screen works, WebToNative also provides advanced settings for customizing its behavior.
- You can choose when the splash screen disappears, such as after a certain page-load progress, a fixed duration, or a JavaScript trigger. You can also set a minimum display time and fade-out effect for a smoother transition.
Tips for a Good Splash Screen
A good splash screen design should be simple, quick, and match your brand. Keep these tips in mind:
1. Keep it simple
- Don't try to put everything on your splash screen. Your logo, app name, and brand color are usually enough.
- A clean design looks better and is easier to recognize.
2. Use a clear logo
- Make sure your logo looks sharp and easy to see.
- A low-quality or stretched image can make your app look less professional, especially on larger screens.
3. Match your brand
- Use colors and visuals that match your app or website.
- This makes the splash screen feel like a natural part of your brand instead of something separate.
4. Keep it quick
- A splash screen should only stay while your app is getting ready.
- Keep animations short and avoid making users wait longer than necessary just to get into the app.
5. Test before launching
- Check how your splash screen looks on different phones and tablets.
- Make sure the logo, text, and background look good and don't get cut off or misplaced.
Conclusion
A splash screen may only appear for a few seconds, but it can make those first moments with your app feel much better. It gives users a smooth start while the app loads and helps them recognize your brand right away.
The good news is that creating a splash screen for your app doesn’t have to be complicated. With WebToNative, you can add and customize your splash screen without writing code. Simply choose your preferred style, add your logo or image, pick your background color, and customize it to match your brand.
Keep it simple, keep it quick, and make those first few seconds count.
Similar Blogs