


App Settings for Android
The Android App Settings section allows you to customize and control how your app behaves on Android devices. You can manage features like permissions, screen orientation, add a callback on app resume, disable caching, and other app-related configurations. These settings help optimize the app experience and make your app feel more native on Android.
Features for Your Android App
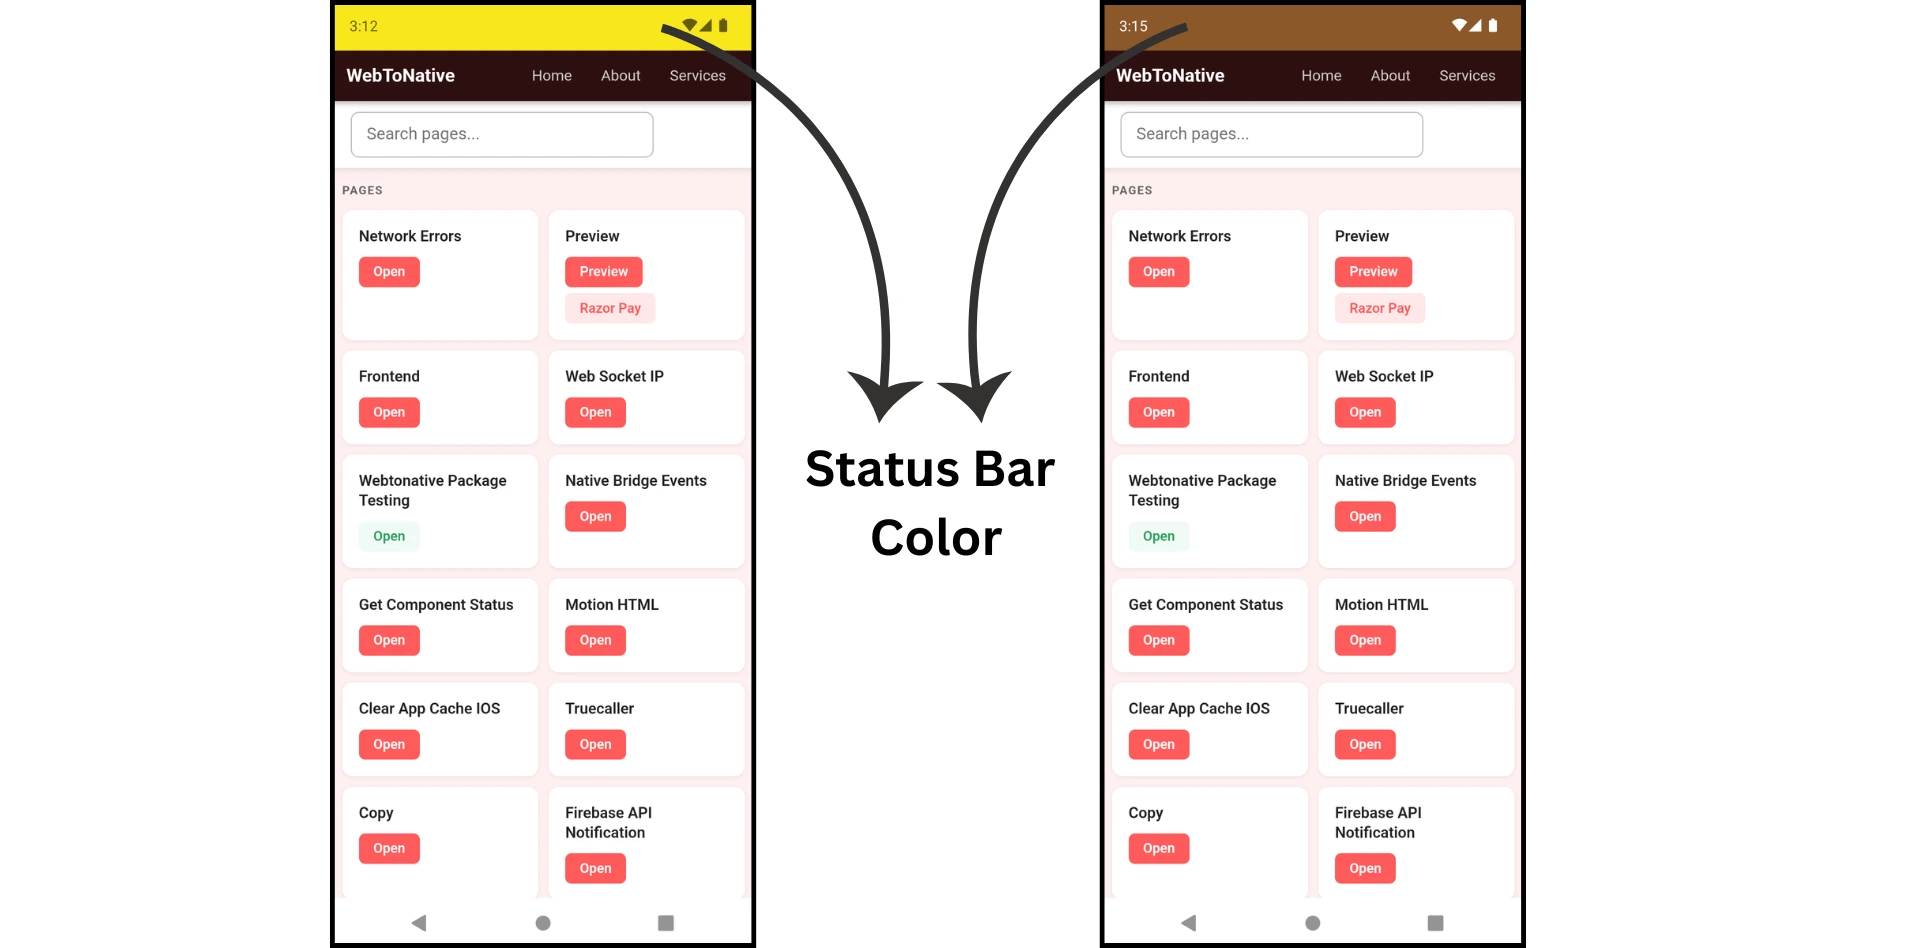
Status Bar Color
Set the color of the status bar. The status bar is the horizontal bar at the top of the screen that displays device information such as time, battery status, and notifications. Use hexadecimal color codes to specify the color. For example, #FFFFFF represents white.
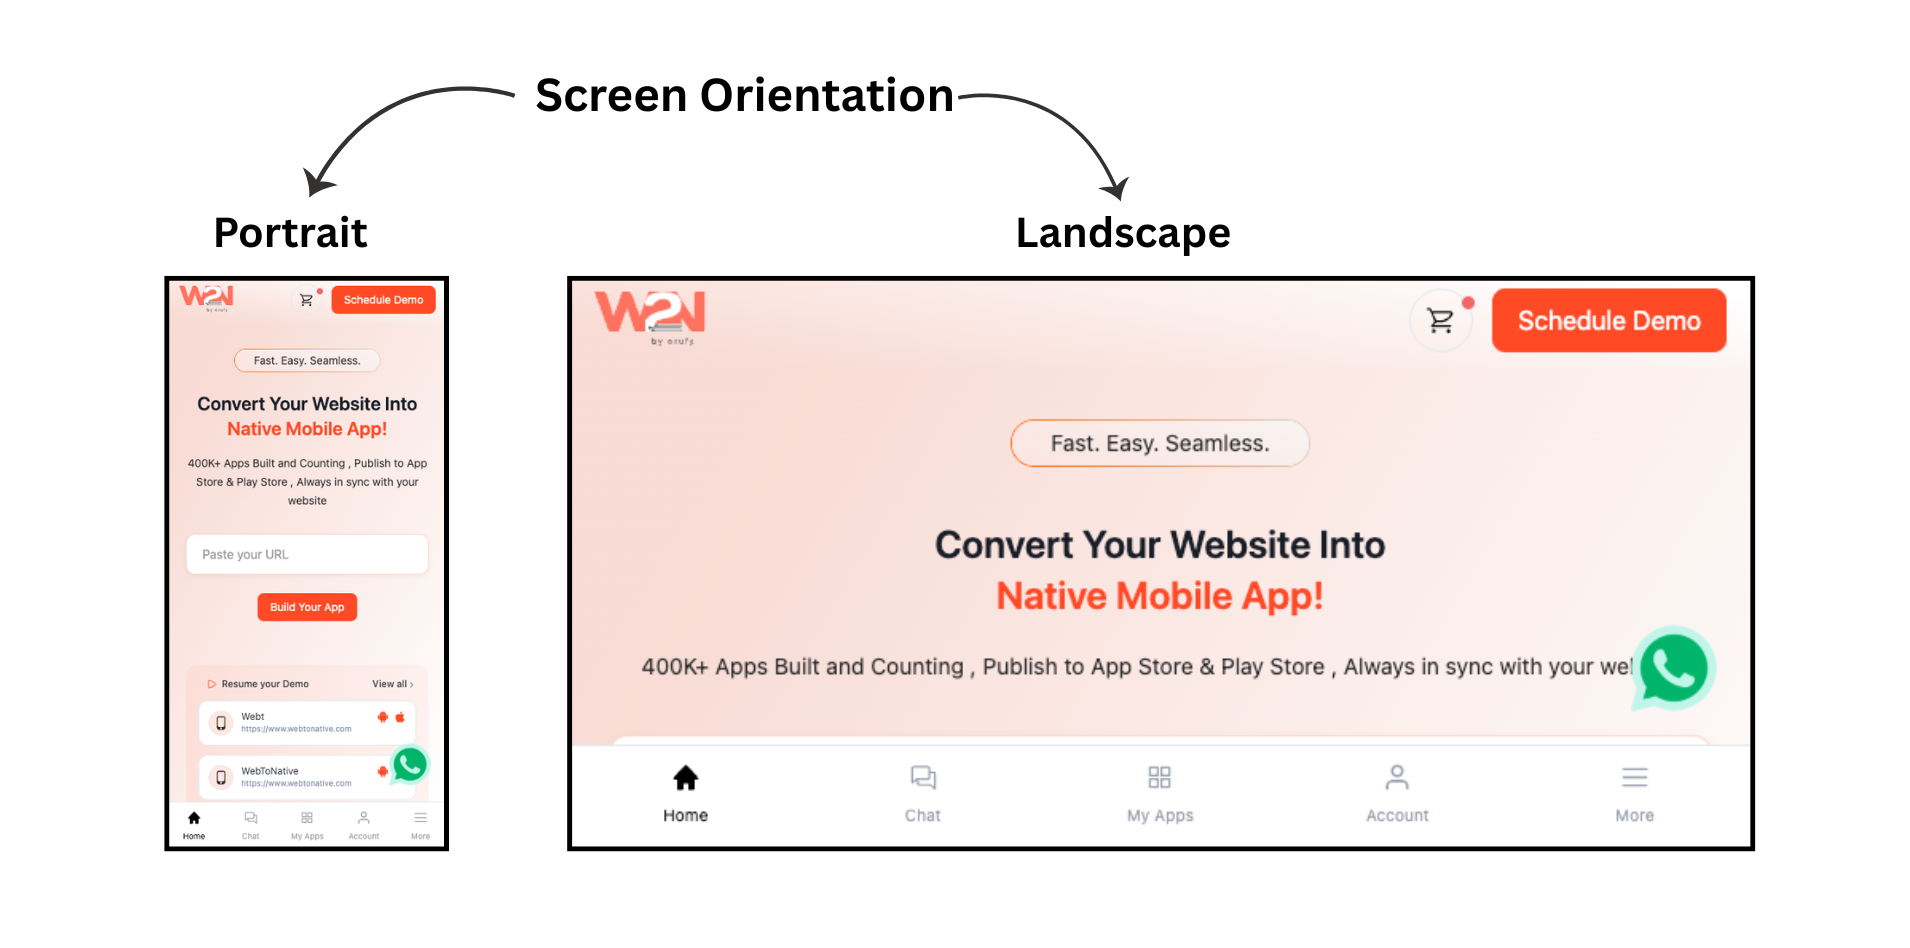
Screen Orientation
Screen Orientation controls how the app layout appears — Portrait, Landscape, or Both. This feature improves usability across different screen sizes:
-
Portrait: Setting the app screen to portrait orientation allows users to view it only vertically.
-
Landscape: Choosing the landscape orientation for the app screen enables users to view it only horizontally.
-
Both (Portrait & Landscape): If you select both, then your users can view the app in both portrait (vertically) and landscape (horizontally) orientations.
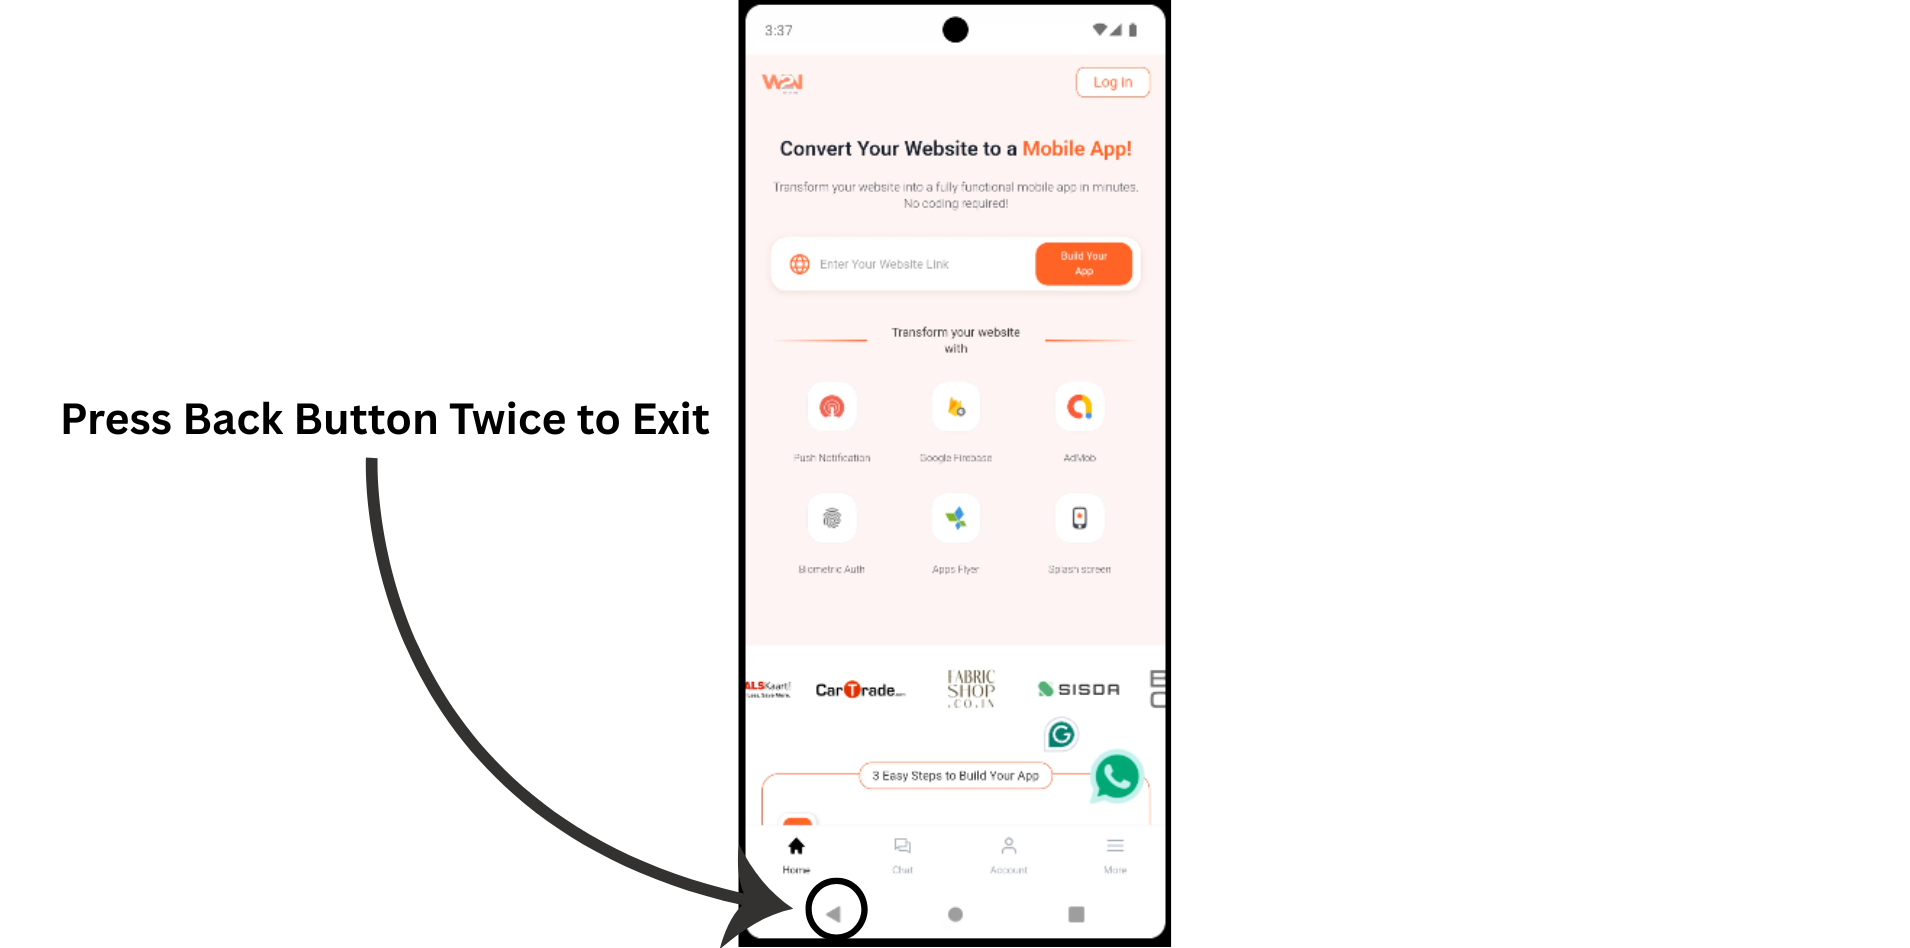
Press Again to Exit
It allows users to quickly exit the app by double-clicking on the back button.
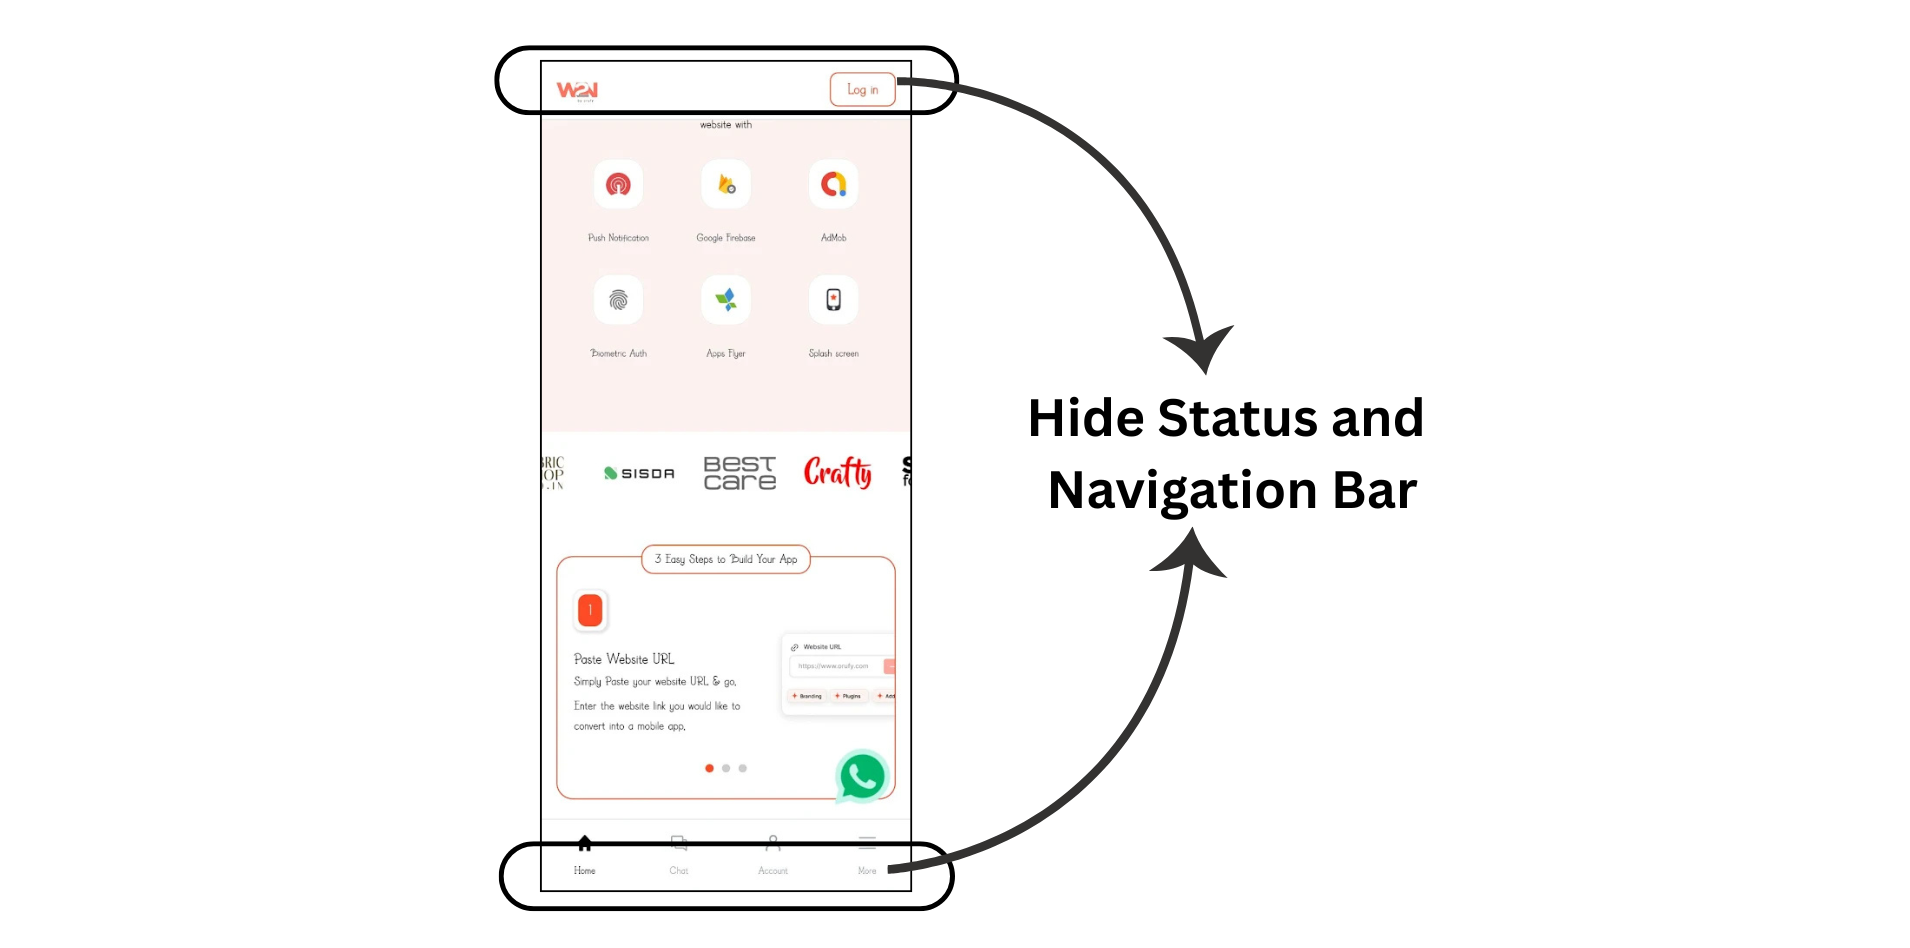
Enable Full Screen
Enabling this setting opens the app in a full-screen mode, hiding status and navigation bars.
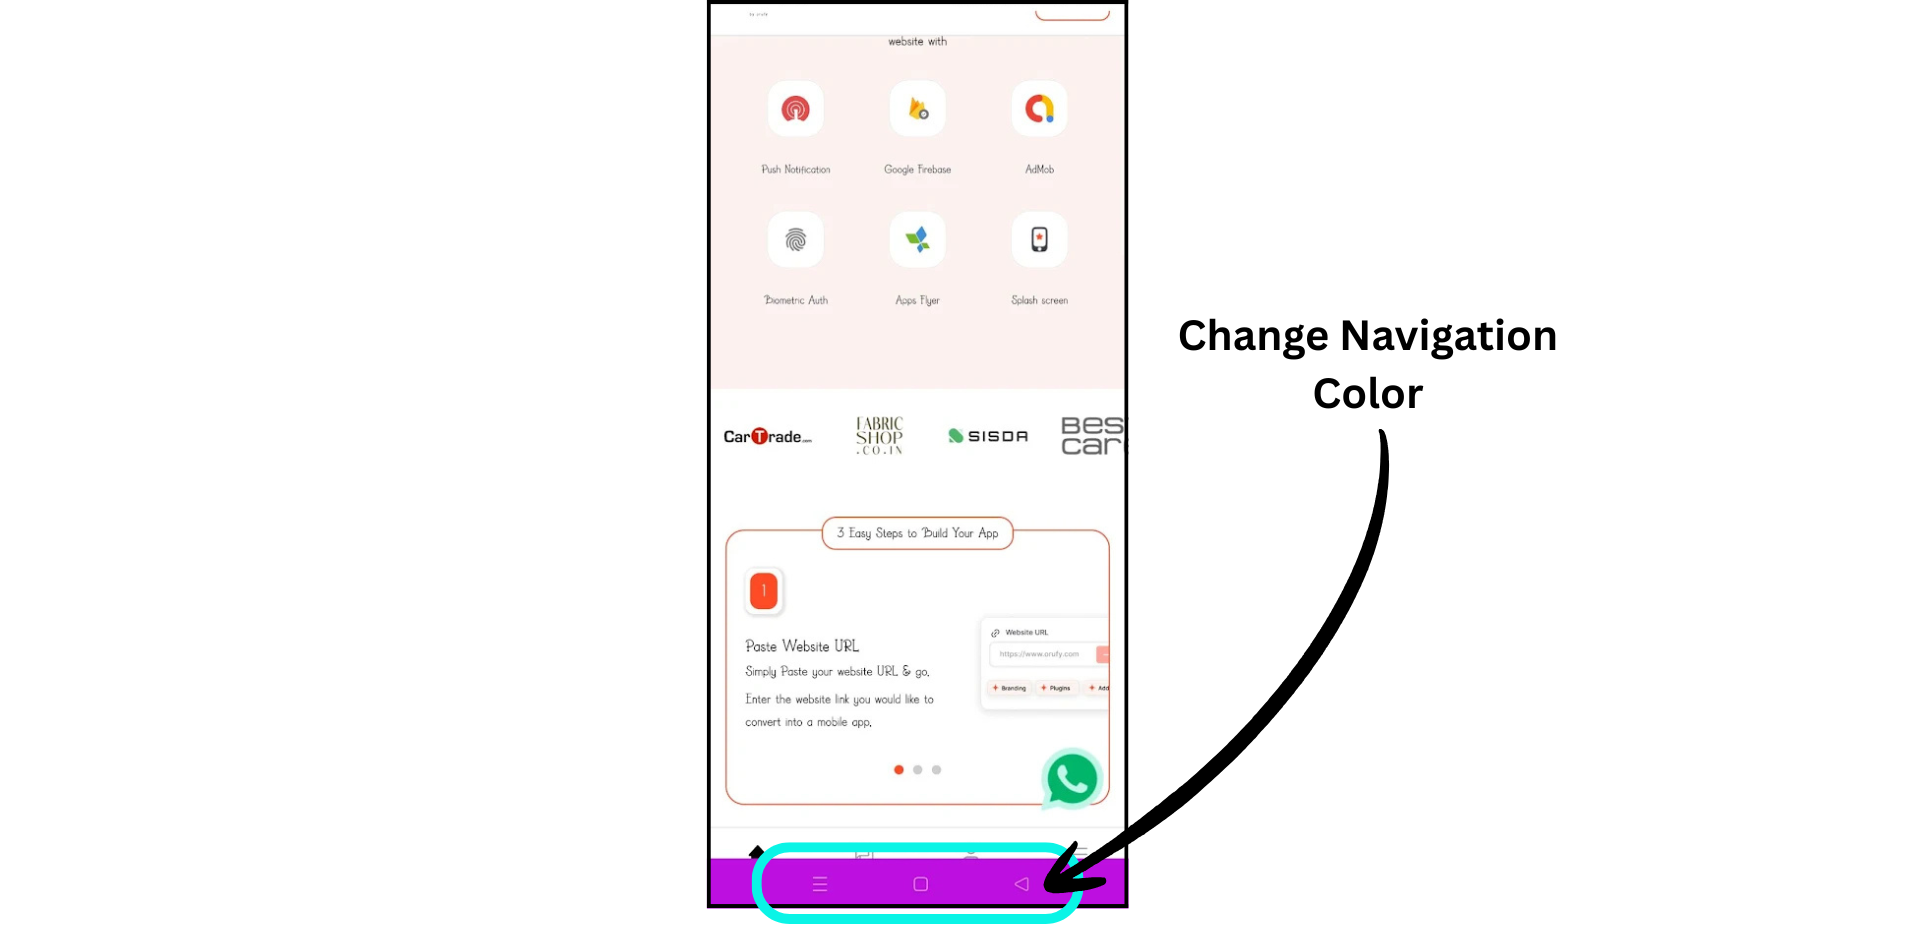
System Navigation Bar Color
Set the color of the system navigation bar to match your app’s theme. The navigation bar is the horizontal bar at the bottom of the Android app screen that contains system navigation buttons such as back, home, and recent apps. You can use hexadecimal color codes to specify the color.
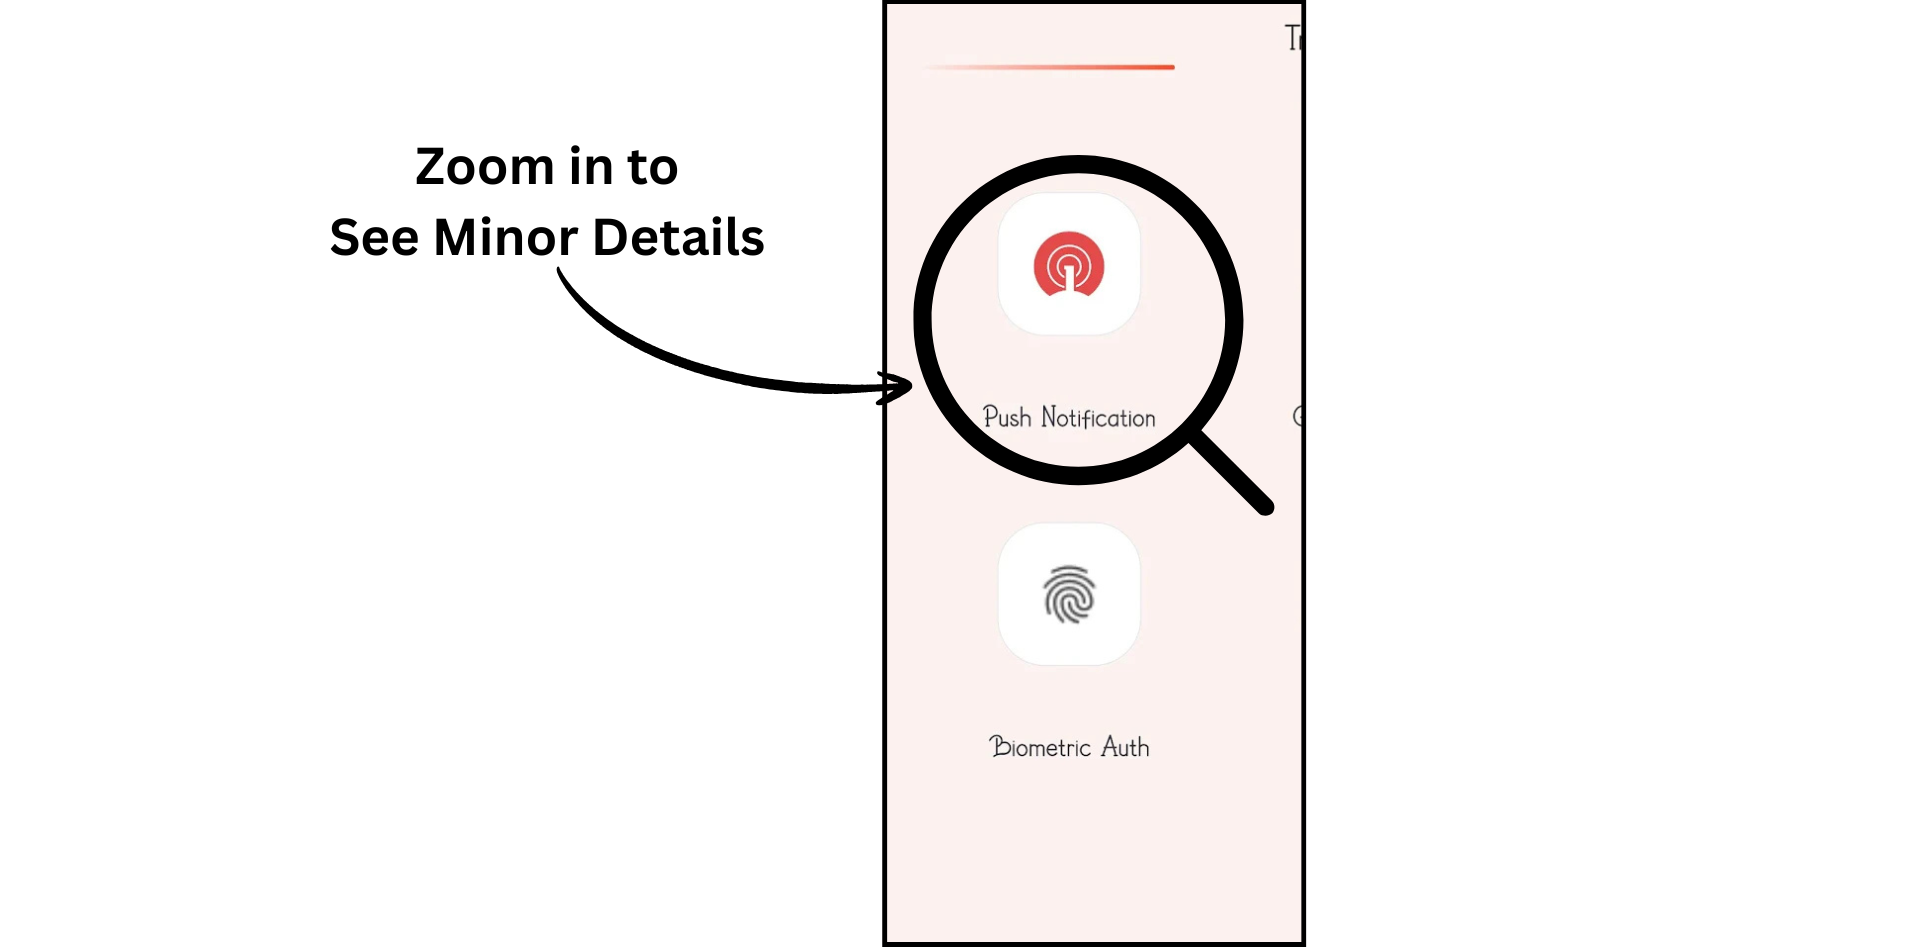
Enable Pinch to Zoom
Allow users to zoom in and out by pinching on the screen. This feature helps apps display images or text in detail for better user viewing.
Add a Callback on App Resume
This setting lets your app automatically perform a specific action the moment a user comes back to it — for example, after switching to another app or receiving a phone call.
Example: Imagine your app shows live prices, a news feed, or an order status. Without this setting, users might see outdated information when they return. With it enabled, the app can instantly refresh or run an update the second it comes back into focus.
For it to work, your website needs to have a function called appResumeCallback set up — your web developer can add this. Once it's in place, every time a user returns to the app, that function will be triggered automatically.
Disable Caching
Turning this on makes your app always load the latest content directly from your website, instead of using a saved (cached) copy from a previous visit. Disable or bypass cache when serving highly dynamic, personalized, or time-sensitive data where outdated information poses a functional issue.
Disable or bypass cache when serving highly dynamic, personalized, or time-sensitive data where outdated information poses a functional issue. For example, Bank/Financial applications always ask to log in every time you enter the application.
JS Bridge Access
JS Bridge Access configures which pages in your app are allowed to call WebToNative’s JavaScript functions. It allows those pages to interact with native capabilities such as biometric authentication, NFC, camera, vibration feedback, and more.
Access is denied for all pages by default. You have to select which pages have permission to use the JS Bridge function.
For example, you have an order tracking page that uses biometric authentication before showing address and other details with a vibration trigger on status updates. This means this page only requires JS Bridge access. You have to grant access to that one URL only.
If a page is not included in your JS Bridge Access settings, any WebToNative JS Bridge function called on that page will not work, no matter if the code is right. Ensure the page that requires native features must be added to the list.
JS Bridge Access Can Be Accessed in Four Ways.

All Pages
It is useful for apps such as fitness trackers, where every screen uses native features like push notifications or vibrations, such as progress trackers and reminders.

Exact URL
If only your payment screen at https://yoursite.com/checkout triggers in-app purchase.

Start with URL
If all your store pages live under https://yoursite.com/shop, setting that begins from /shop/cart & /shop/orders and every other page under it automatically accessed.
Custom Regex
If your URLs follow a pattern such as https://yoursite.com/user/123/scan, a regular expression allows you to match all such pages without listing each URL individually.
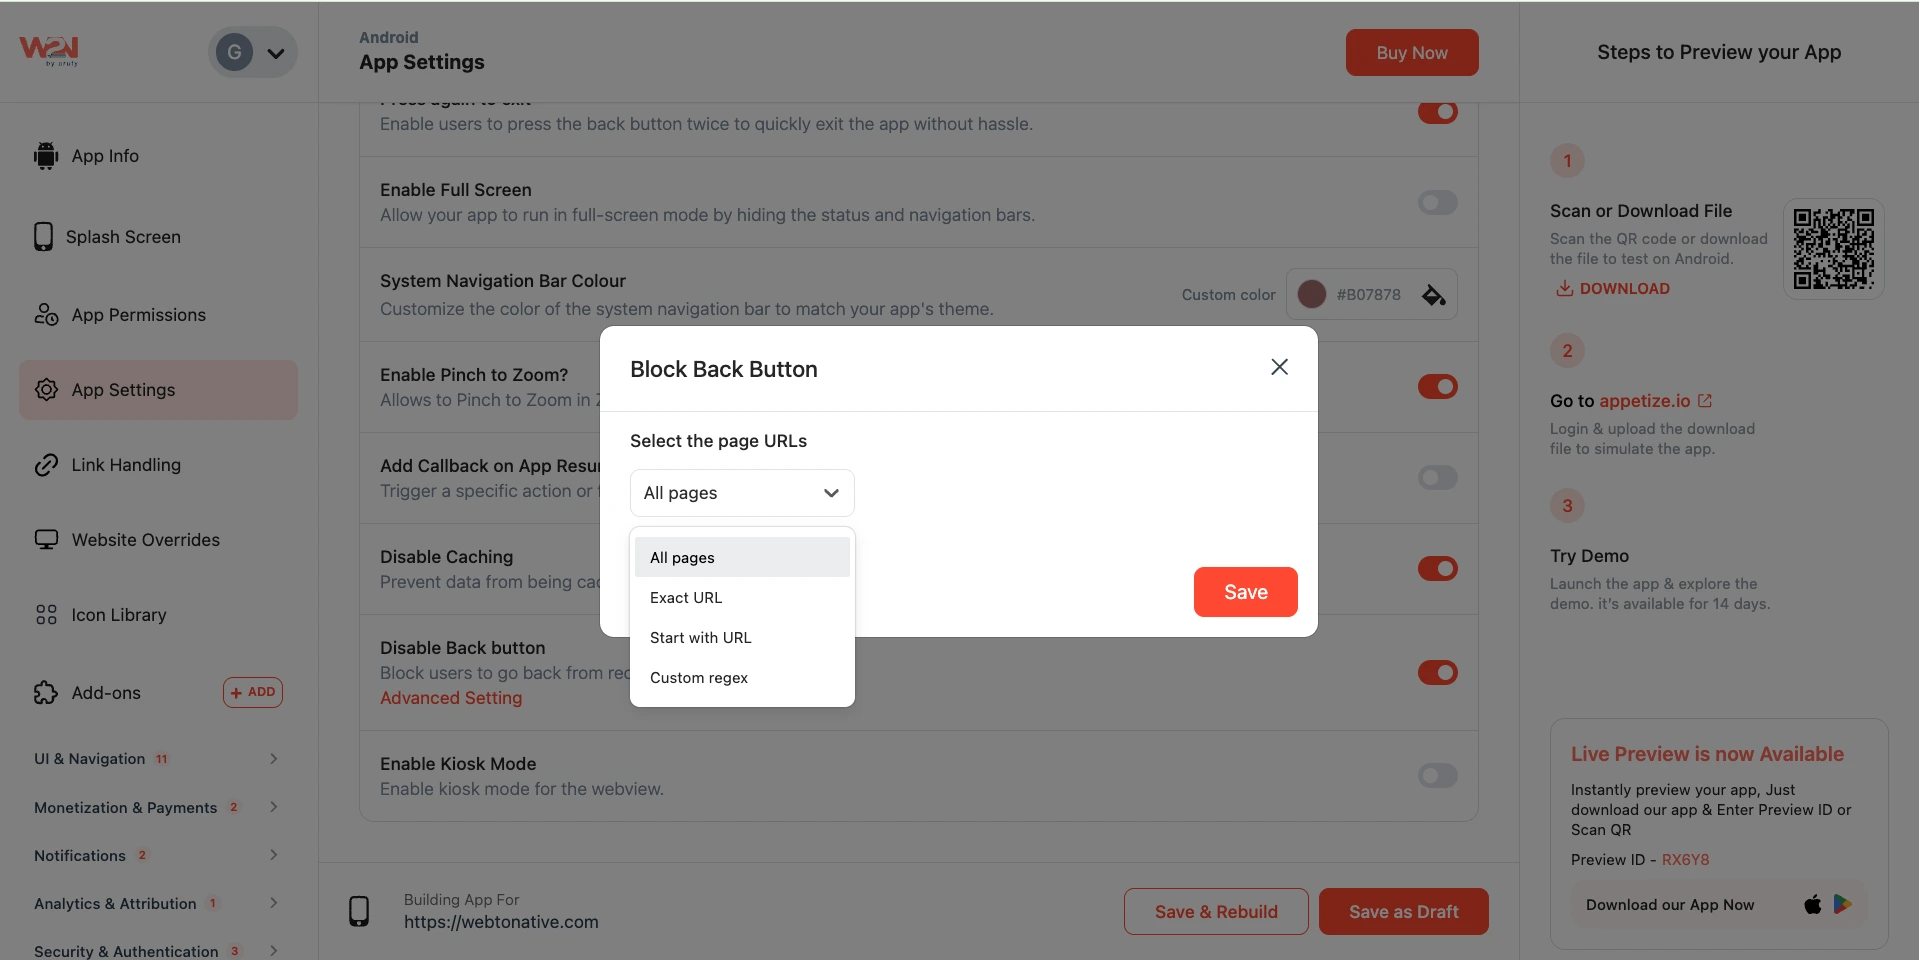
Disable Back Button
Prevents users from tapping the Android back button on pages where going back could cause problems — like accidentally leaving a payment page, re-submitting a form, or exiting a locked screen.
All Pages
Blocks the back button everywhere in the app. The user simply cannot go back to any screen.
Best for: Kiosk-style apps, single-page apps, or any app where back navigation should be fully disabled.
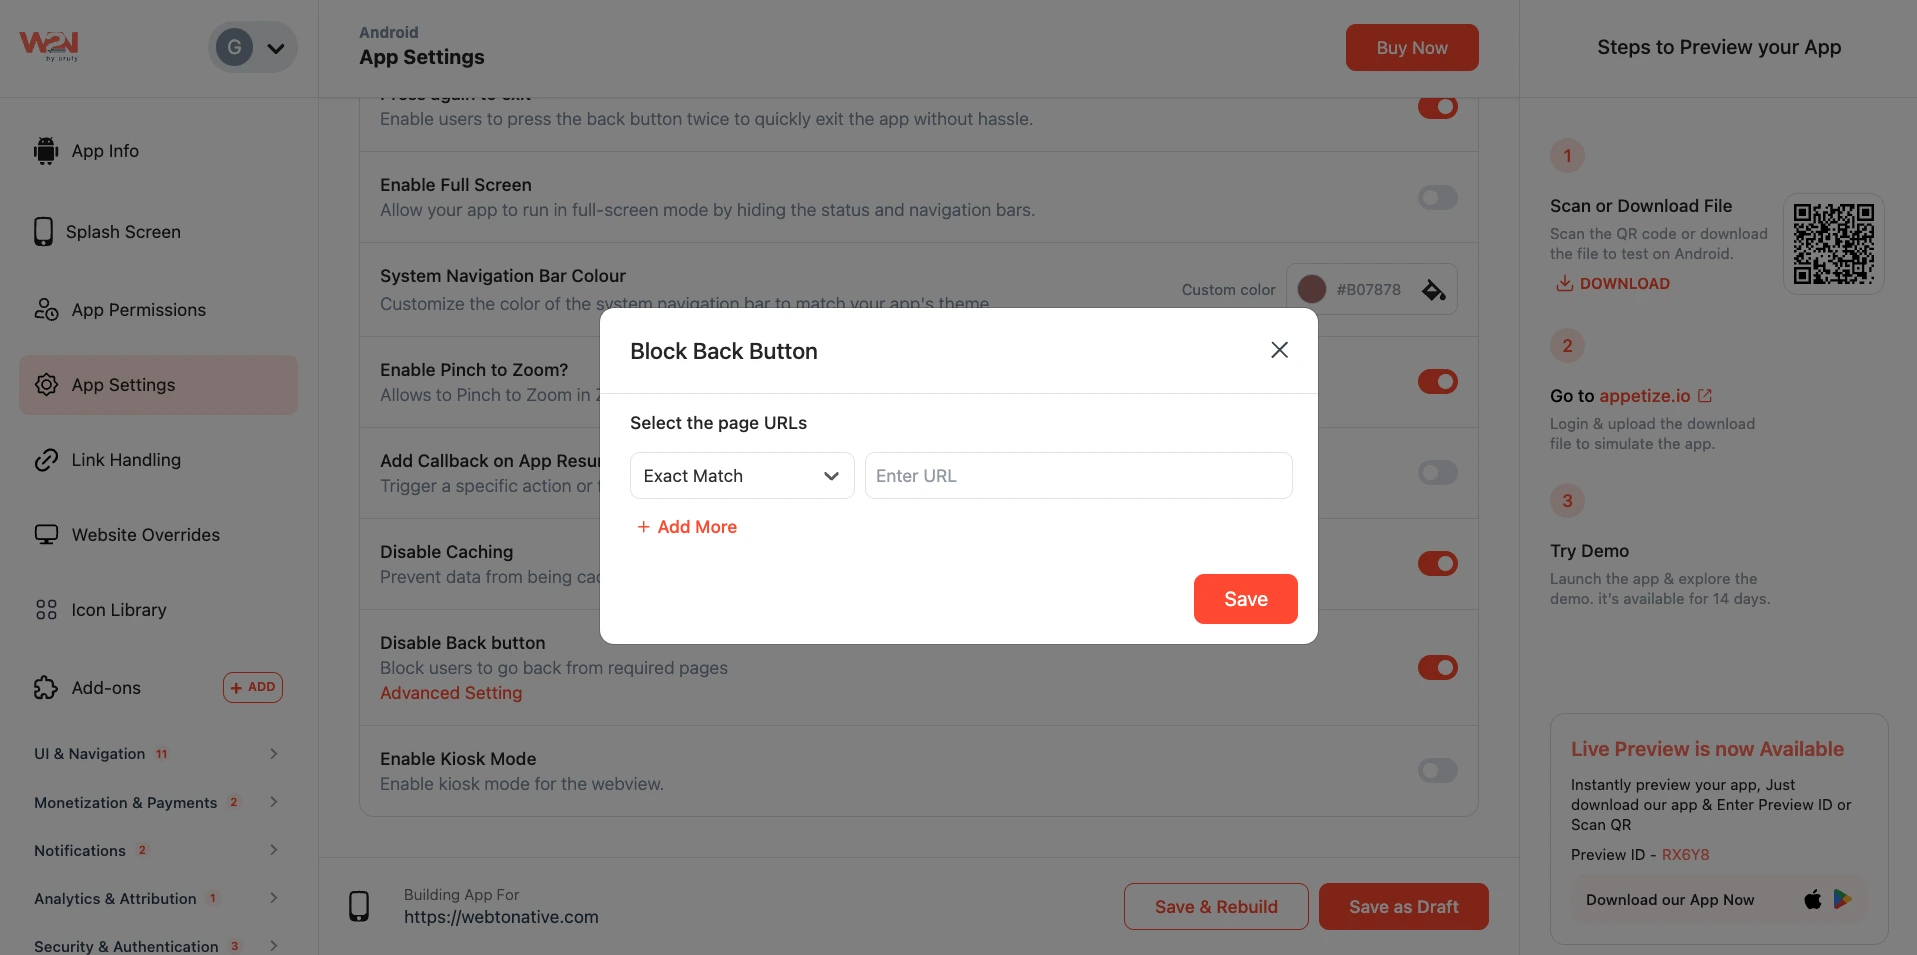
Exact URL
Blocks the back button only on one specific page. You type in the full URL of that page.
Best for: Checkout pages, payment confirmation screens, or login walls where you don't want users going back. Example: (yoursite.com/checkout/payment)
Start with URL
Blocks the back button on any page whose address begins with a certain path. One rule covers a whole section of your site.
Best for: Blocking back navigation across an entire section — like all pages under /checkout/ or /onboarding/. Example: (yoursite.com/checkout/) — covers /checkout/cart, /checkout/payment, /checkout/confirm all at once.
Custom Regex
For advanced users. Lets you write a pattern that matches multiple URLs in a flexible way.
Best for: Developers who need precise control over which URLs are matched using pattern rules. Example: Block back on all pages containing "order" or "payment" anywhere in the URL. ./(checkout|payment|order)/.
- Select the URL where you want to block the back button and enter your URL in the given field.
Kiosk Mode
Kiosk Mode locks your app into a permanent, full-screen experience. Once enabled, users cannot exit the app, press the Back button, go to the Home screen, switch to other apps, or access any device settings. The screen stays on at all times, and all standard Android navigation controls are hidden.
Common Use Cases Include
Retail Stores
Product catalog or self-checkout screens

Restaurants
Digital menus or table-side ordering