


Barcode Scan
When your mobile app needs users to scan a product, ticket, or shipment, sending them out to their phone’s default camera or separate scanner app breaks the experience. They leave your app, scan somewhere else, and have to come back again. It also gives you no control over how that scanning screen looks or behaves.
Barcode Scan opens a fully native scanner right inside the mobile app. Users never leave the app, and you get complete control over the header. The scan window, on-screen buttons, sounds, and even multi-item scanning.
This feature is available for Android and iOS. You can use the feature with any WebToNative paid plan. The multi-scan feature will be available from the Pro plan.
Why Should I Use a Barcode Scan?
Keep Users Inside the App
There is no third-party app or the device’s camera. The scans happen inside the mobile app, keeping the user’s flow uninterrupted from the beginning to the end.

Compatible with Any Use Case
Whether it is a warehouse inventory check, ticket entry, loyalty card scan, or retail checkout, a multi-scanner can be configured to fit exactly where your app requires it.

Instant Confirmation
A visual highlight, a beep sound, or a vibration gives instant feedback to the user that their scan has been registered without any repetitive attempts.
Where to Find It In Your Dashboard
My Apps ➡️ Edit your app ➡️ Add-ons ➡️ Device & Hardware ➡️ Barcode Scan
What Does WebToNative Provide in Barcode Scan?

Complete Scan Window
Control the size, corner radius, border style, open animation of the scan window, and border thickness to match your app’s design.

Camera & Feedback Controls
Set the default zoom and overlay darkness; add a gallery button or a flashlight; and turn on vibration feedback, visual, or sound for a successful scan.
Multi-Scan Mode
Allow users to scan multiple times in one session with a running count badge and a confirmation step before they finish.
Steps to Apply Barcode Scan to Your App with WebToNative
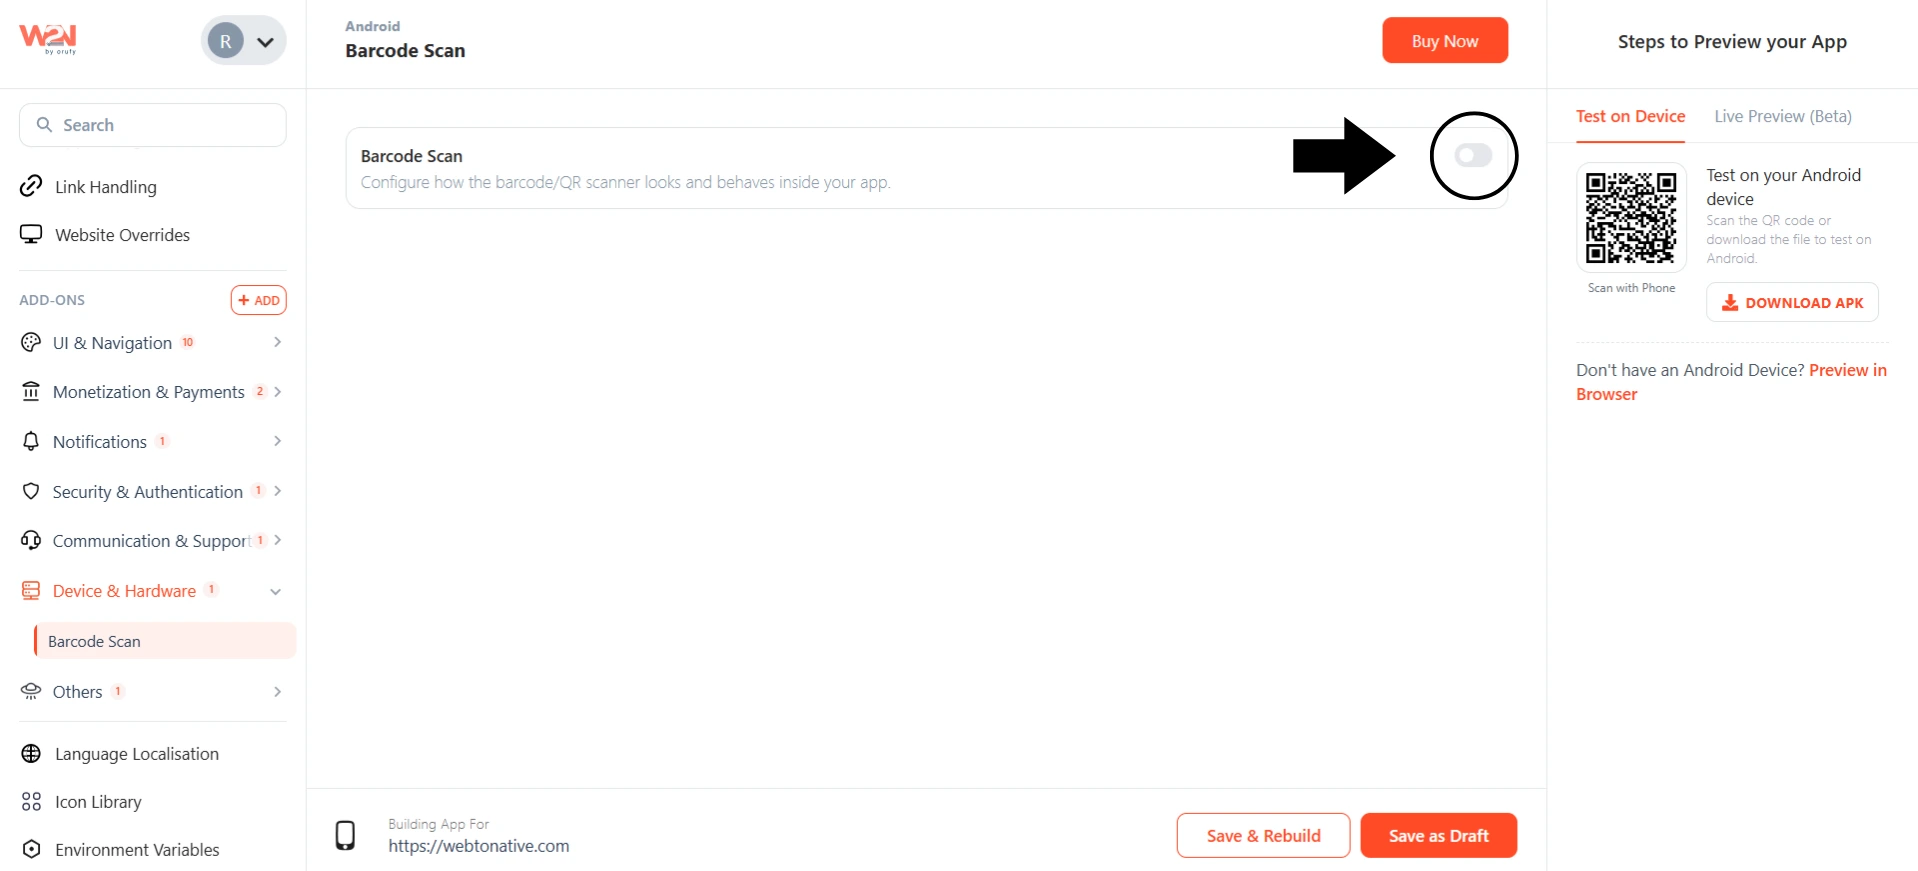
Enable / Disable Toggle
Switch the Barcode Scan toggle to ON to activate the add-on. By default, it is disabled. The scanner is hidden, and none of the settings below apply inside the mobile app.
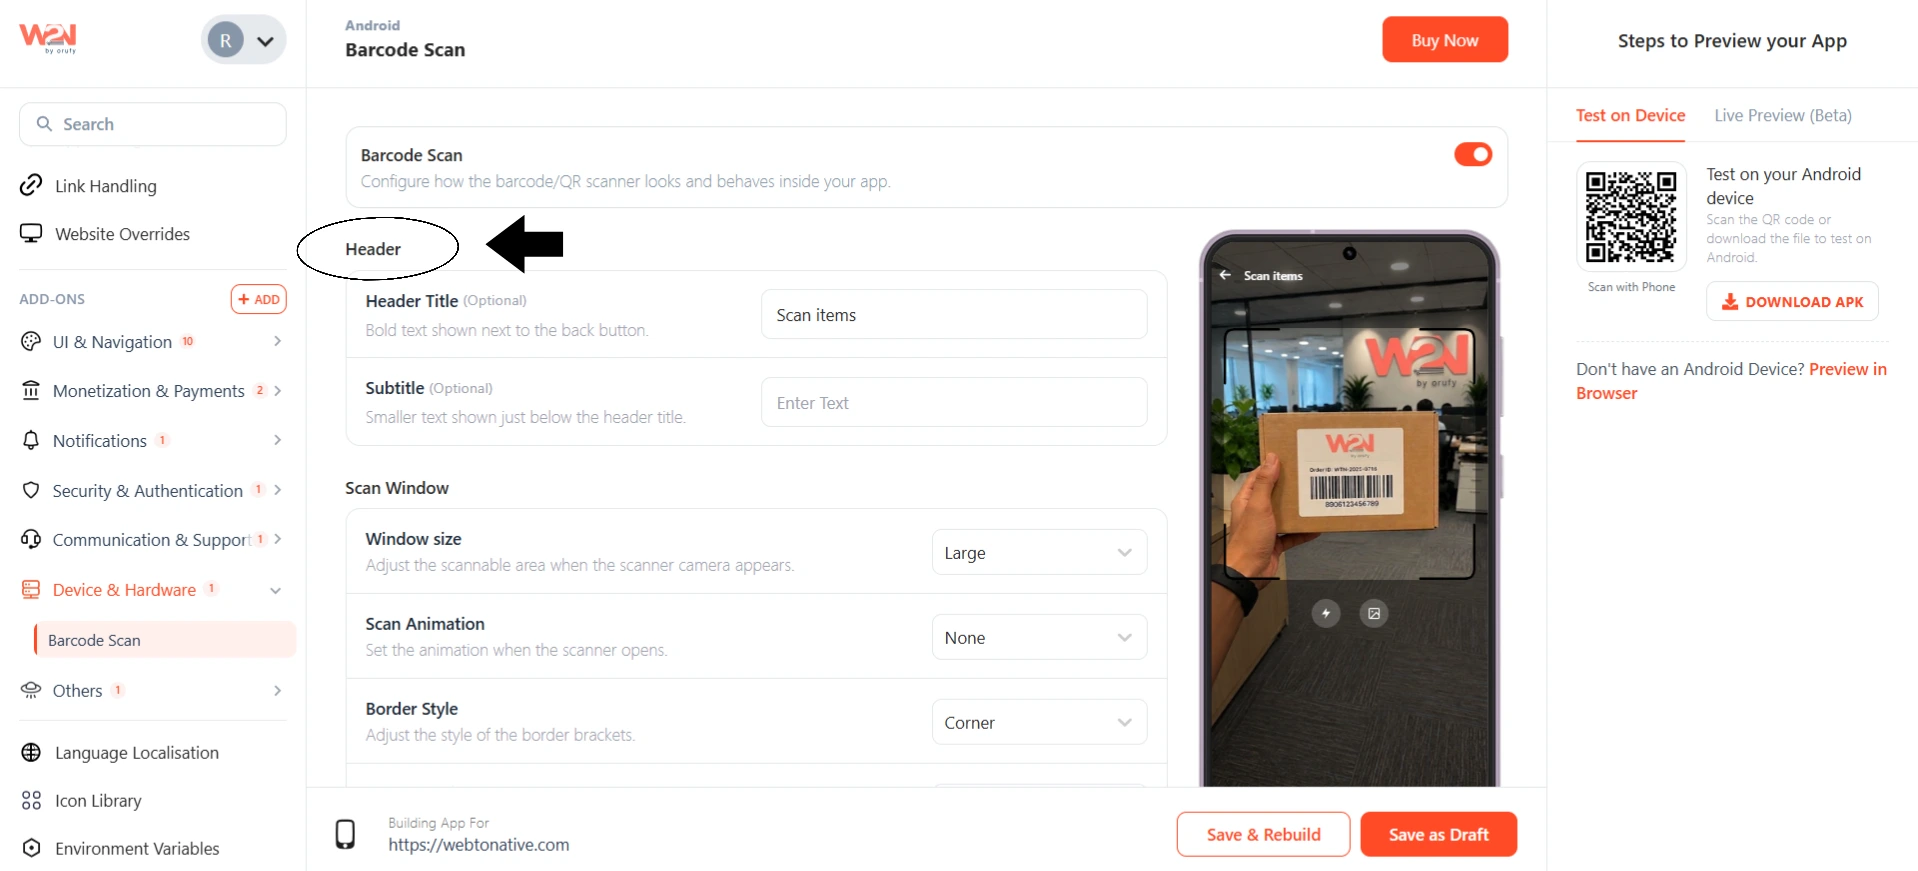
Header
The top bar is shown when the scanner is opened, informing users what screen they are on.
-
Header Title: Enter the main content for the screen. The bold text next to the back button. For example, Scan Item or Scan QR.
-
Subtitle (Optional): A smaller text below the title. Use this only if you want to add any extra information. For example, a brief instruction.
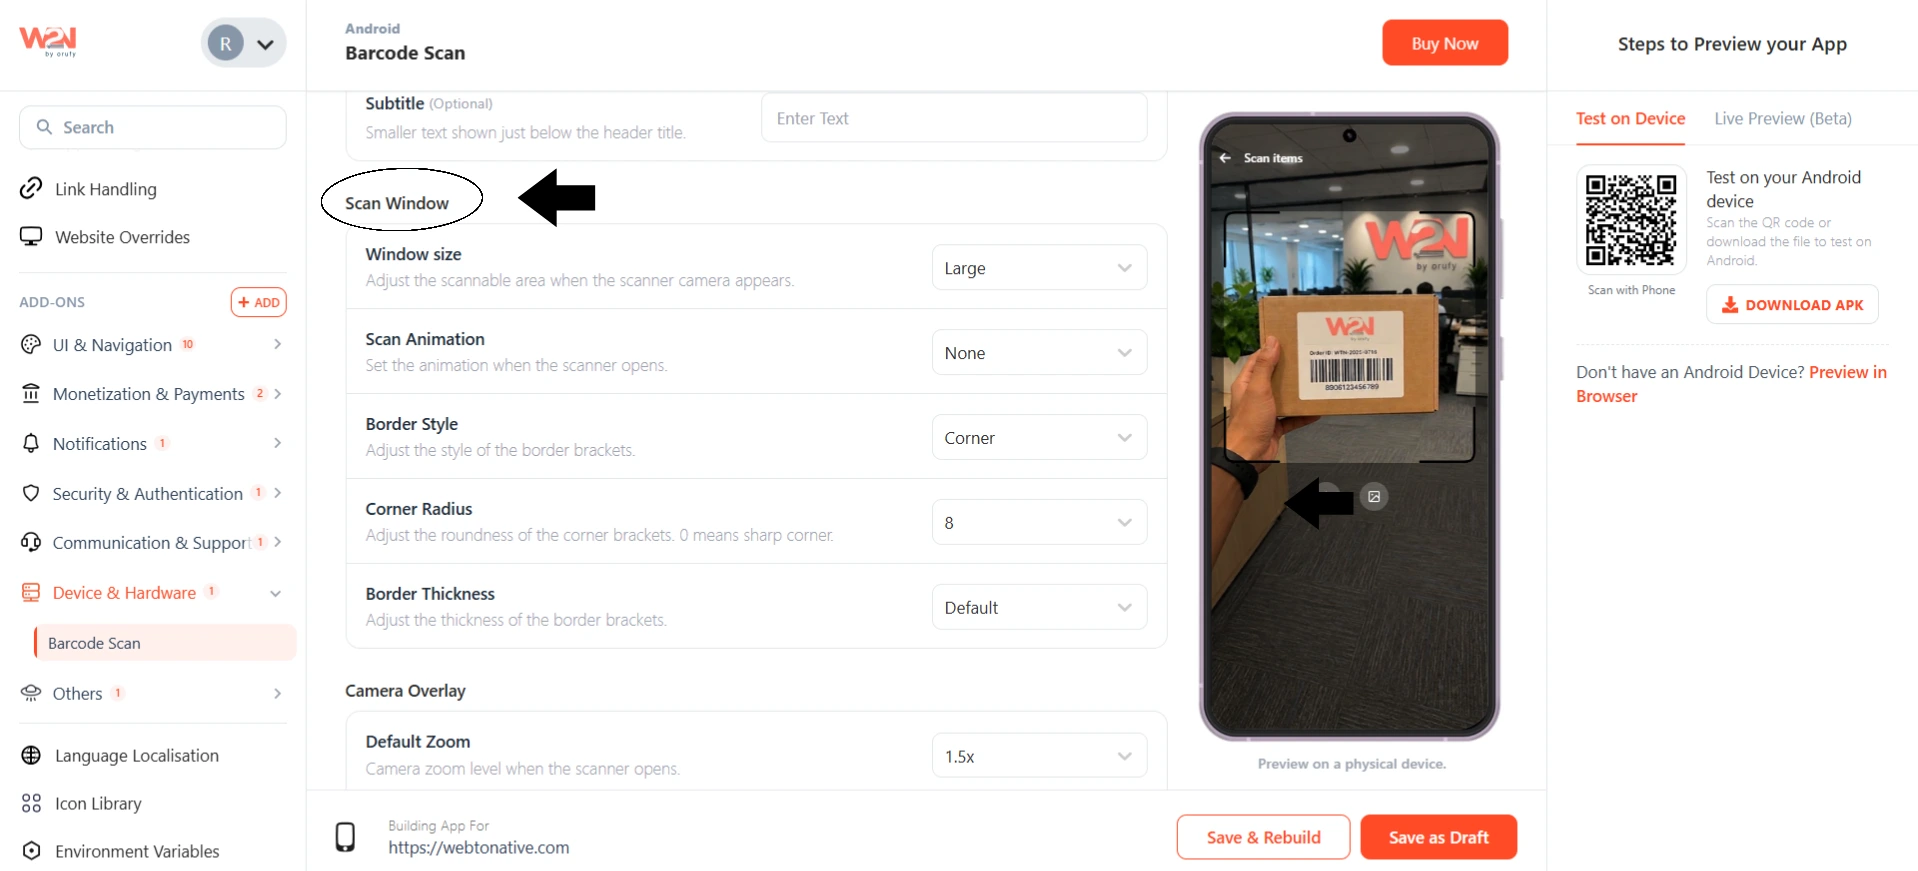
Scan Windows
This section controls how the scanning window will look on screen.
-
Window Size: Controls how big the scannable area will be: small, medium, or large.
-
Scan Animations: A visual effect where a moving line simulates the process of scanning. You can use none, sweep, or pulse animation.
-
Border Style: Adjust the shape of the border around the scan area to be either full or corner.
-
Corner Radius: Adjust the radius of the corner from 0, 4, 8, 12, or 16. Higher value means more rounded corners. 0 is the sharpest among all.
-
Border Thickness: Adjust the thickness of the border to default, thin, or bold.
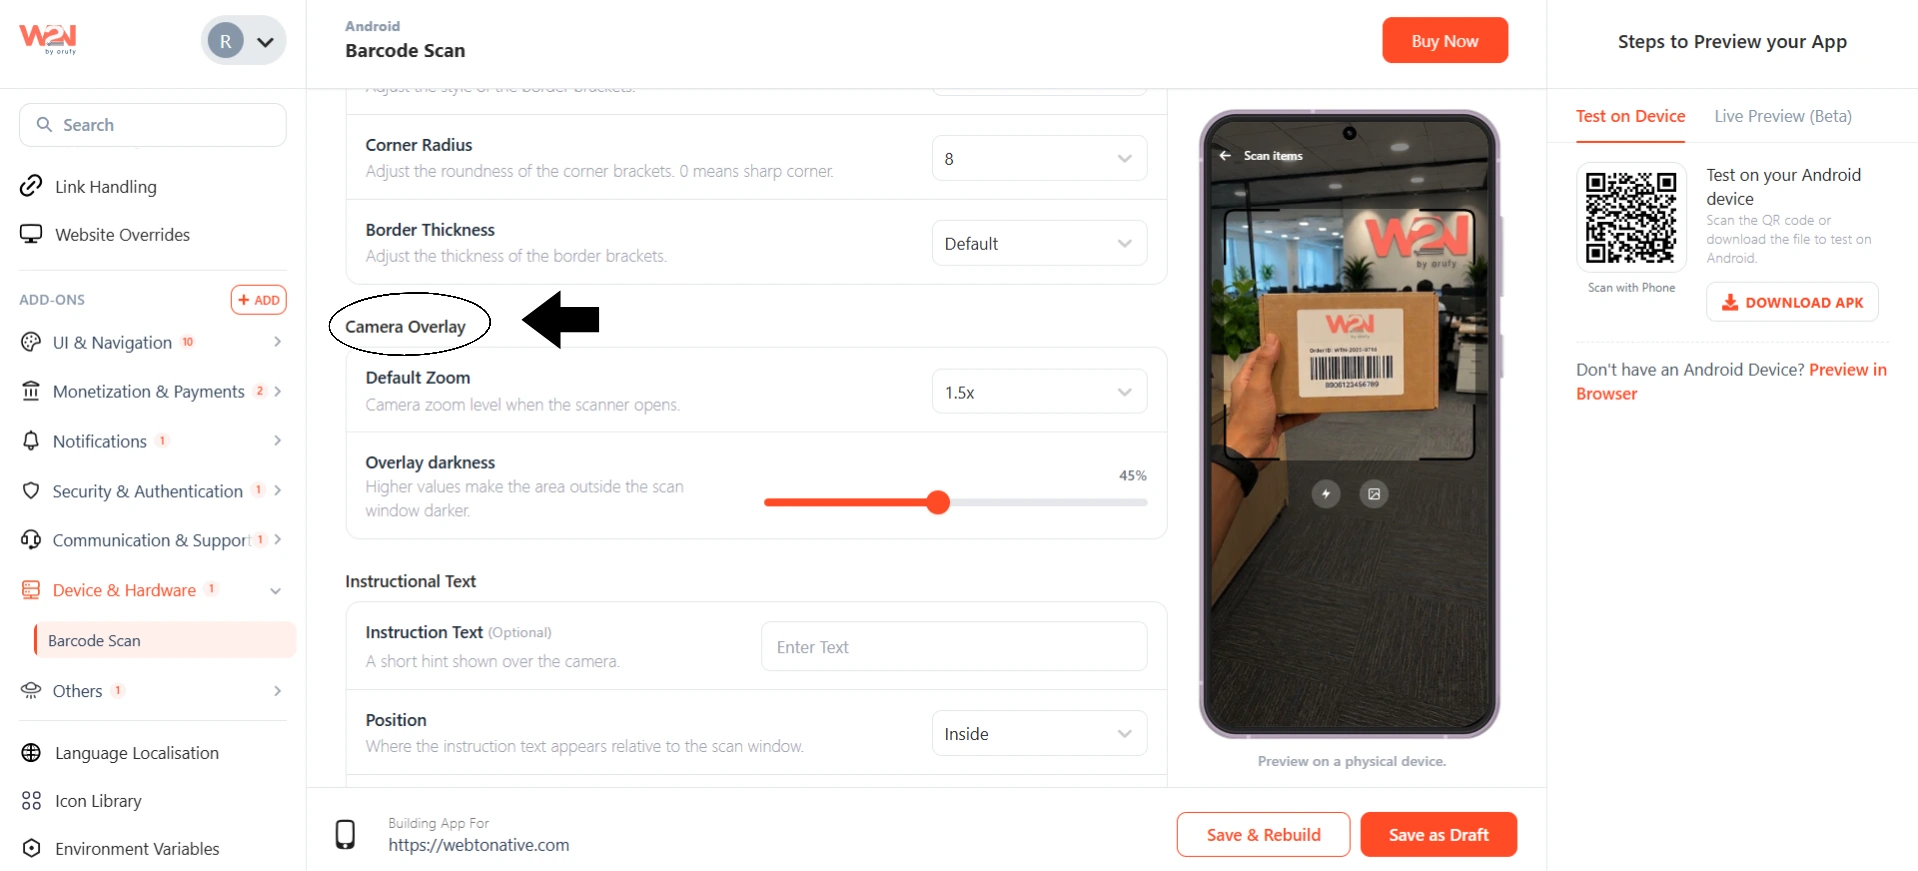
Camera Overlay
It controls the camera view behind the scan window.
-
Default Zoom: You can control the camera zoom levels from 1x, 1.5x, or 2x when the scanner opens.
-
Overlay Darkness: Use the adjustable slider to adjust the darkness. A higher value makes the area outside the scan window.
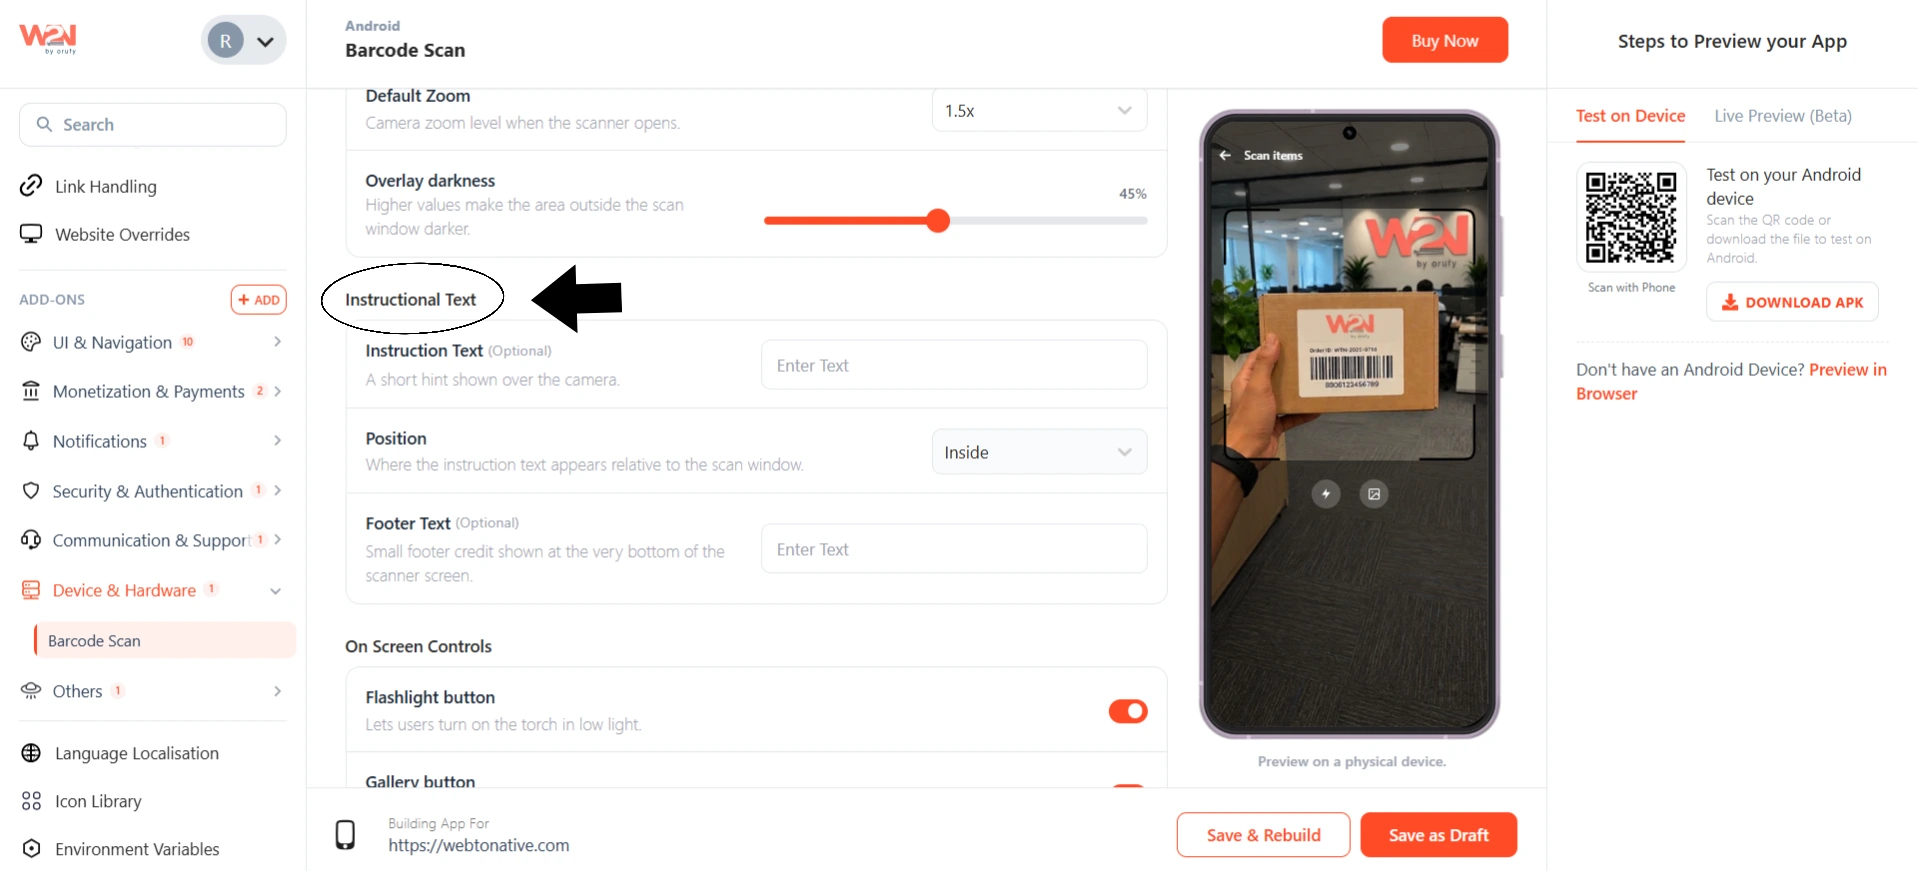
Instructional Text
It allows adding a short, helpful text to guide the user during scanning.
-
Instruction text (Optional): You can enter a short hint or instruction that will appear above the camera. For example, Align the QR code within the frame.
-
Position: Set where the instruction text appears relative to the scan window. Either above, inside, or below.
-
Footer Text (Optional): You can add a small credit text at the very bottom of the scanner screen.
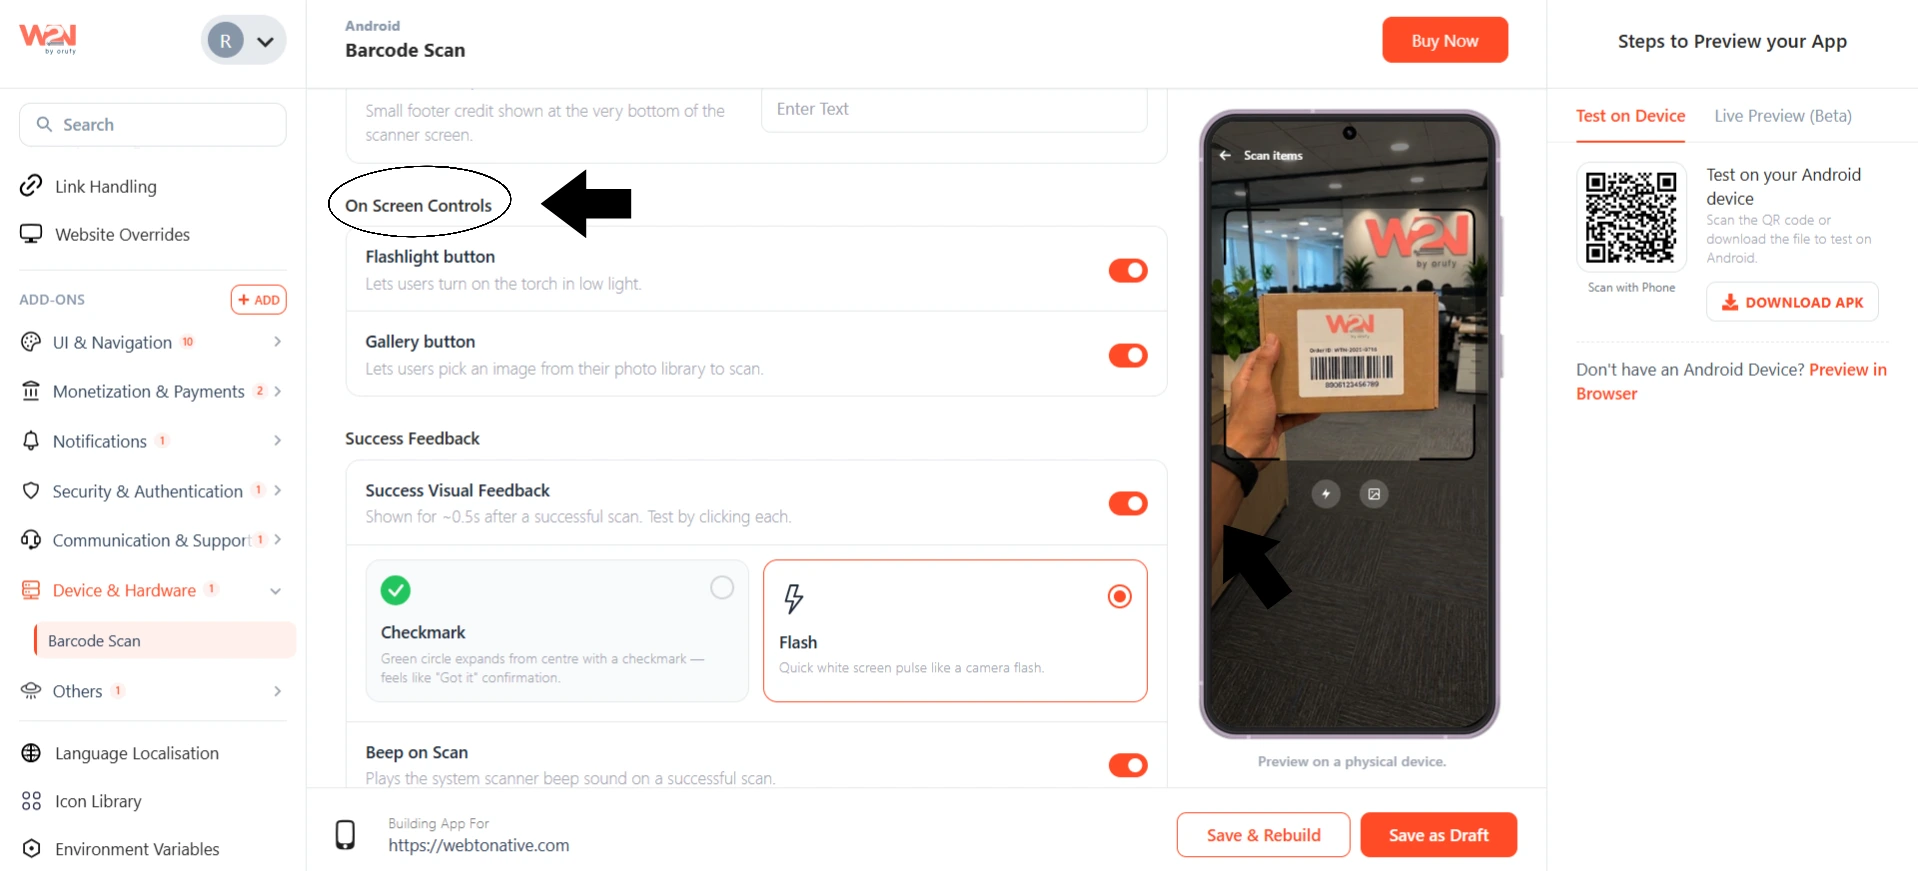
On-Screen Controls
This section allows users to control the scanner while it opens.
-
Flashlight Button: You can toggle on to show or hide the button. It is easier to scan in no or dim light using the torch.
-
Gallery Button: You can toggle on to show or hide the button. Pick an image from the device’s gallery to scan.
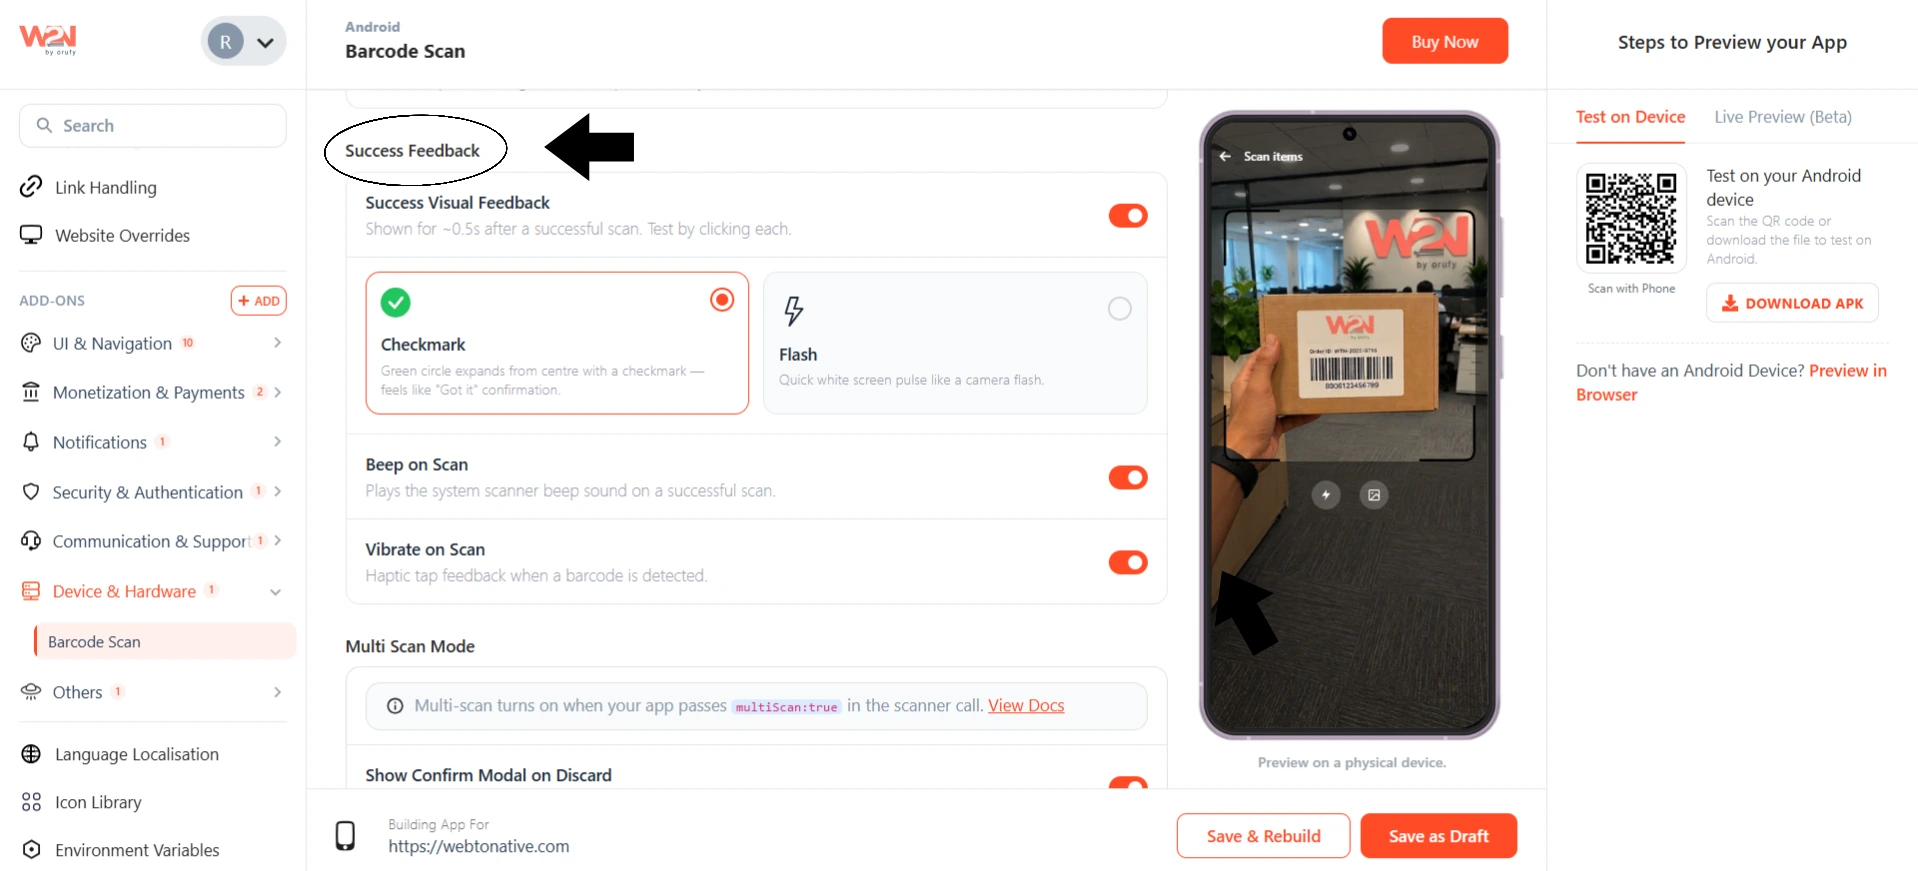
Success Feedback
You can control how the mobile app confirms a successful scan.
-
Success Visual Feedback: It shows a visual confirmation for about 0.5 seconds after a scan. You can choose a checkmark or a flash screen to show the successful scan.
-
Beep on Scan: It plays the device scanner beep sound on a successful scan.
-
Vibrate on Scan: It gives a haptic tap when a barcode is detected.
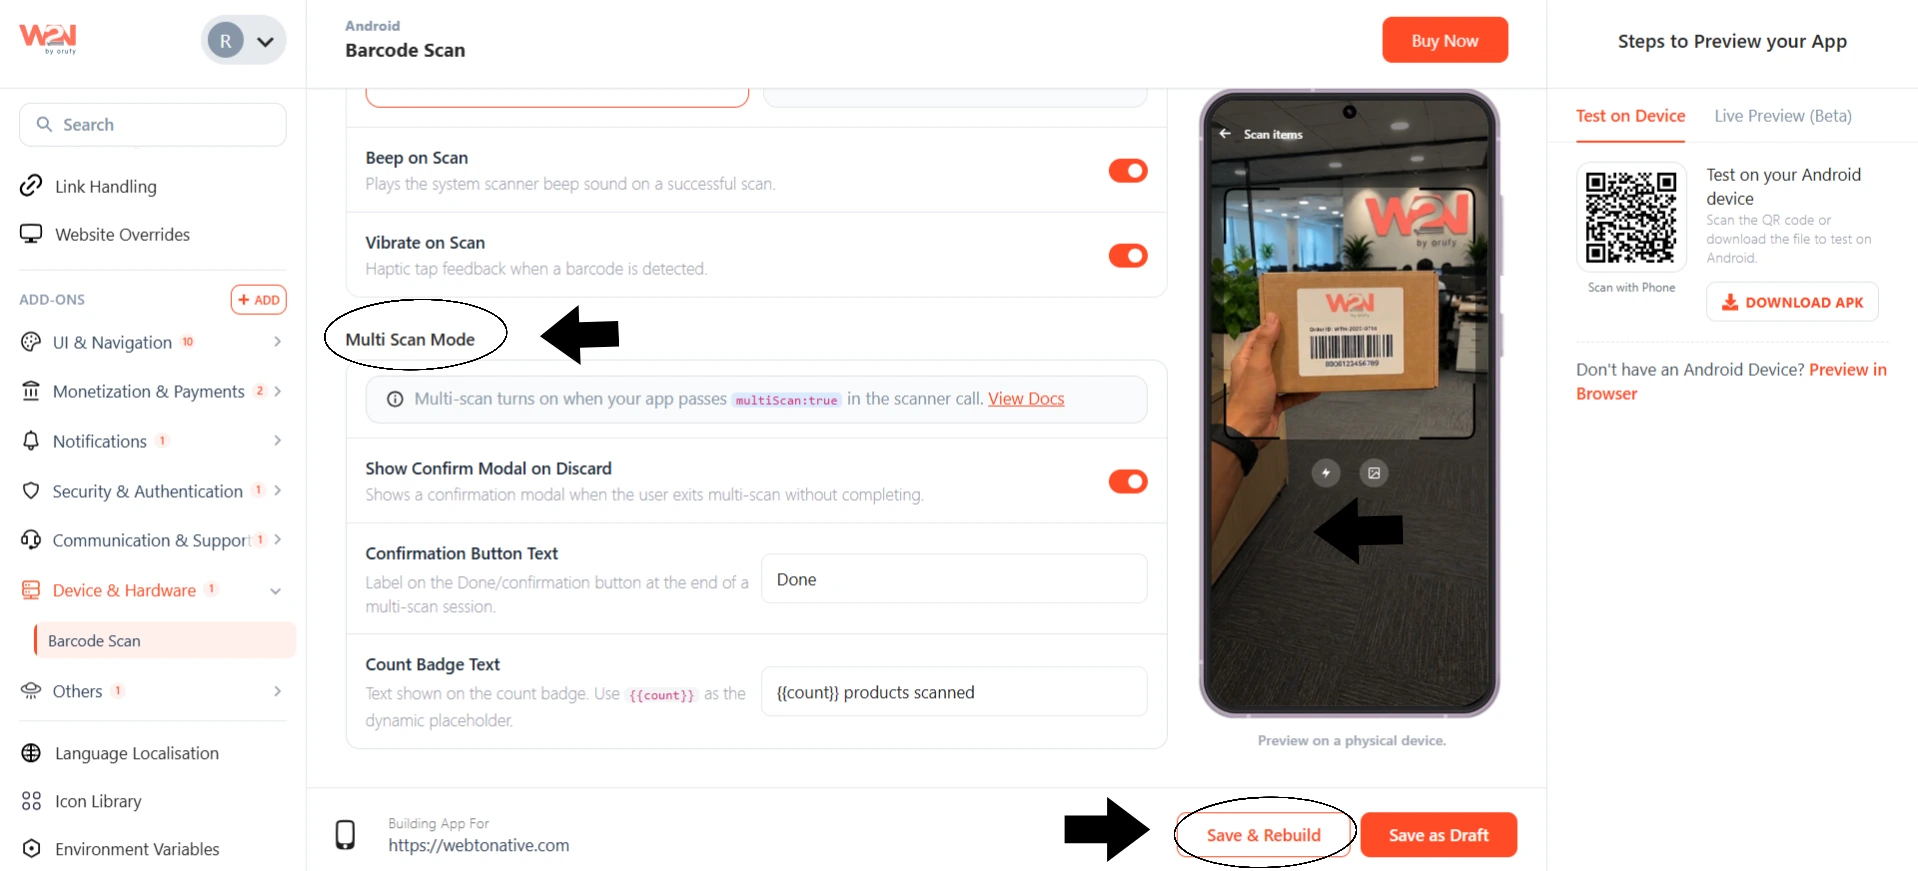
Multi-Scan Mode
This mode turns on automatically when your app passes multiScan: true in the scanner cell. For more details, visit the Barcode Scan Documentation (opens in a new tab).
-
Show Confirm Modal on Discard: It shows a confirmation message modal when the user leaves without completing the multi-scan.
-
Confirmation Button Text: Label the button as Done at the end of a multi-scan session. For example, “Done” or "Confirm."
-
Count Badge Text: The text shown on the count badge. Use
{{count}}as the placeholder. For example,{{count}}products showed.
Save & Rebuild
Click Save & Rebuild to apply and see your changes inside the mobile app.
Not sure which setting to select? Use a small or medium window with sweep animation for a quick and low-friction single scan. Turn on multi-scan mode with the count badge for inventory or bulk check-in cases.
Frequently Asked Questions
Q1. Does the Barcode Scan function without an internet connection?
A. Yes, the scanning works offline since it uses the device camera. However, what happens after the scan depends on your app’s own website or logic that might require an internet connection.
Q2. Can I use Barcode Scan for both single and multiple items?
A. Yes, by default the scanner captures one barcode per scan. If you want to scan multiple items in one session, pass multiScan: true in the scanner cell. It will enable multi-scan mode along with the count badge and confirmation option.