


True Caller SDK
Verifying a user's phone number via SMS OTP requires building (or paying for) an SMS delivery pipeline, handling delivery failures, managing rate limits, and complying with carrier regulations. It also fails in low-signal areas and is vulnerable to SIM-swap fraud.
Truecaller SDK removes all of that. When a user taps login, the Truecaller app on their device confirms their verified identity directly — their phone number is already confirmed by Truecaller's own onboarding. Your app receives a credential, sends it to your backend to verify, and issues a session. No SMS. No wait time. No delivery failure.
This add-on is included free with your Business plan on Android and iOS, and you can unlock it from your Starter plan.
Core features for True Caller SDK in WebToNative

1-Tap Verification
Users with Truecaller installed can log in or register instantly — no typing, no waiting for an OTP, no failed delivery.

No SMS OTP Needed
Removes the cost and technical complexity of building an SMS delivery pipeline. No carrier integrations, no delivery failures.

Profile Auto-Fill
With the user's consent, Truecaller can return their verified name and profile details — reducing registration form friction further.

Secure Authorization
Android uses OAuth 2.0 with PKCE. iOS uses a signed JWT. Both require backend verification — preventing frontend-only forgery.

Faster Onboarding
Fewer steps from app open to verified user means lower drop-off during registration. Particularly effective in markets where Truecaller adoption is high.

User Consent Model
Truecaller only shares data the user explicitly agrees to. The consent screen shows exactly what information is being requested before any data is passed.
Where to find it in your dashboard
My Apps ➡️ Edit your app ➡️ Add-ons ➡️ Security and Authentication ➡️ Truecaller
How Android and iOS verification work differently
Truecaller uses a different verification method on each platform. Your backend must handle both. WebToNative returns a platform field in every callback so your code always knows which flow to run.
| Android — OAuth 2.0 + PKCE | iOS — Signed JWT |
|---|---|
| User taps login — Truecaller consent screen opens | User taps login — Truecaller app opens for consent |
| User consents — SDK returns authorizationCode + codeVerifier | User consents — SDK returns a signed JWT token in authorizationCode |
| Your backend exchanges both with Truecaller for an access token | Your backend verifies the JWT signature using Truecaller's public keys |
| Access token is used to fetch the verified user profile | Decode the verified claims to extract the user's phone number and profile |
Backend verification is required on both platforms - the credentials returned by the SDK are not a user identity — they are proof the user completed the flow. Your backend must exchange or verify these credentials with Truecaller before issuing a session. Never accept frontend data alone as a verified login
Steps to Register your app on Truecaller (Android)
Register at the Truecaller Developer Portal (https://developer.truecaller.com/ (opens in a new tab)) . If your app will only be used in non-EU regions, you may also use the non-EU SDK console (https://sdk-console-noneu.truecaller.com/login (opens in a new tab)).
Log in to the account
Log in to the Truecaller Developer Portal and create a new project. Select Mobile as the application type.
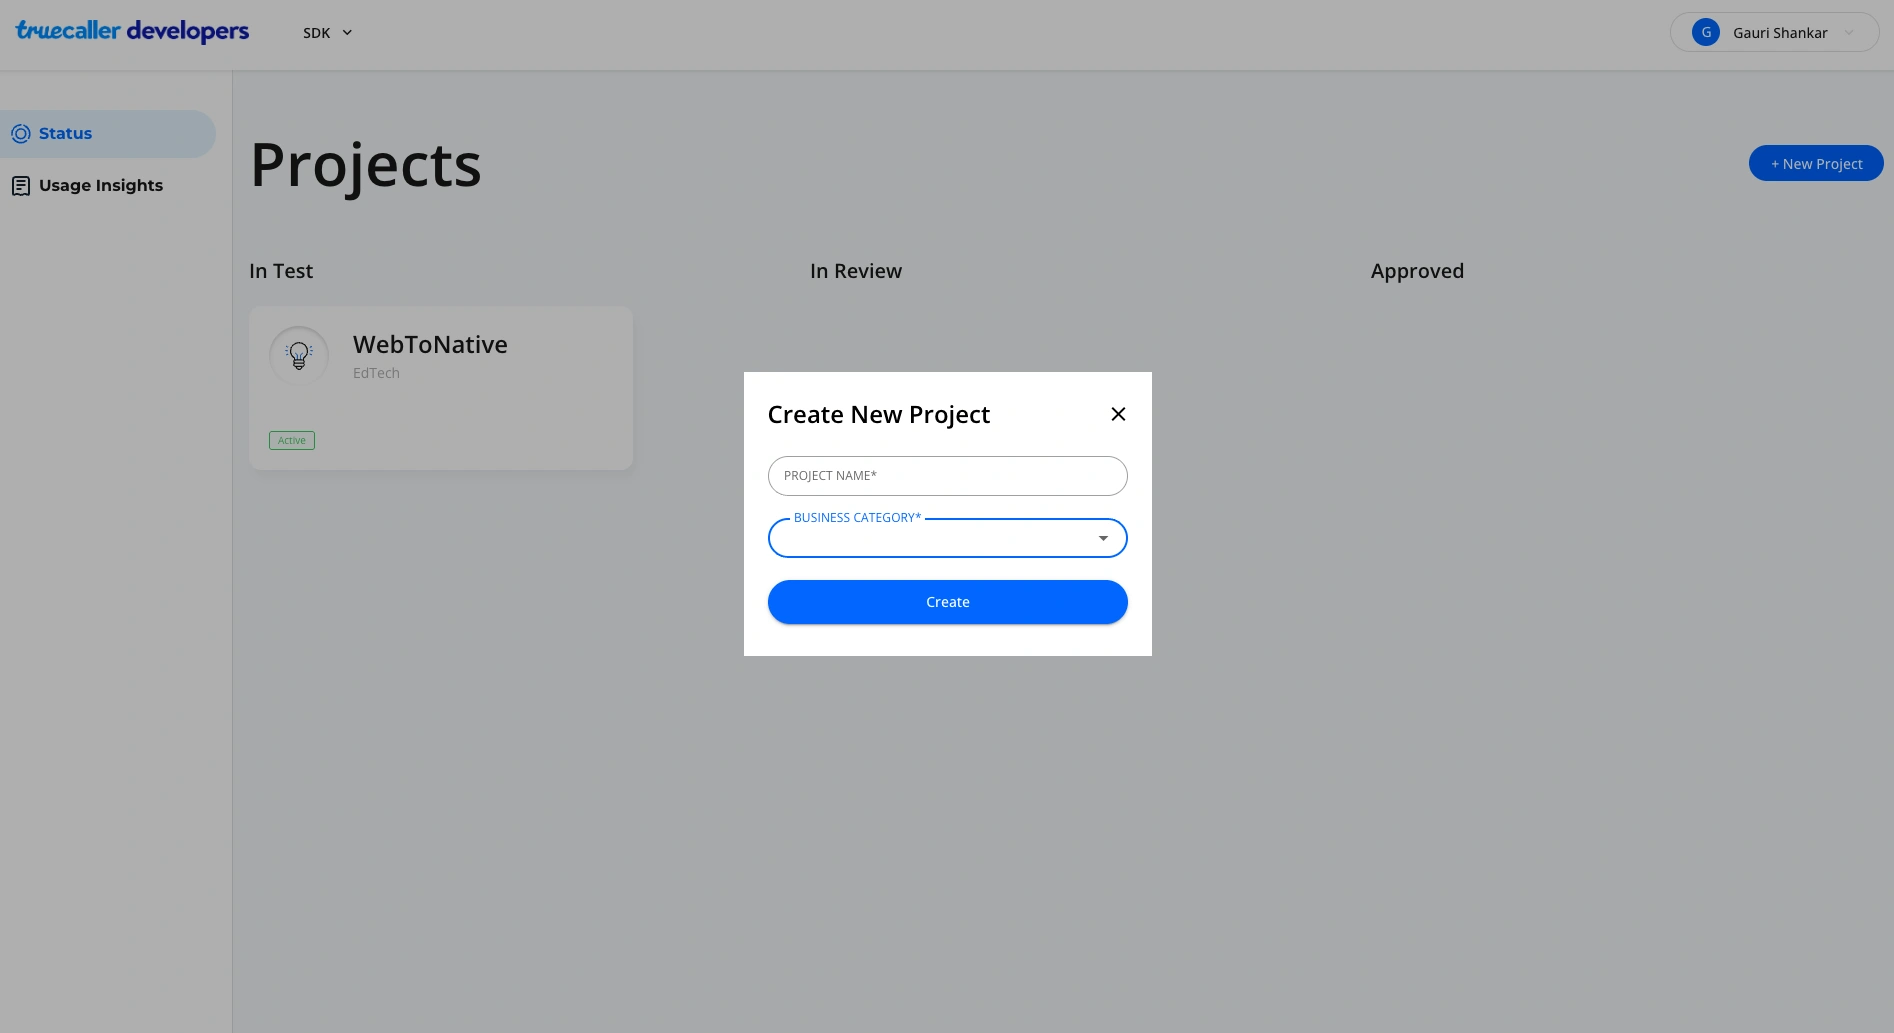
Project Details
Enter project details — your project name and business category.
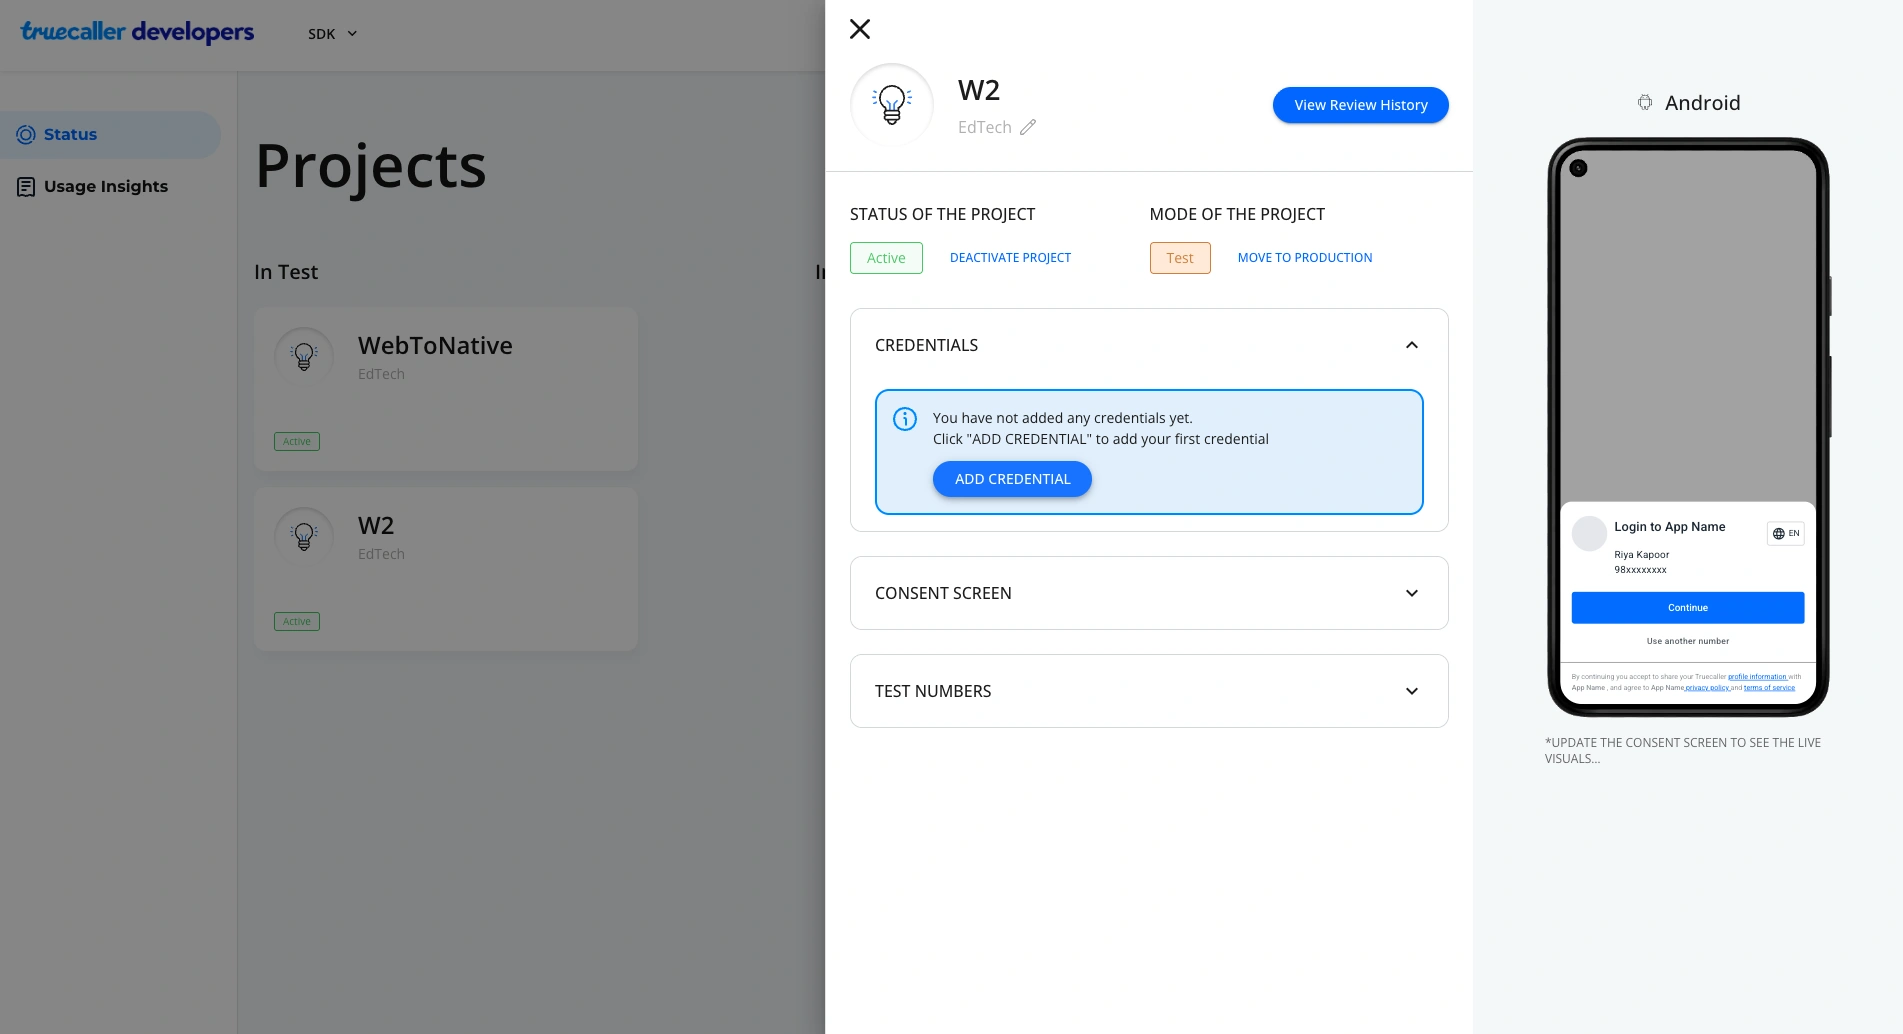
Add Credentials
Add the list of credentials, select platform Android.
| Field | Where to Find it |
|---|---|
| Package Name | WebToNative dashboard → App Info → Package Name |
| SHA-1 Fingerprint | Google Play Console → see below |
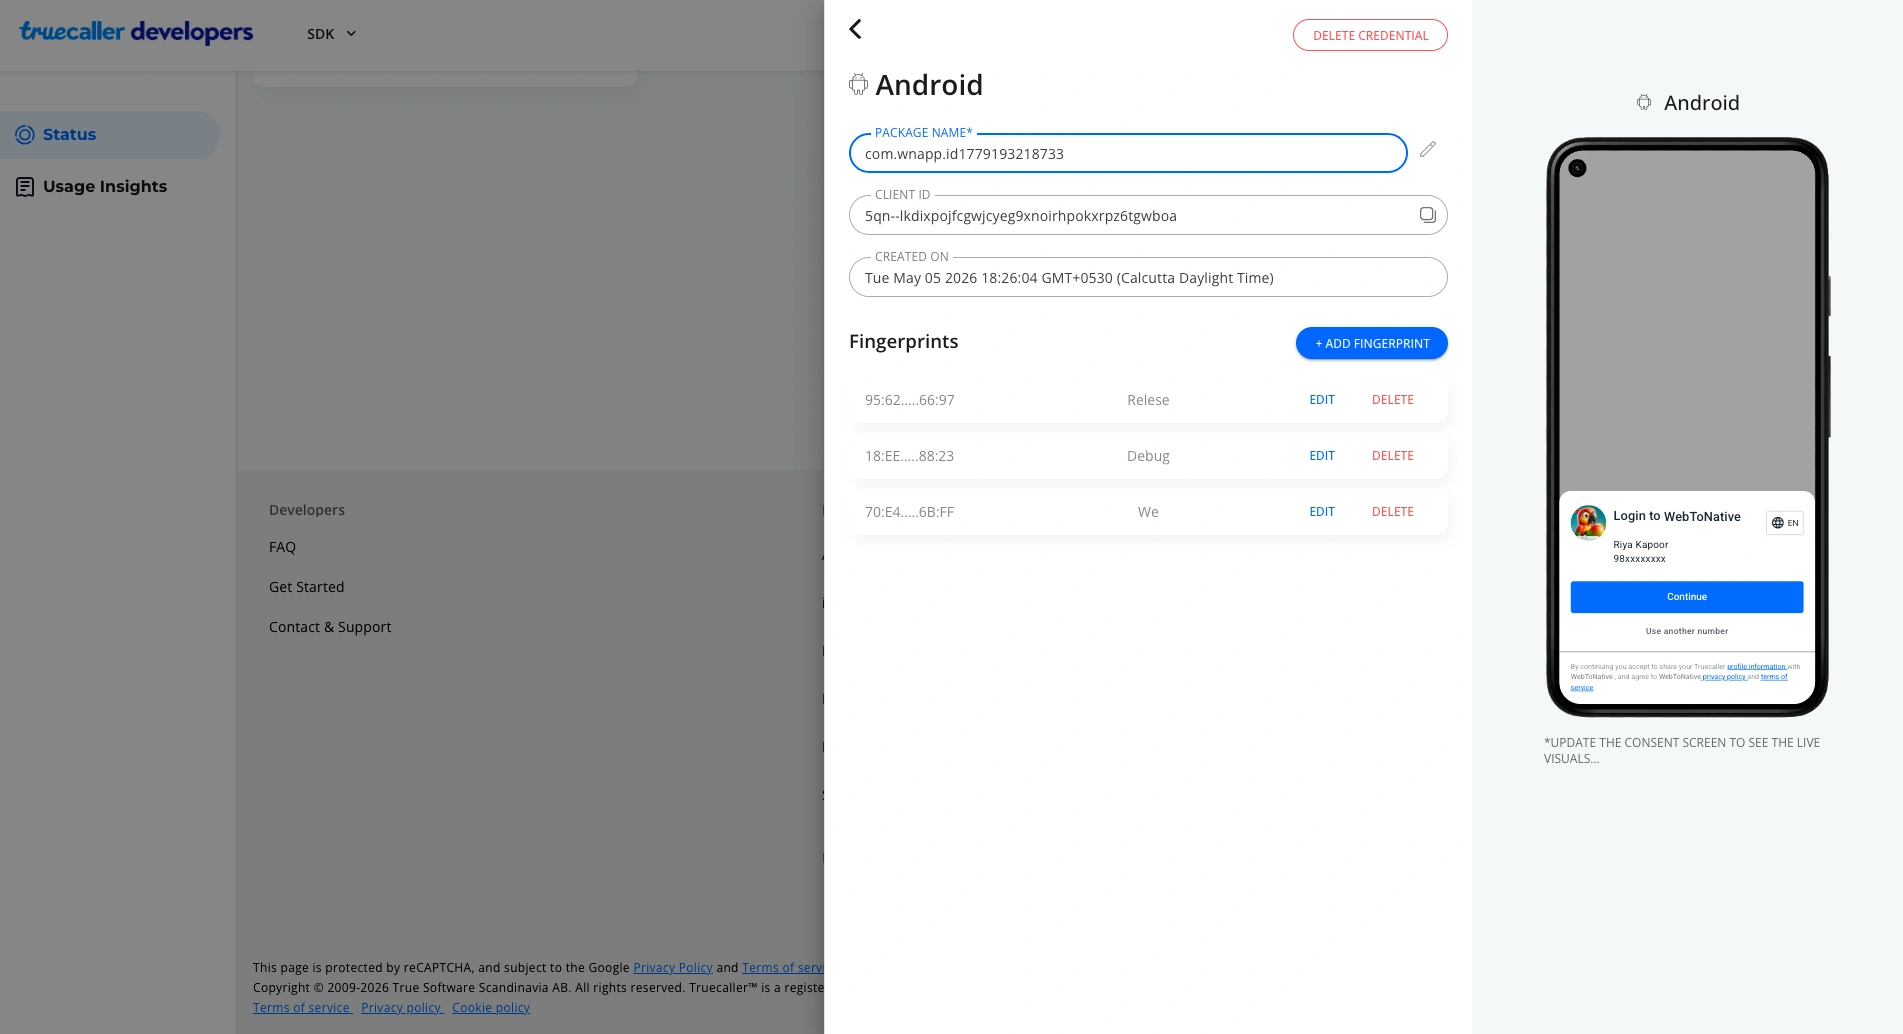
SHA -1 Fingerprint
Get the SHA-1 fingerprint from Google Play Console.
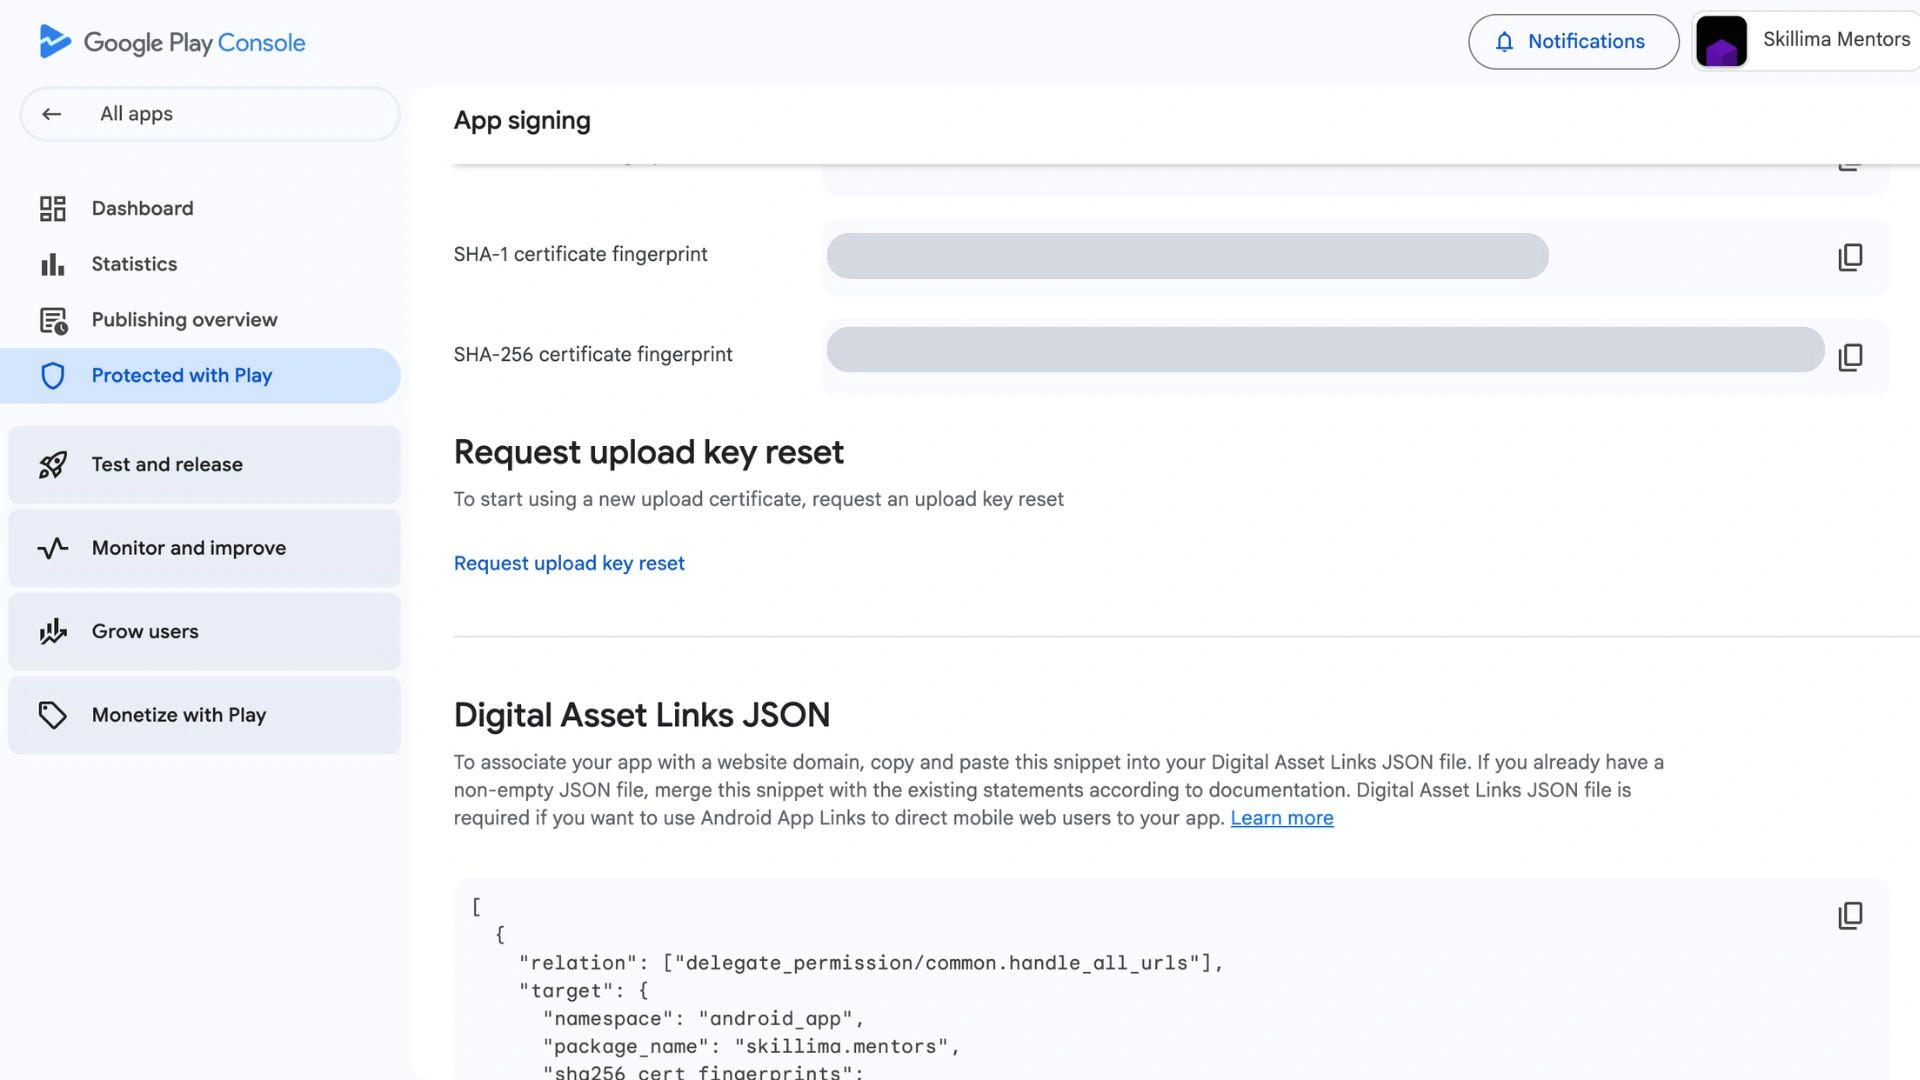
This fingerprint authenticates your application with Truecaller. Use the release SHA-1 from your app's signing key, not a debug key.
Google Play Console → Your App → Setup → App Integrity → App Signing → App signing key certificate → copy SHA-1 certificate fingerprint
Save credentials
Truecaller will issue a Client ID. Copy this — you'll enter it in the WebToNative dashboard.
Edit the consent screen
Configure how your login screen appears to users when Truecaller asks for their consent
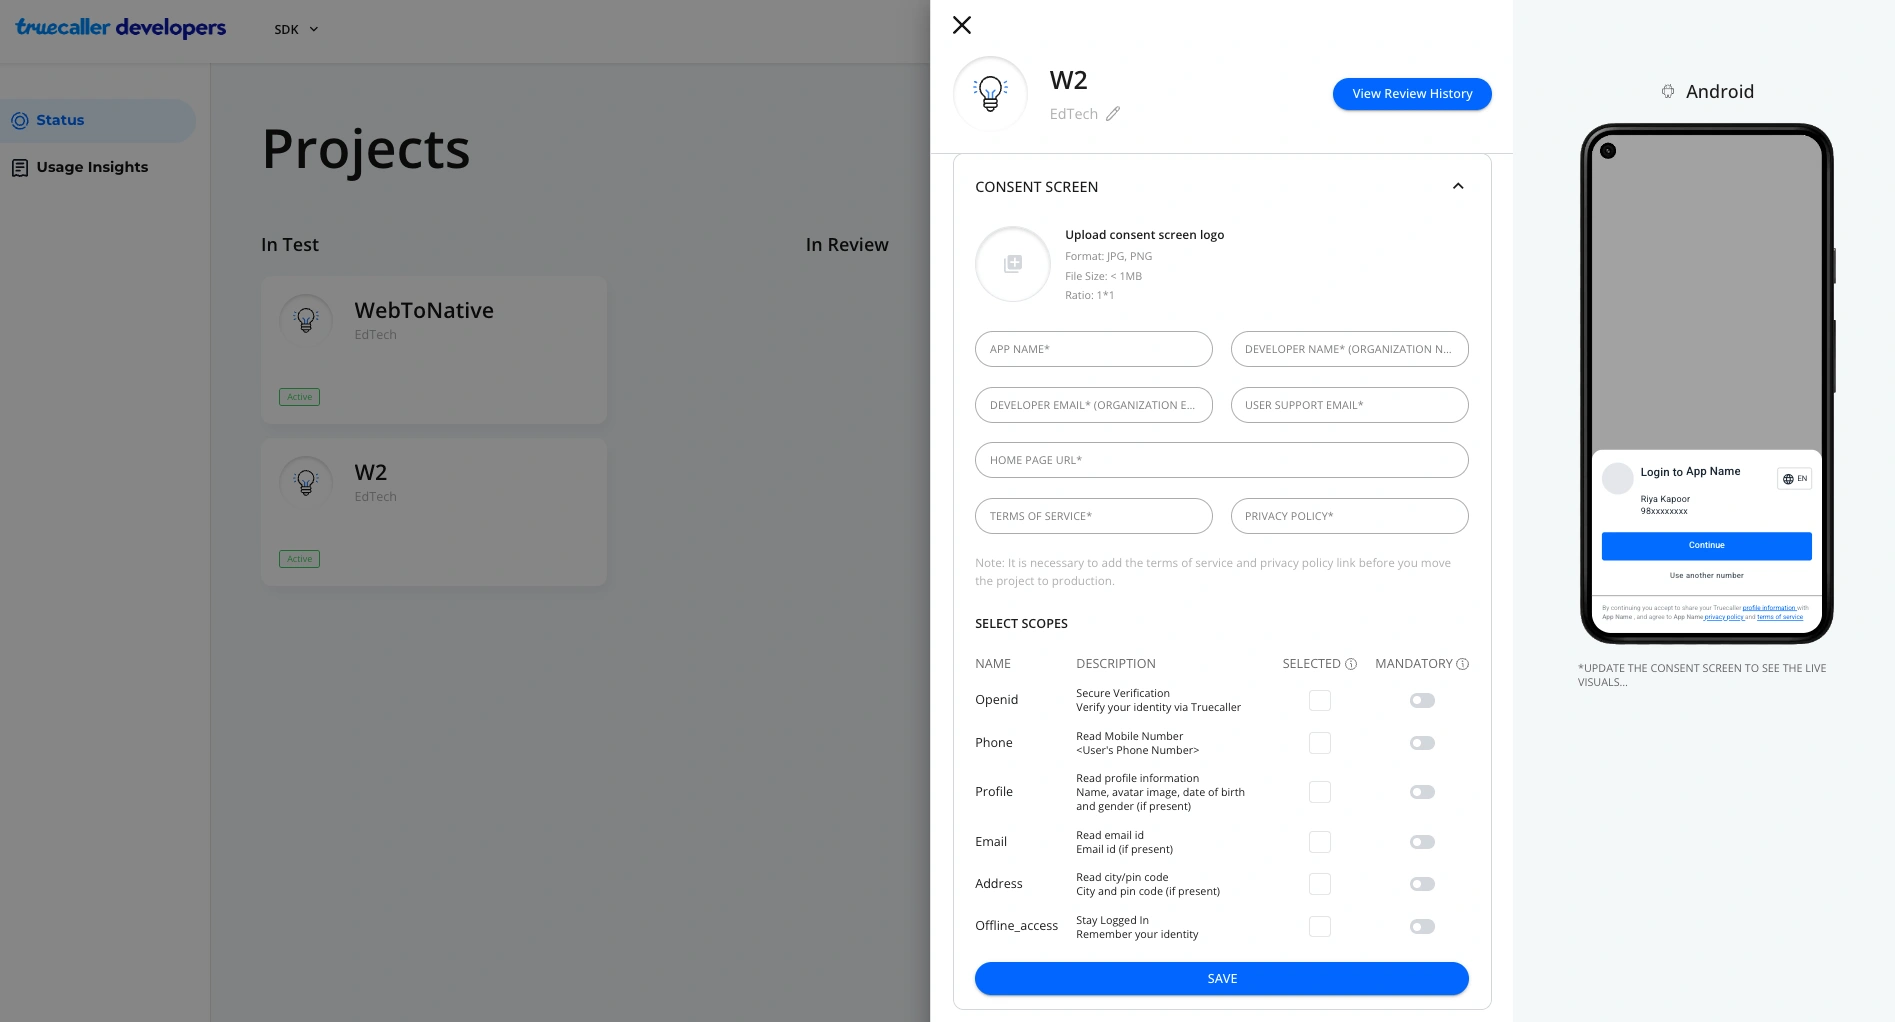
| Field | Description |
|---|---|
| App Name | Your app's display name shown to users |
| Home Screen Logo | Your app icon or brand logo |
| Developer Name | Organisation name displayed to the user |
| Developer Email | Contact email for the developer |
| User Support Email | How users can contact your app for Truecaller-related issues |
| PHome Page URL | Your app or company website |
| Terms of Service URL | Link to your Terms of Service |
| Privacy URL | Link to your Privacy Policy |
Select Scopes
Select and add the data your app is requesting access to. Select only what you actually need:
- OpenID Token: The token Truecaller provides to verify the user's identity.
- Phone Number: The user's verified phone number.
- Profile: Complete profile — name, photo, and other details.
- Email: User's email address, if available in their Truecaller profile.
- Address: User's address, if available in their Truecaller profile.
- Offline Access: Also returns a refresh token to generate new access tokens without re-authentication.
Save
Your Android application is now registered with Truecaller.
Steps to Register your app on Truecaller (iOS)
Register your iOS app on the Truecaller Developer Portal. For detailed iOS setup steps, follow the official guide at https://docs.truecaller.com/truecaller-sdk/ios/generating-app-key (opens in a new tab)
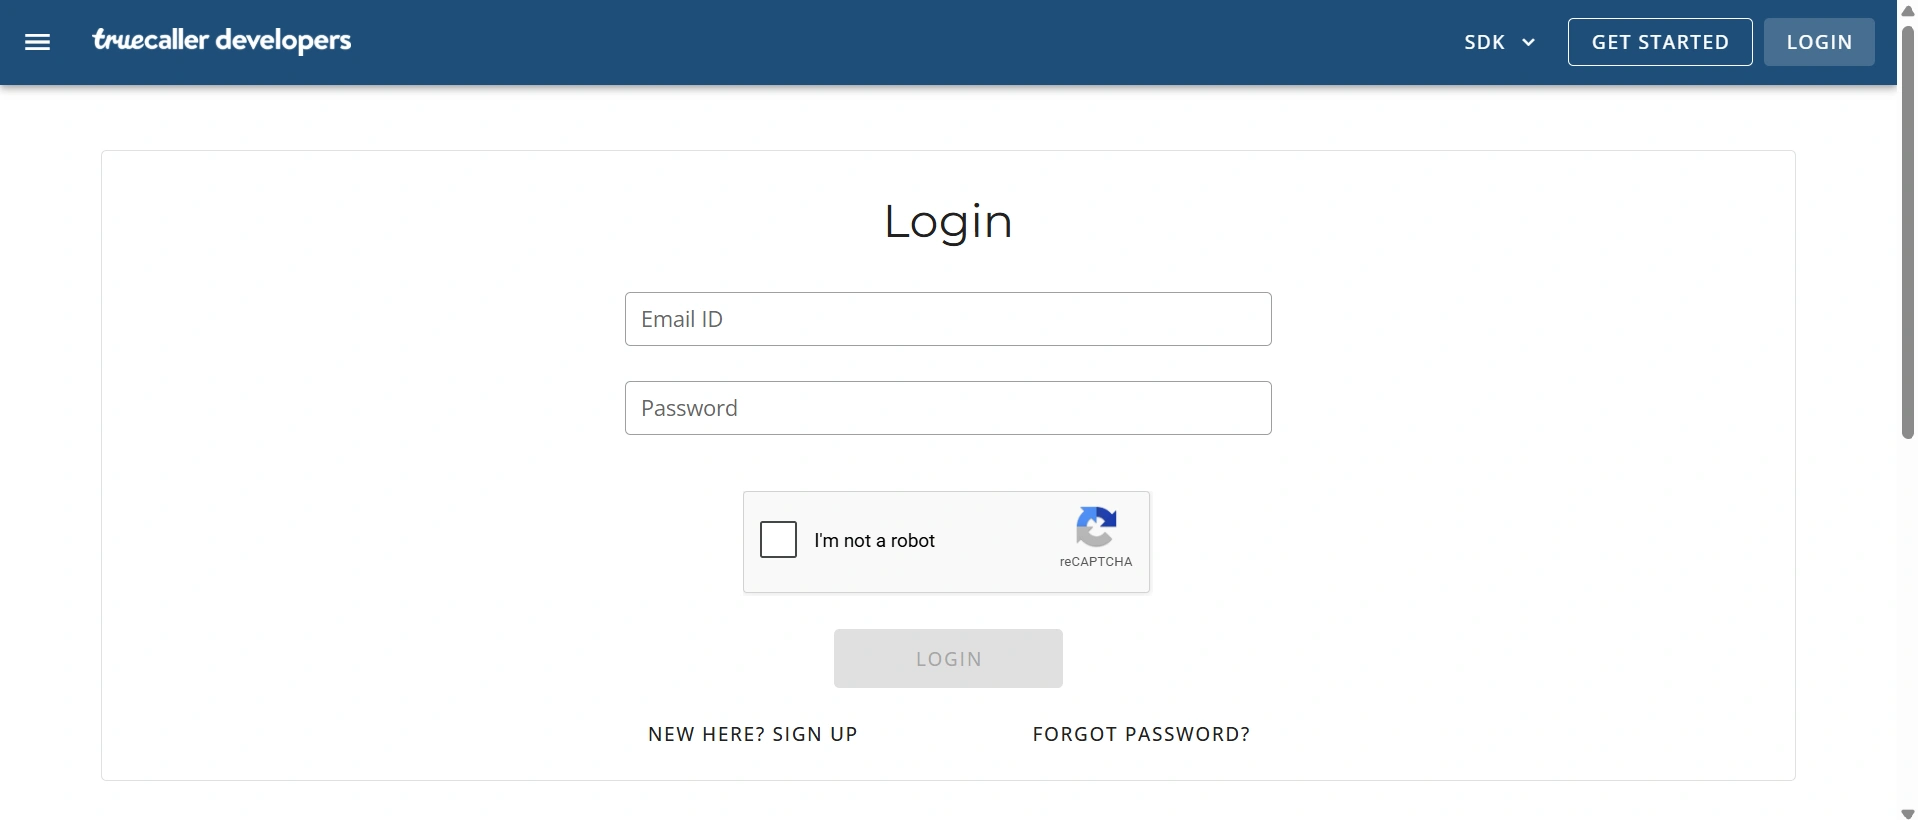
Login
Log in to the Truecaller Developer Portal and navigate to your application.
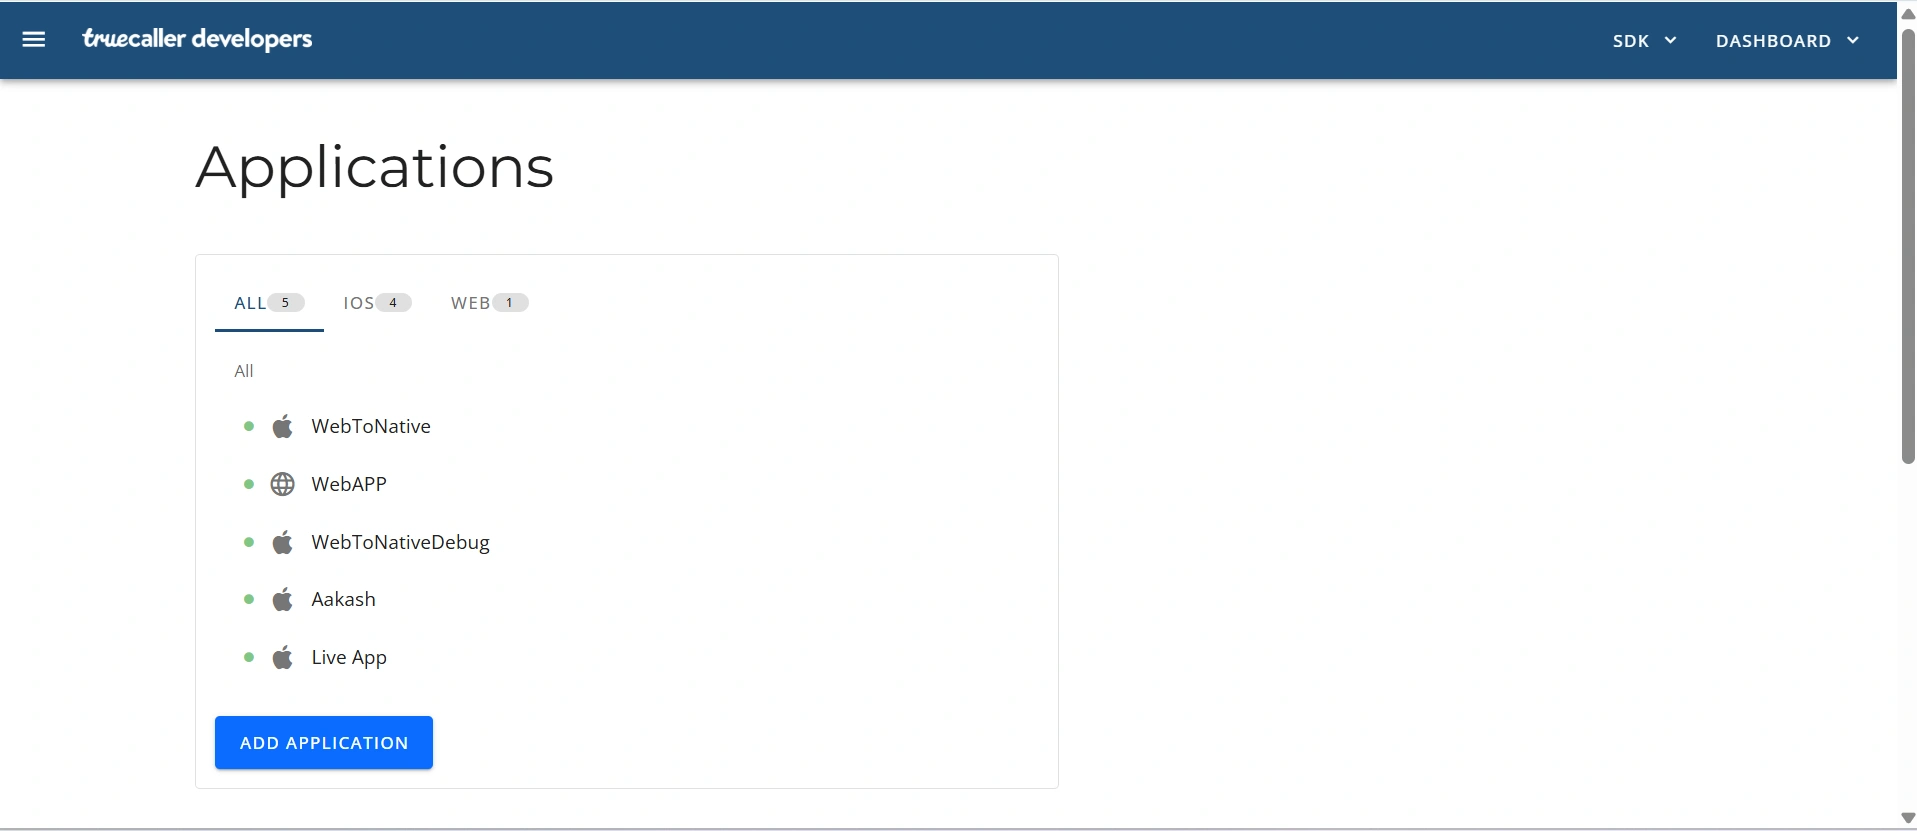
Add the Application
Add a new application or add iOS to an existing project.
App Details
Enter your app details for iOS:
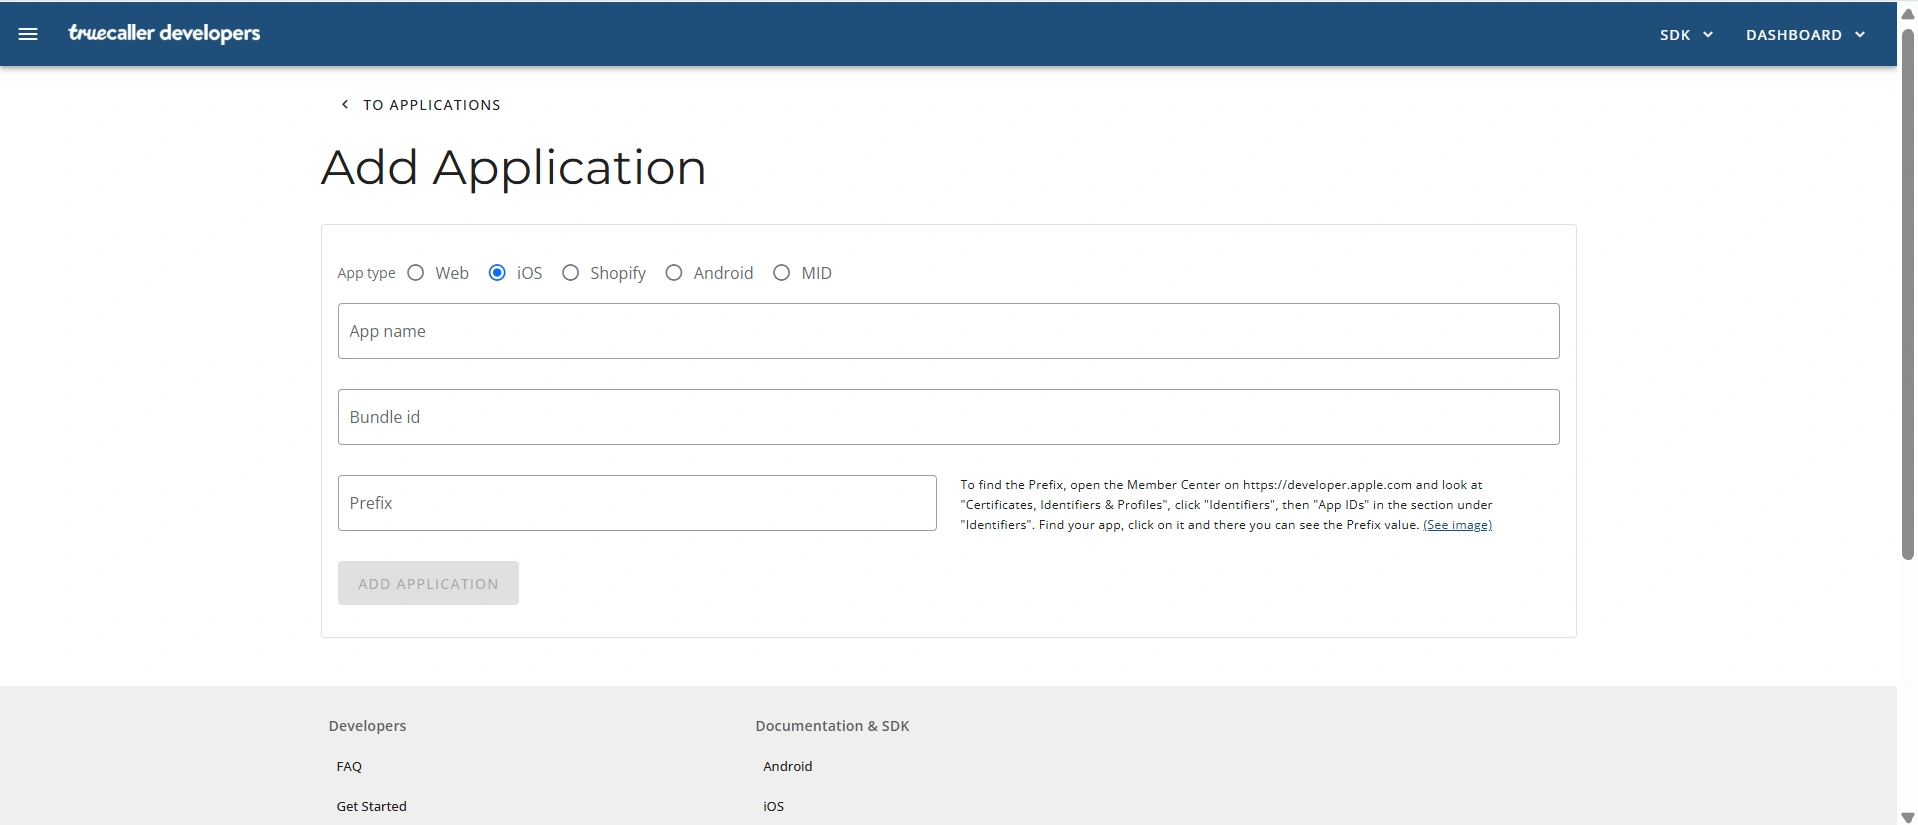
| Field | Where To Find |
|---|---|
| App Name | Your app's display name on the App Store |
| Bundle ID | WebToNative dashboard → App Info → Bundle ID |
Save
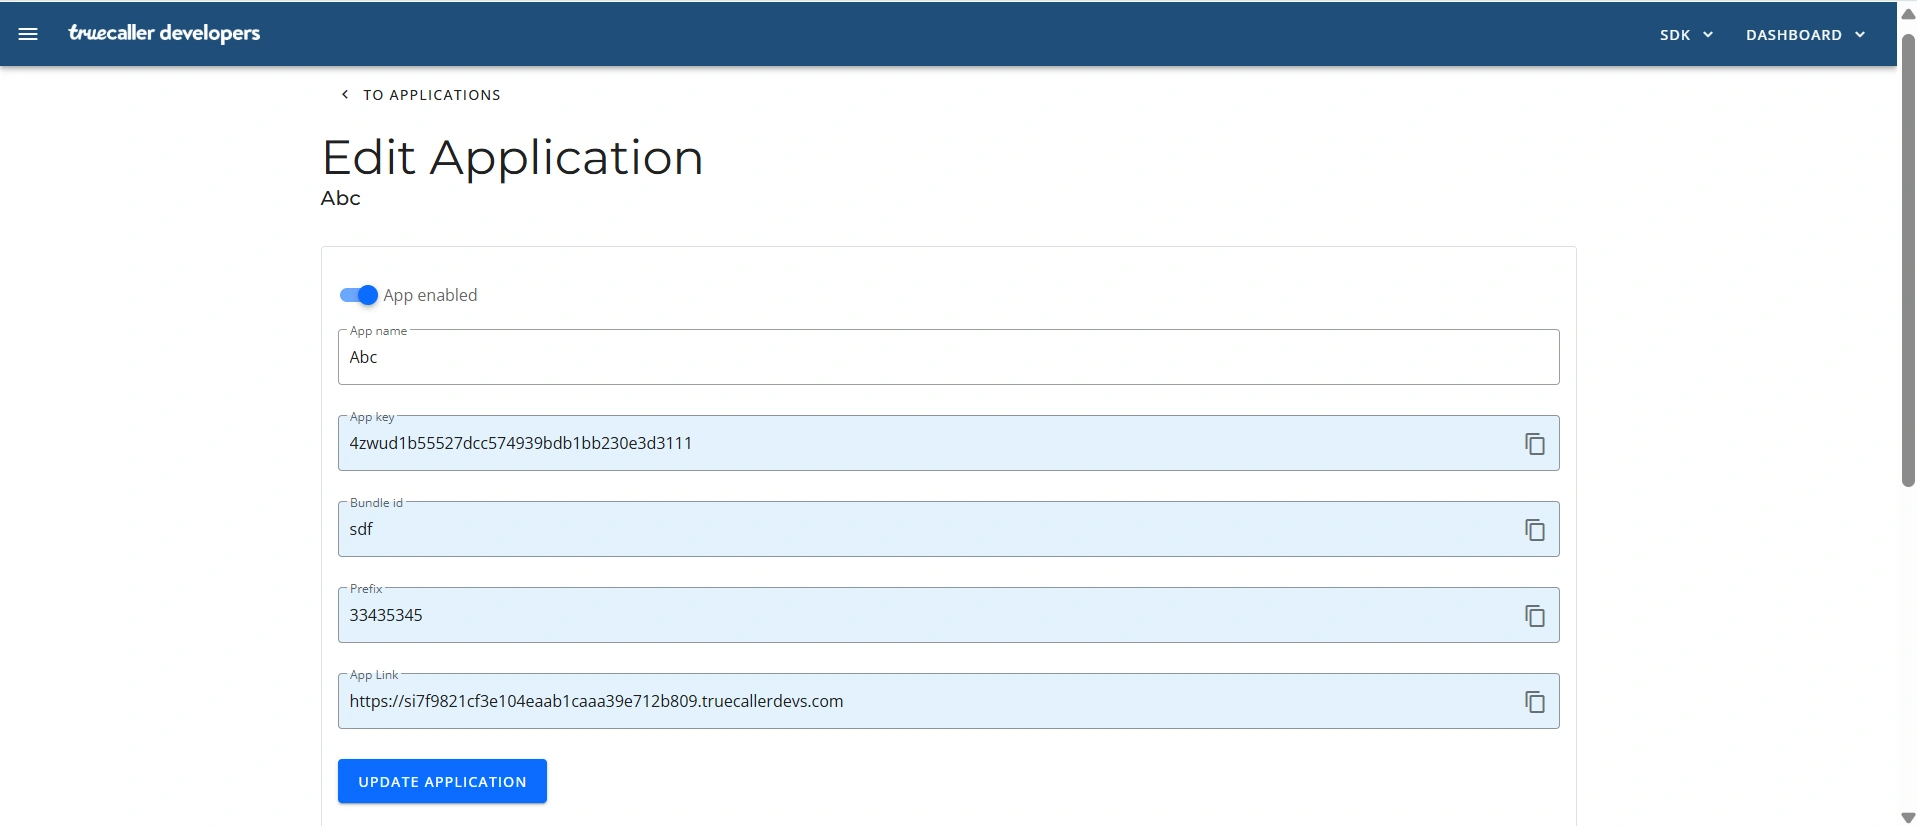
Truecaller will generate your App Key and App Link. Copy both — you'll need them for the WebToNative dashboard.
Enter credentials in WebToNative
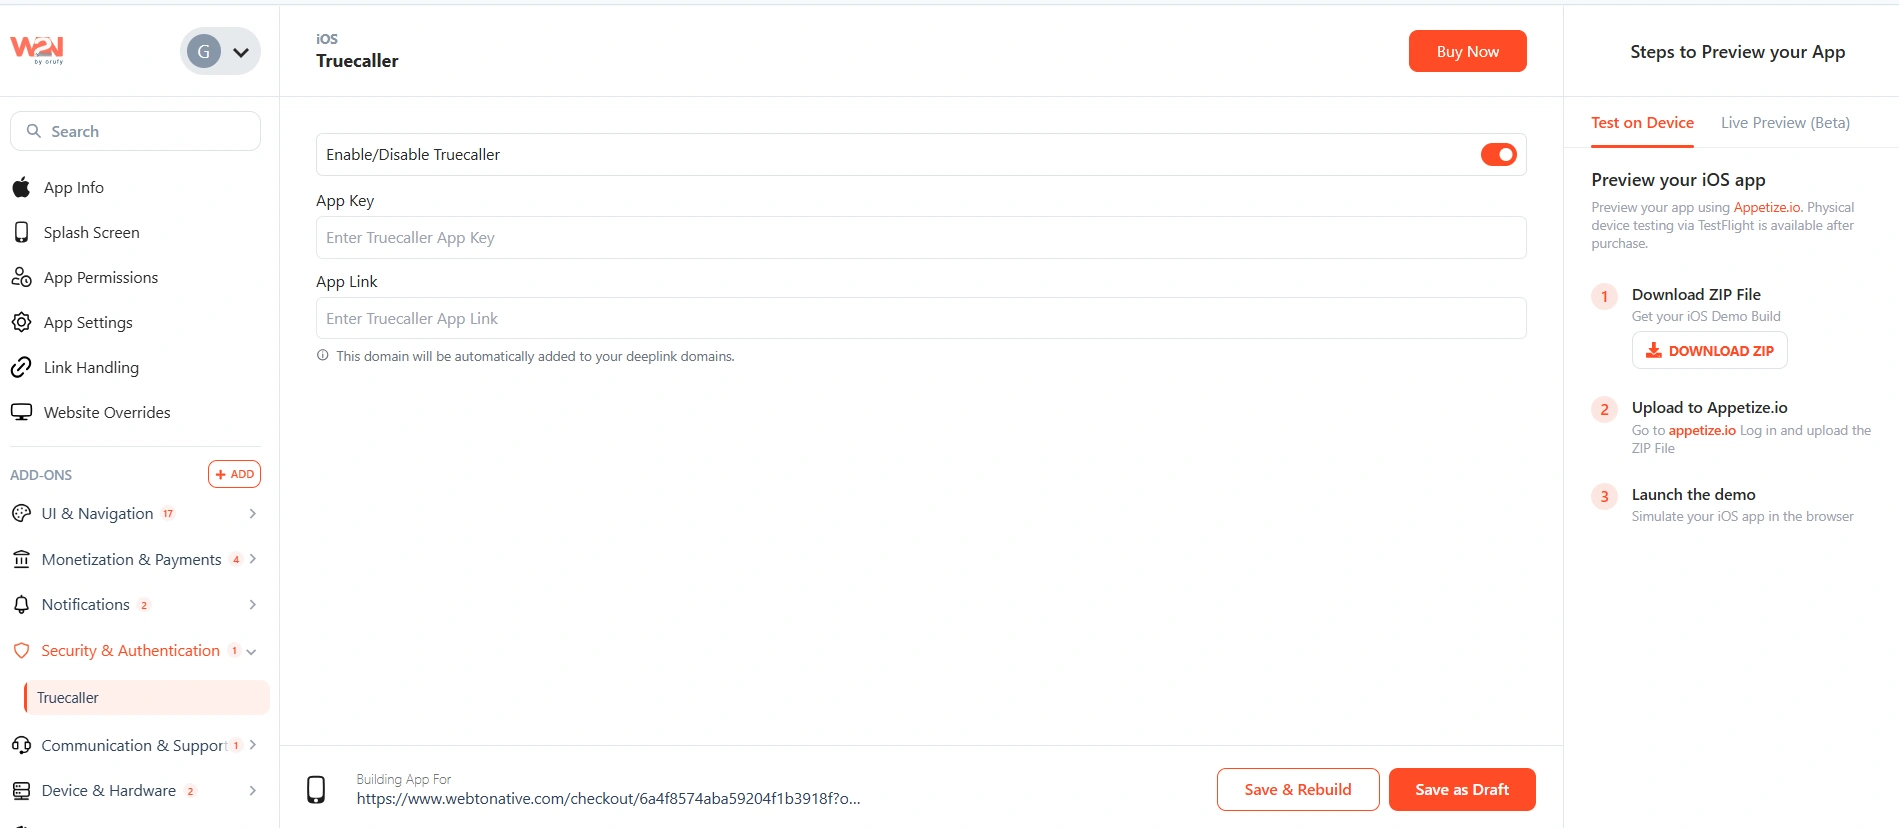
Open your WebToNative dashboard → Add-Ons → Truecaller and enter the credentials you received from the Truecaller portal.
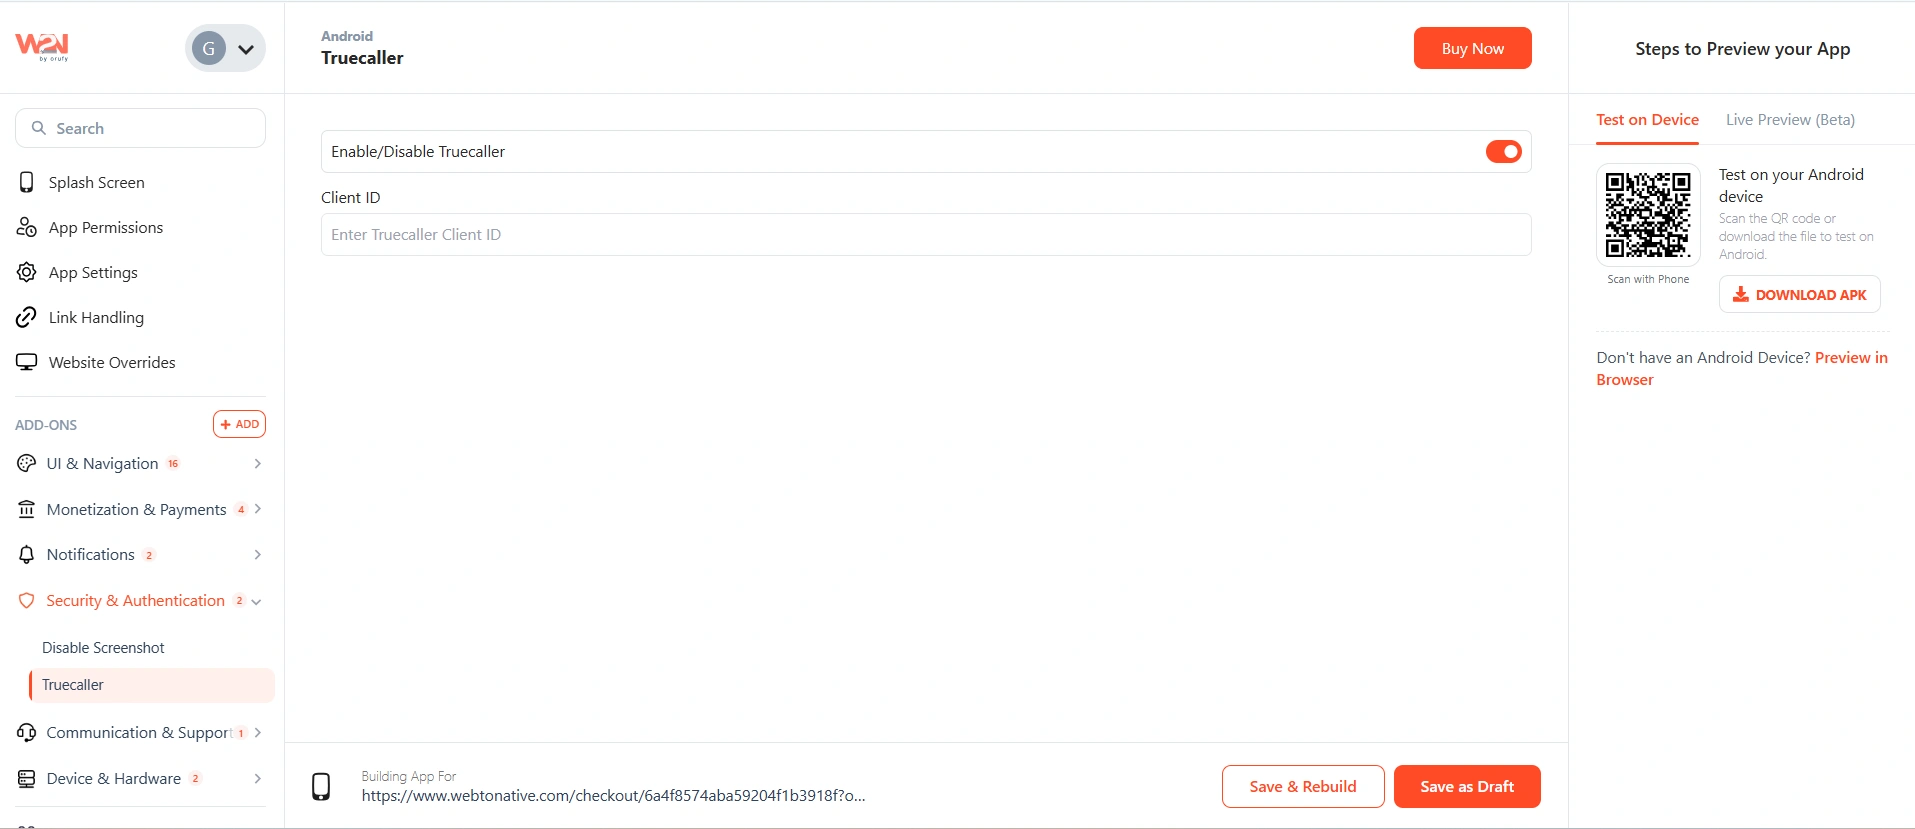

Android Client ID
The Client ID issued by Truecaller after registering your Android app. This links your WebToNative Android build to your Truecaller project.

iOS App Key
The App Key issued by Truecaller for your iOS application. Required for the iOS verification flow to initialize.

iOS App Link
The App Link generated by Truecaller for your iOS app. Used as the universal link callback that returns users to your app after the Truecaller consent flow.
After saving credentials, click Save & Rebuild to generate a new app build with Truecaller integrated. Test on a real device with the Truecaller app installed.
How callbacks differ between Android and iOS
Both platforms use the same JavaScript function — but what comes back in the callback is different, and iOS has an important limitation.
| Behaviour | Android | iOS |
|---|---|---|
| truVerification method | OAuth 2.0 with PKCE | Signed JWT (legacy TrueSDK) |
| authorizationCode | OAuth authorisation code — exchange with codeVerifier on backend | Signed JWT token — verify signature on backend, then decode claims |
| codeVerifier | PKCE verifier — required for backend exchange | Empty string — not used in JWT flow) |
| platform field | "android" | "ios" |
| Cancellation callback | Always fires — USER_CANCELLED error returned | May not fire — see important note below |
On iOS, if the user closes Truecaller mid-flow, switches away, or dismisses the login screen, the SDK may not return a callback at all. This is a known limitation of the Truecaller iOS SDK — it is not something WebToNative can work around.
Recommended solution: implement a frontend timeout (e.g. 10 seconds) that treats no response as a cancellation. This prevents your UI from hanging indefinitely. Code examples are in the JavaScript API docs.
JavaScript API
A single function — truecallerLogin() — triggers the verification flow on both Android and iOS. It handles platform differences internally, returning a unified callback with a platform field so your code can branch on the backend verification path.
Full function reference, callback shapes, error codes, iOS timeout pattern, and backend verification flows are in the developer docs.
View JavaScript API Docs → https://docs.webtonative.com/javascript-apis/truecaller (opens in a new tab)
Integration checklist
Truecaller App
- App registered at developer.truecaller.com
- Android package name and release SHA-1 added
- iOS Bundle ID and App Name added
- Consent screen configured (name, logo, emails, URLs)
- Required OAuth scopes selected
- Android Client ID and iOS App Key + App Link copied
WebToNative & Your App
- Truecaller add-on enabled in dashboard
- Android Client ID, iOS App Key, iOS App Link entered
- App rebuilt and tested on real device
- Callback checks response.platform before backend call
- iOS timeout implemented to handle missing cancellation
- Backend verifies credentials before issuing a session
Frequently Asked Questions
Do I need a different function for Android and iOS?
No — truecallerLogin() is the single entry point for both platforms. WebToNative handles the platform-specific SDK calls internally. The callback returns a platform field ("android" or "ios") so your code can branch to the correct backend verification path.
What if Truecaller is not installed on the user's device?
The callback fires with success: false and error.code: "TRUECALLER_NOT_INSTALLED". Handle this in your callback by falling back to your standard phone-number login flow — for example, showing an OTP input field.
Why didn't I receive a callback on iOS when the user closed the prompt?
This is a known limitation of Truecaller's legacy iOS SDK. When a user dismisses the flow, switches away from the app, or the universal-link callback never fires, the SDK does not always emit a cancellation event. Implement a frontend timeout (the docs recommend 10 seconds) that treats no response as a cancellation — this prevents your UI from hanging indefinitely.
Why is codeVerifier empty on iOS?
iOS uses the legacy JWT delegate flow, which does not use PKCE. The codeVerifier field is included in the callback response so the data shape stays identical across both platforms — but it is intentionally empty on iOS and should be ignored. On iOS, verify the JWT signature in authorizationCode instead.
Can I get the user's phone number directly from the frontend callback?
No. The frontend callback only receives credentials that prove the user completed the flow — not the verified profile itself. The phone number and user details are only available after your backend exchanges or verifies those credentials with Truecaller. Never treat frontend callback data as a verified identity.
Does this work in a regular browser?
No — the Truecaller plugin only activates inside the Android and iOS WebToNative app shells. Calling the function in a regular web browser has no effect. Make sure your login flow only displays the Truecaller button when the user is inside the app, not on a regular website visit.