


Google OAuth Client ID
Set up a Google Cloud project, configure the OAuth consent screen, and create Client IDs for Android, iOS, and Web — the three credentials needed for Google Login in your WebToNative app.
All three credentials must belong to the same Google Cloud project. Create one project and add all three Client IDs inside it.
Step-by-step — Google Cloud Console
Go to Google Cloud Console
Open https://console.cloud.google.com/ (opens in a new tab) and sign in with the Google account that will manage this project.
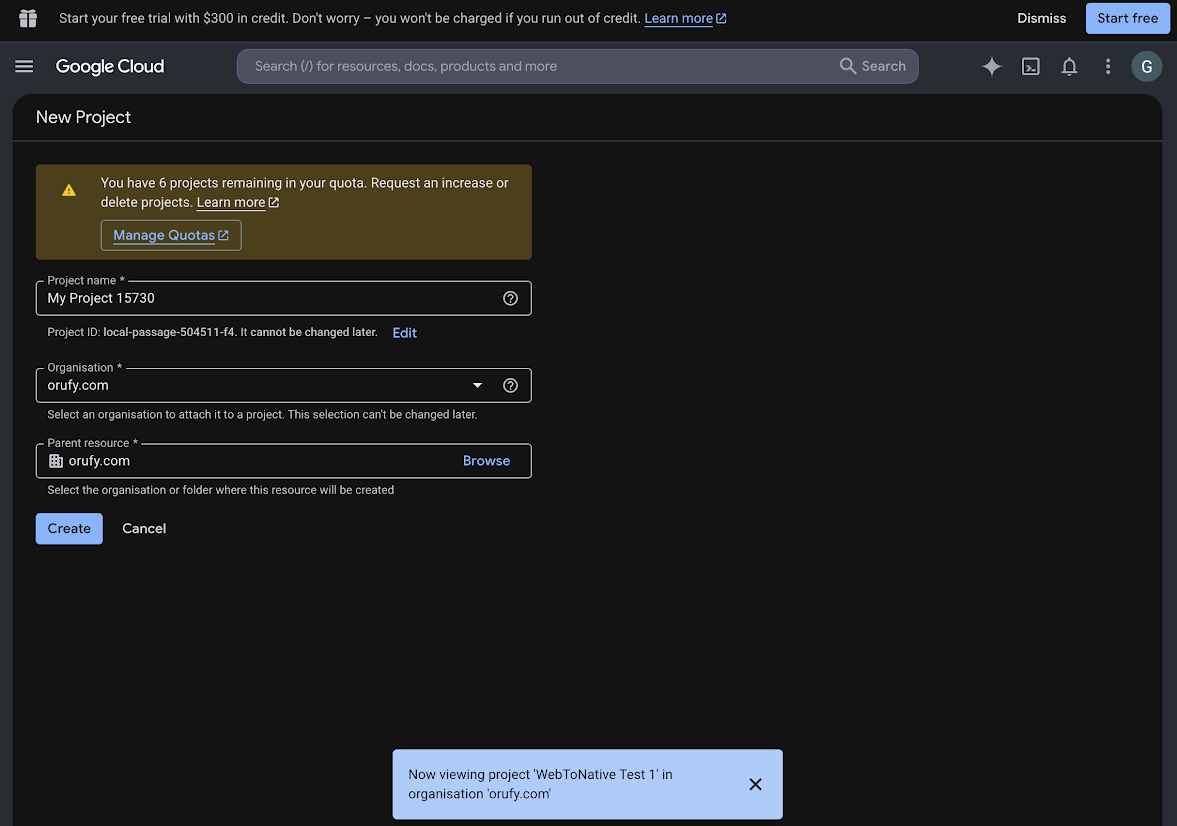
Create a new project
Click the project selector at the top → New Project. Enter a project name and select your organisation or leave it blank. Click Create.
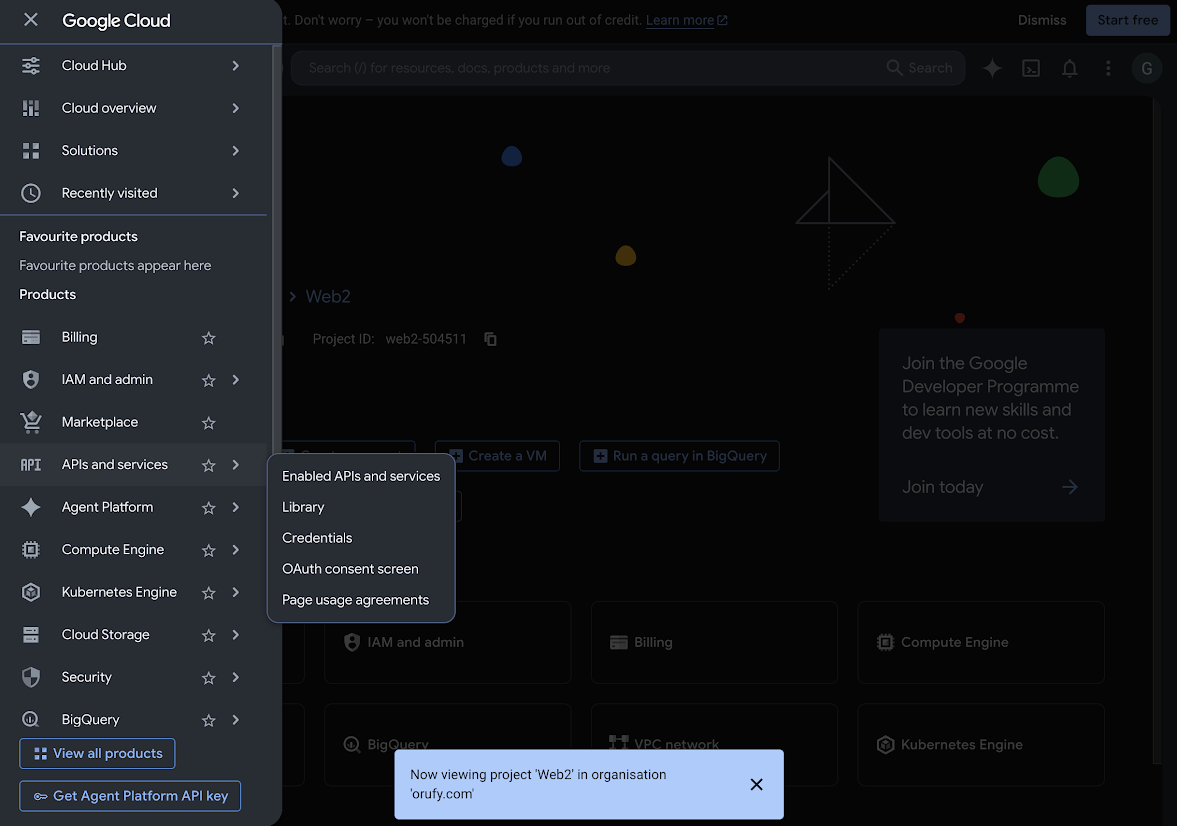
Go to API & Services
In the left sidebar, go to APIs & Services → Credentials.
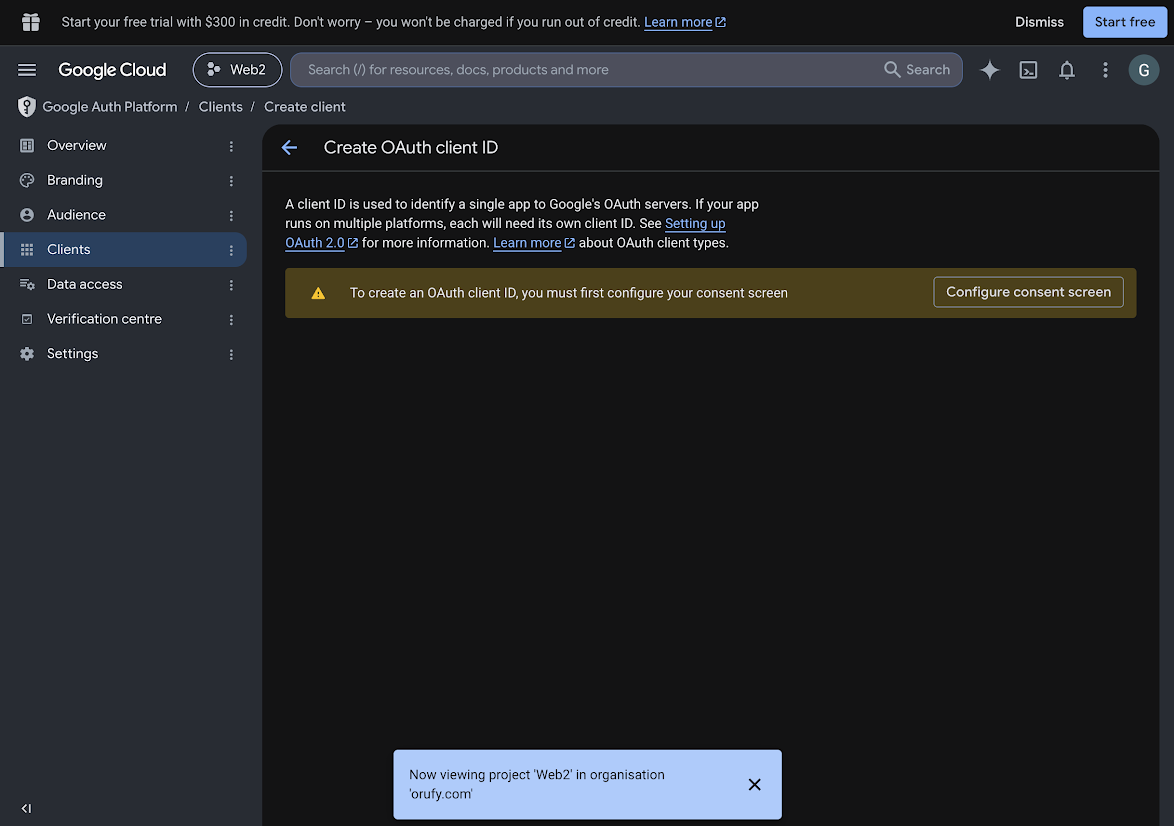
Configure the OAuth Consent Screen
Before creating credentials, click Configure Consent Screen. This is the screen users see when your app asks for permission to use their Google account.
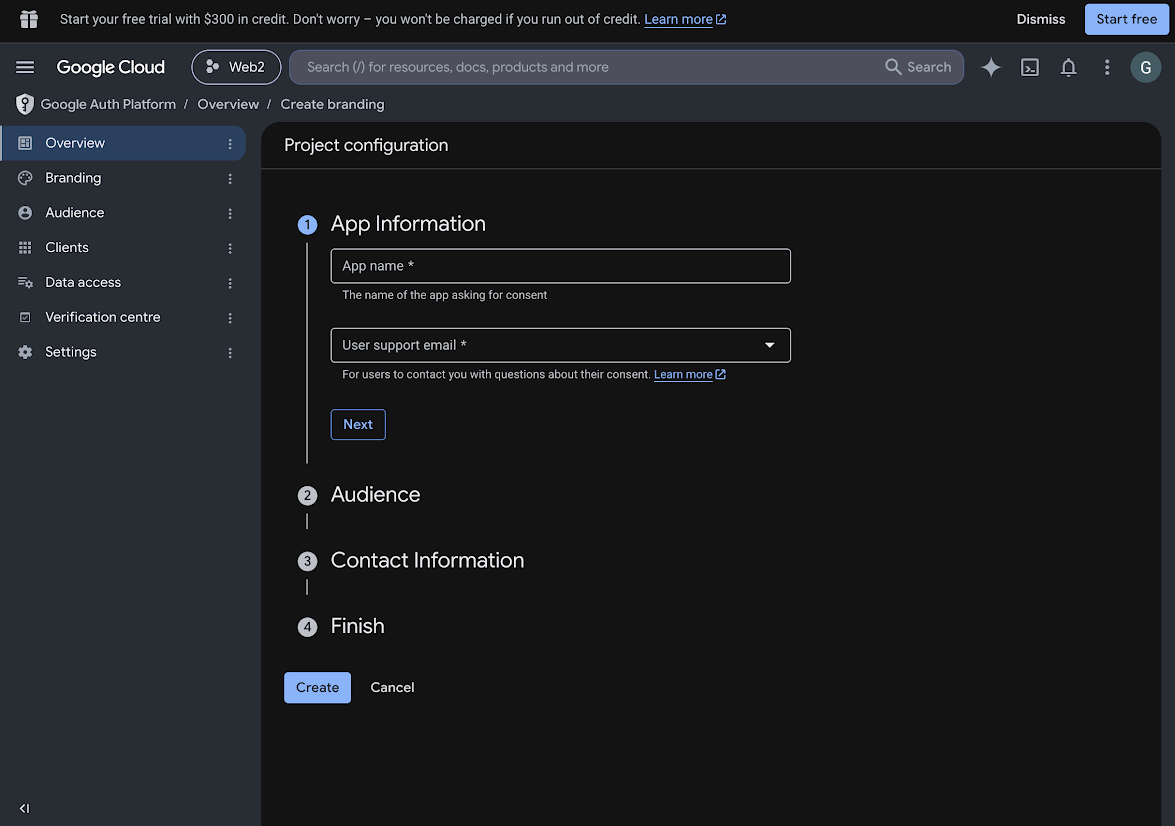
Required consent screen fields
- App Name — the name shown to users on the consent screen
- Support Email — contact email shown on the consent screen
- Audience — select External so anyone with a Google account can use your app (Internal limits access to your organisation only)
- Contact Information — developer contact email for Google
Click Get started, fill in the details, and complete the consent screen setup.
Create Credentials
Go to the Credentials page under API & Services again, click OAuth Client ID, and choose the application type you want to use to generate the credentials.
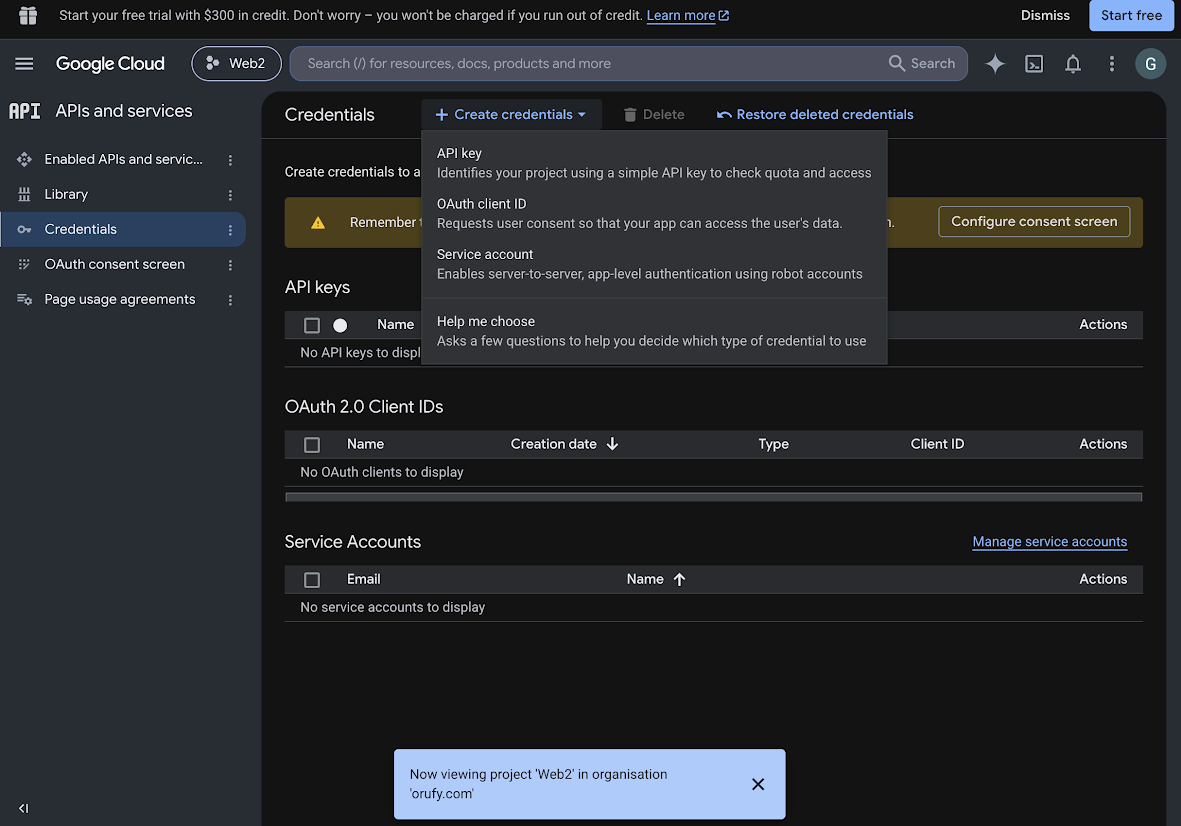
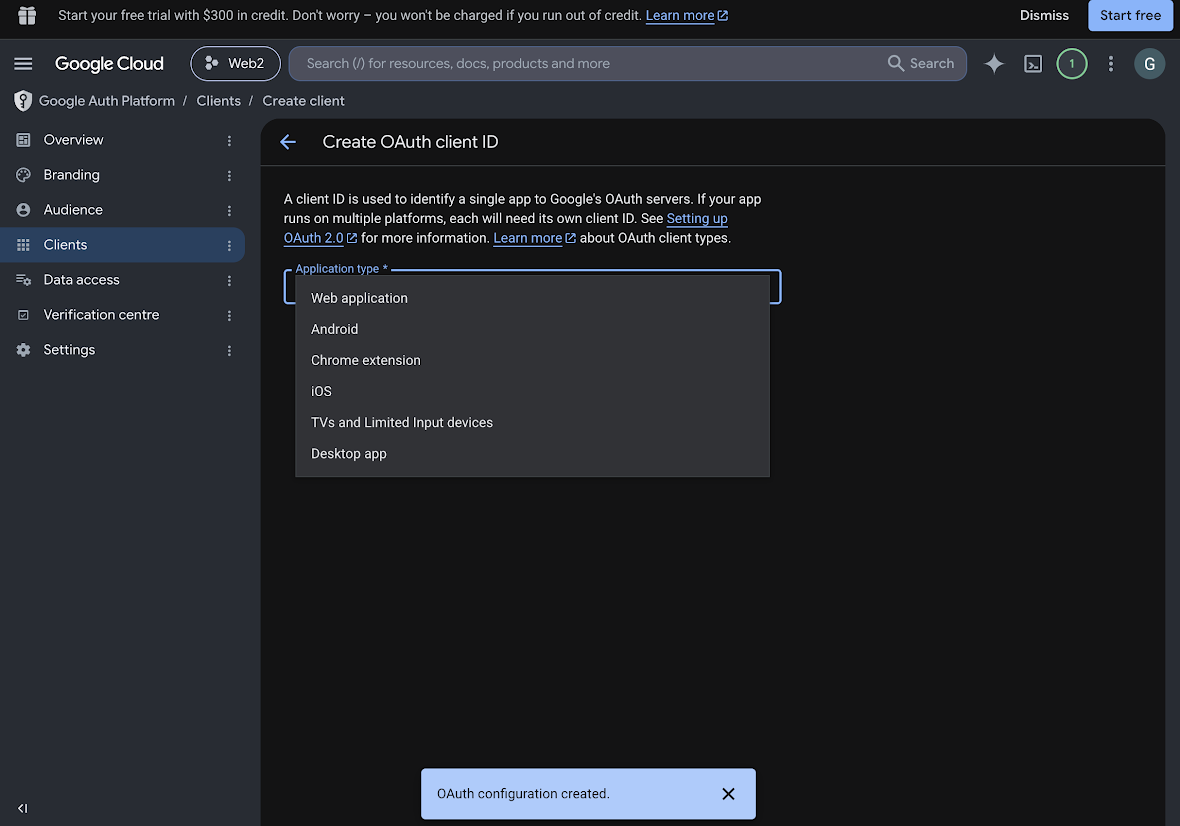
Create the Web Application Client ID
Select Web Application as the application type.
Enter a name for this client (e.g. "My App – Web"). Add your Authorised Redirect URI — the URL on your website that handles the Google login callback (success or failure). Click Create. Copy the Web Client ID — you'll enter this in WebToNative.
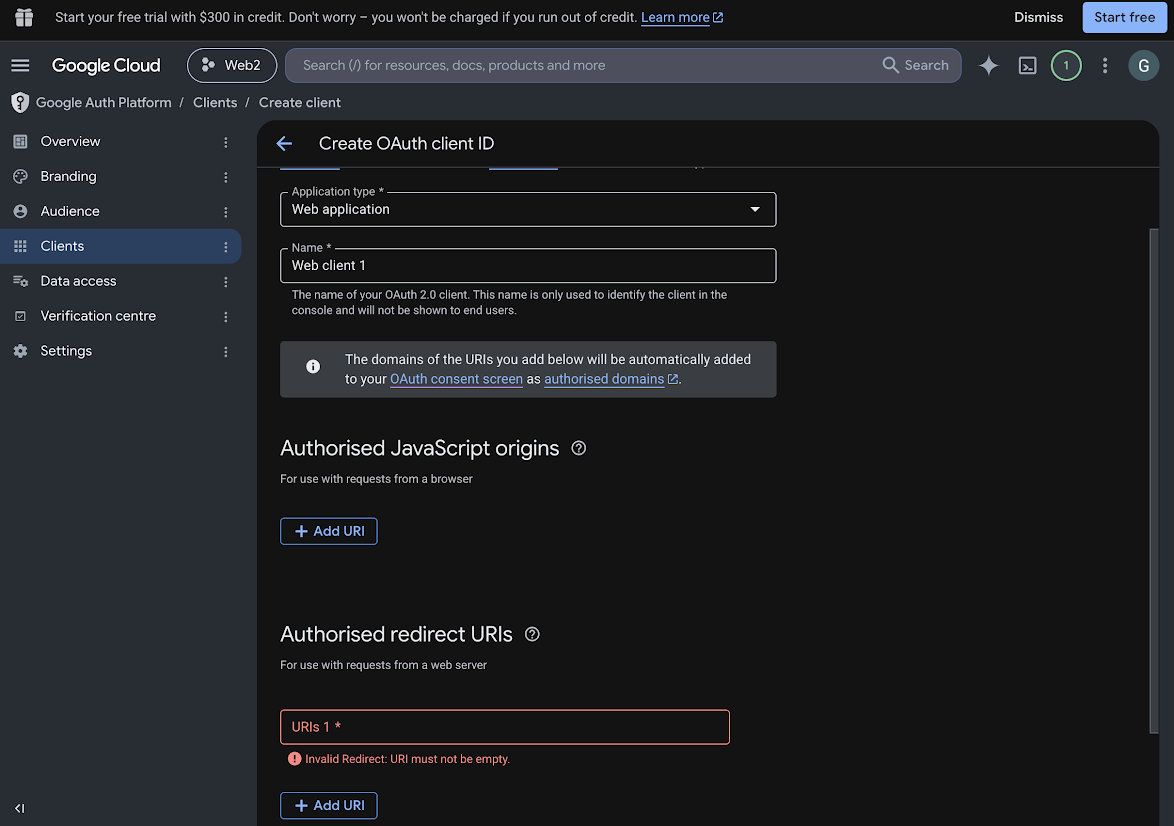
Create the Android Client ID
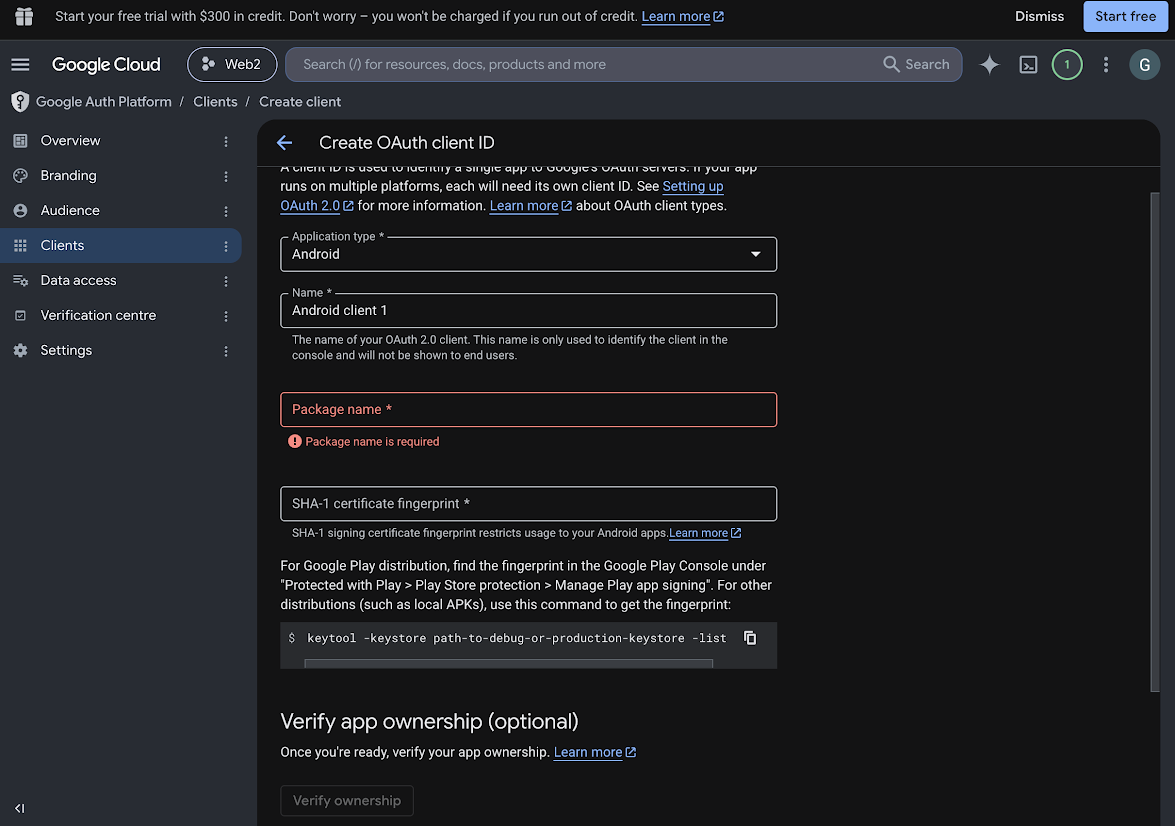
This time select Android as the application type.
Android credential fields
- Package Name — from WebToNative Dashboard → App Info → Package Name
- SHA-1 Certificate Fingerprint — from Google Play Console. How to get it →https://www.webtonative.com/support/socialloginintegrations/shakeyforgooglelogin (opens in a new tab)
Click Create. The Android Client ID is created — you don't need to paste this in WebToNative separately, but it must exist in the project.
Create the iOS Client ID
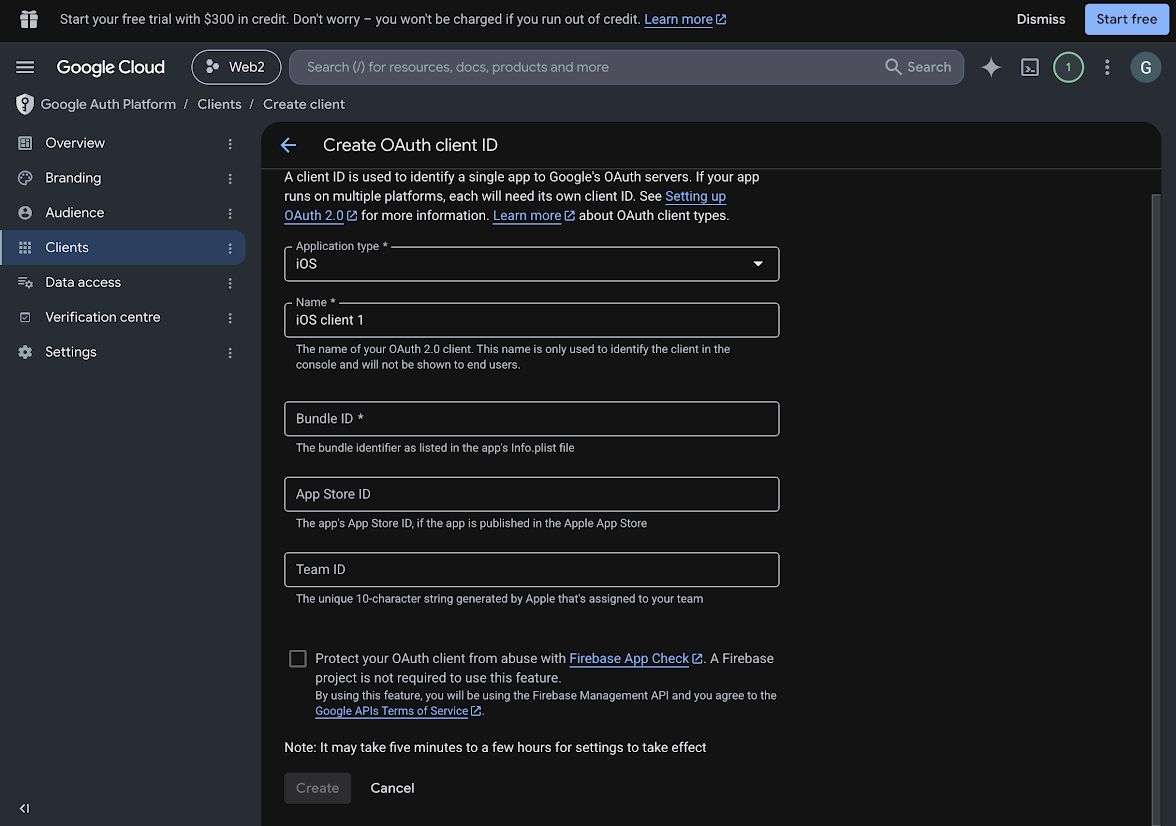
Select iOS as the application type.
iOS credential fields
- Name — a label to identify this credential (e.g. "My App – iOS")
- Bundle ID — from WebToNative Dashboard → App Info → Bundle ID
Click Create. Copy the iOS Client ID — you'll enter this as the Client ID in the WebToNative Google Login configuration.
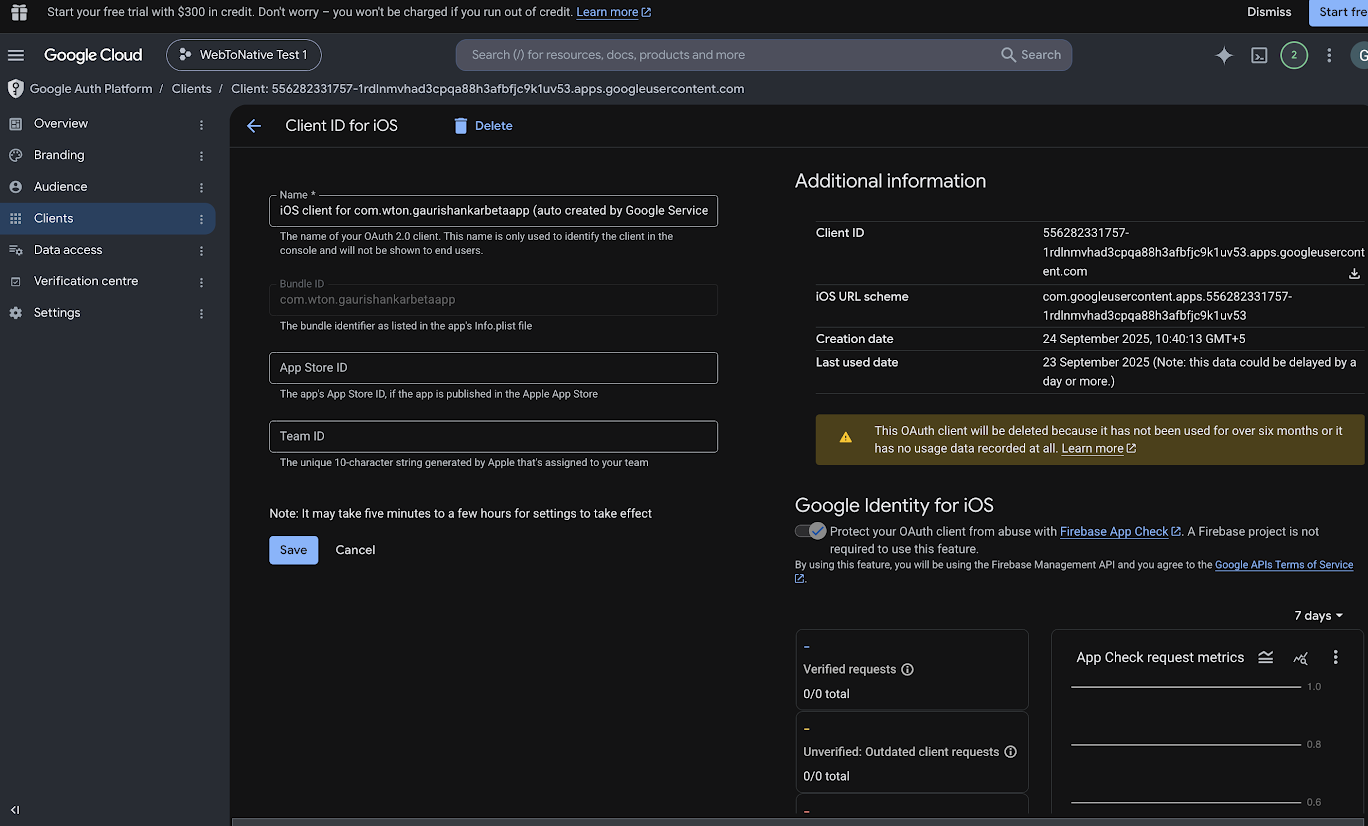
You now have all three credentials. Enter the iOS Client ID as Client ID and the Web Client ID as Web Client ID in your WebToNative dashboard → Add-Ons → Social Login → Google Login → Configure.
Summary — what goes where
| Google Cloud Console credential | Paste in WebToNative as |
|---|---|
| iOS Application → Client ID | Client ID |
| Web Application → Client ID | Web Client ID |
Frequently Asked Question
Why do I need a Web Client ID if my app is mobile?
Google's authentication flow for mobile apps still routes through a web client in the background — it's part of how Google validates the token on the server side. The Web Client ID is what your backend or WebToNative uses to verify the token returned by the Google Sign-In. Without it, verification fails.
What should I put as the Authorised Redirect URI?
Enter the callback URL on your website that handles the login result — the page Google sends users back to after they approve or decline access. If you're using Popup Flow, this is less critical, but it's still good practice to add your domain. Use the full URL including https://.