


The Language Localisation lets you choose the default language users see when they open the app, as well as other languages your app supports.
The feature is supported for Android and iOS. It includes a 14-day free trial and starts with a Pro Paid Plan.
The app displays content based on the device's language. This language is saved at the time of configuration, so once it is set, the app continues showing that language going forward. If a language is not saved at configuration, English is used as the default language.
Why Use Language Localisation in Your App?

Reach a Global Audience
A single language limits users' ability to use the app fully. Let users read and navigate in the language they are familiar with.
Automatic Translation
No need to translate every string manually. Once you add a language, its translations are generated automatically for you.

Full Control Over Each String
Each translation is editable. If an automatic translation is not proper, you can rewrite it manually.
What WebToNative Provides in Language Localisation?
Default Language Selection
Choose the original language your app is built in. Every language is translated based on this one.
Multiple Language Support
Add as many languages as you need from a dropdown menu, including French, Hindi, German, and more.
Search Across Translations
Read any word or string across the entire translation table instead of scrolling.
Reset or Remove Any Language
Regenerate all translations for a language in one click or remove a language completely if not required.
Lock Individual Translations
Lock a specific string so it stays untouched even if you reset that translation later.
Edit any Translation
Open any string and edit its text for every translation it appears in, all from one dashboard.
Where to Find It
My Apps ➡️ Edit your app ➡️ Language Localisation
Steps to Apply Language Localisation to Your App
Set the Default Language
This is the original language your app content is written in. Every translation is generated based on it.
-
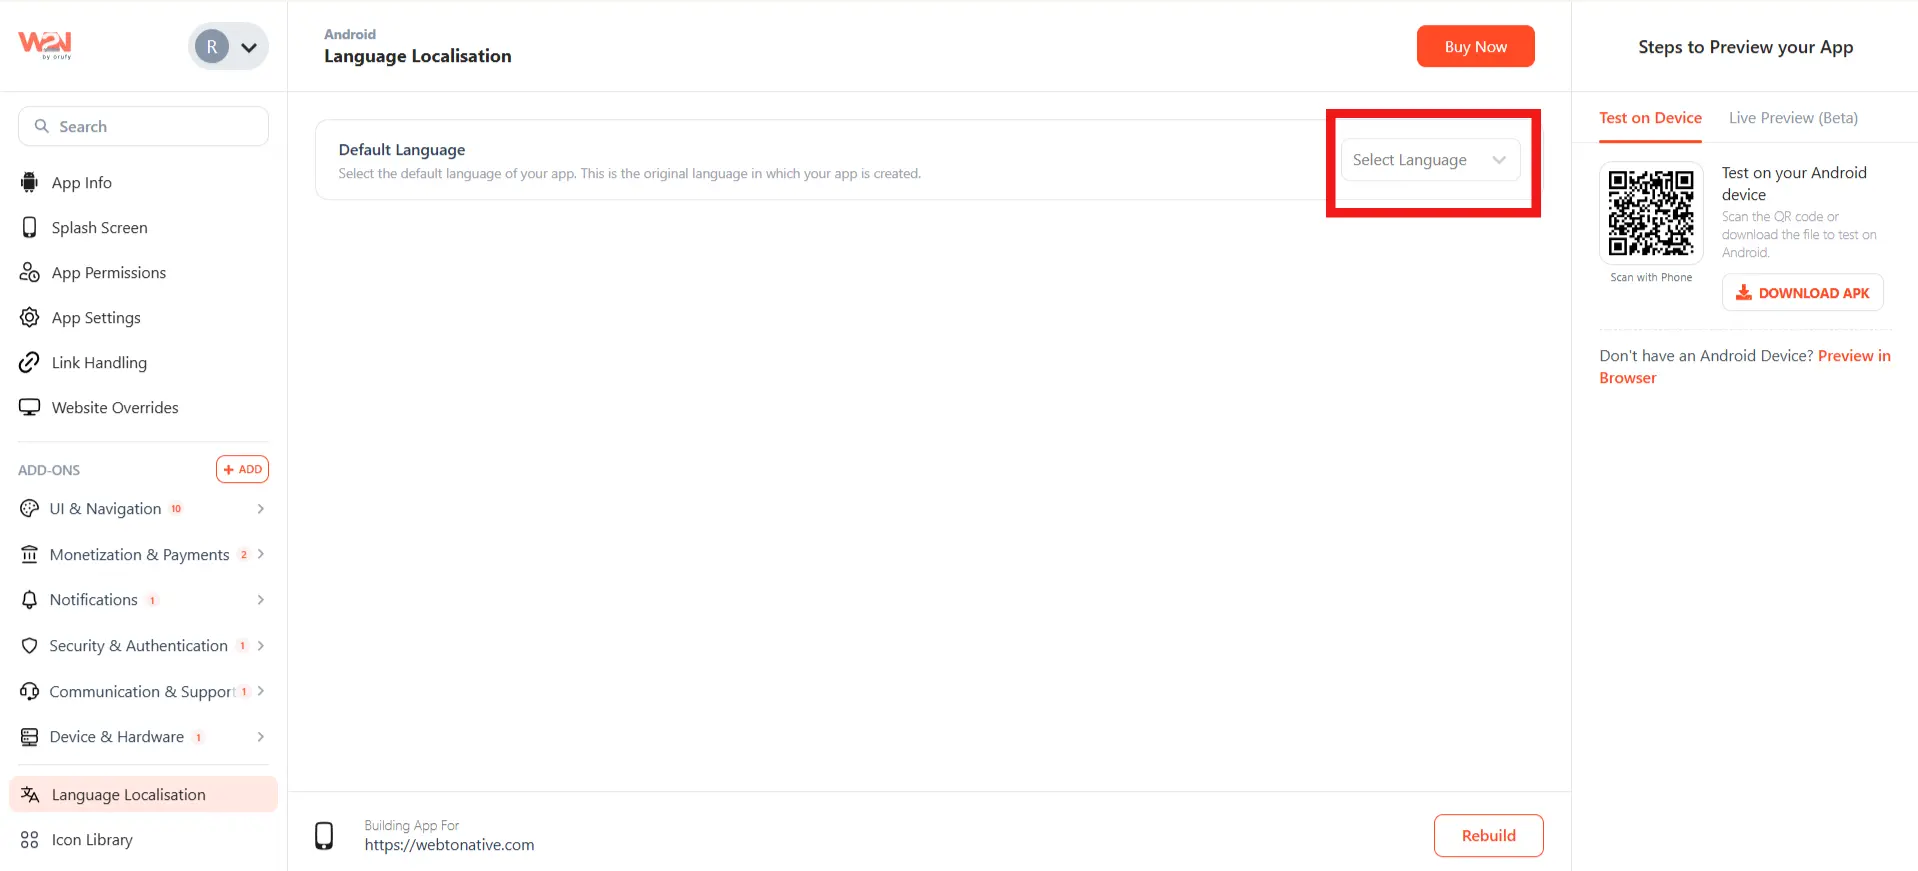
Click on the Select Language button inside the Default Language field.
-
Choose your app’s original language from the dropdown menu.
You can change your app’s default language even after it’s been set. Inside the Default Language field, click on the language selected. The dropdown menu opens again, and select a new language.
Add a Language for Translation
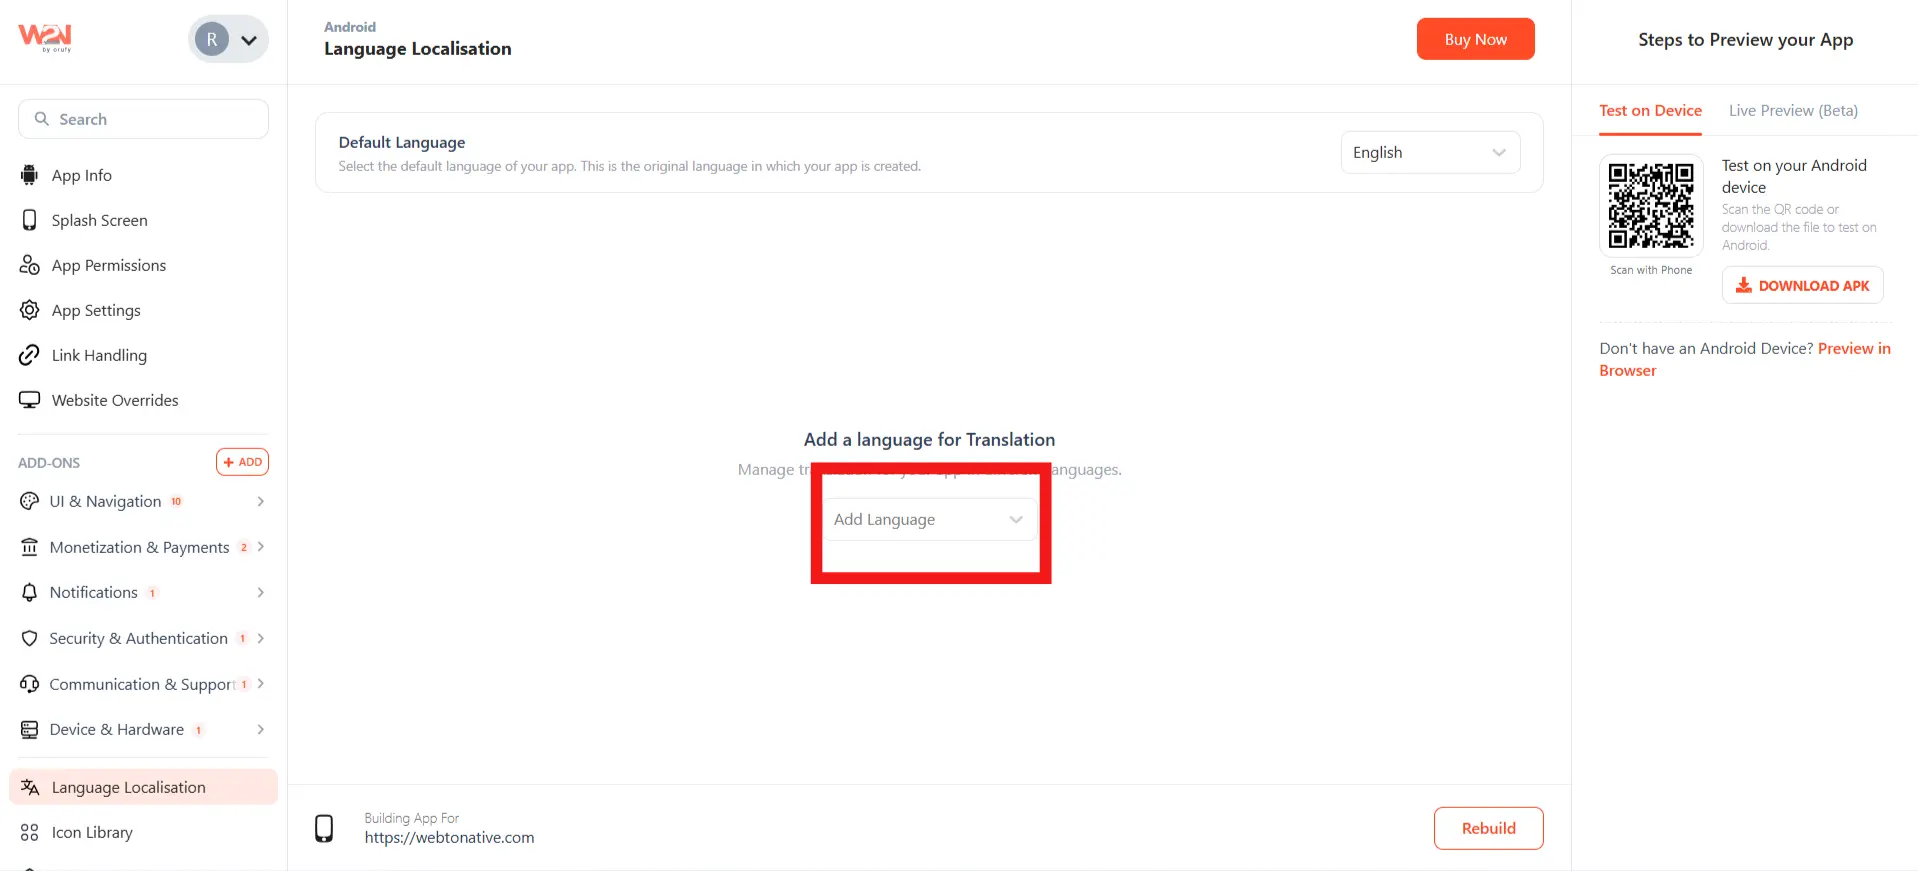
Once your default language is set, the Add a Language for Translation section appears. This is where you add every other language your app must support.
- Click on Add Language. A dropdown menu will open with multiple language options.
-
Select a language such as French, Spanish, and more.
-
Repeat for every additional language you want.
You can add as many additional languages as you need based on your plan. Each plan has its own language limit, with higher plans supporting more languages.
Search & Review Translations
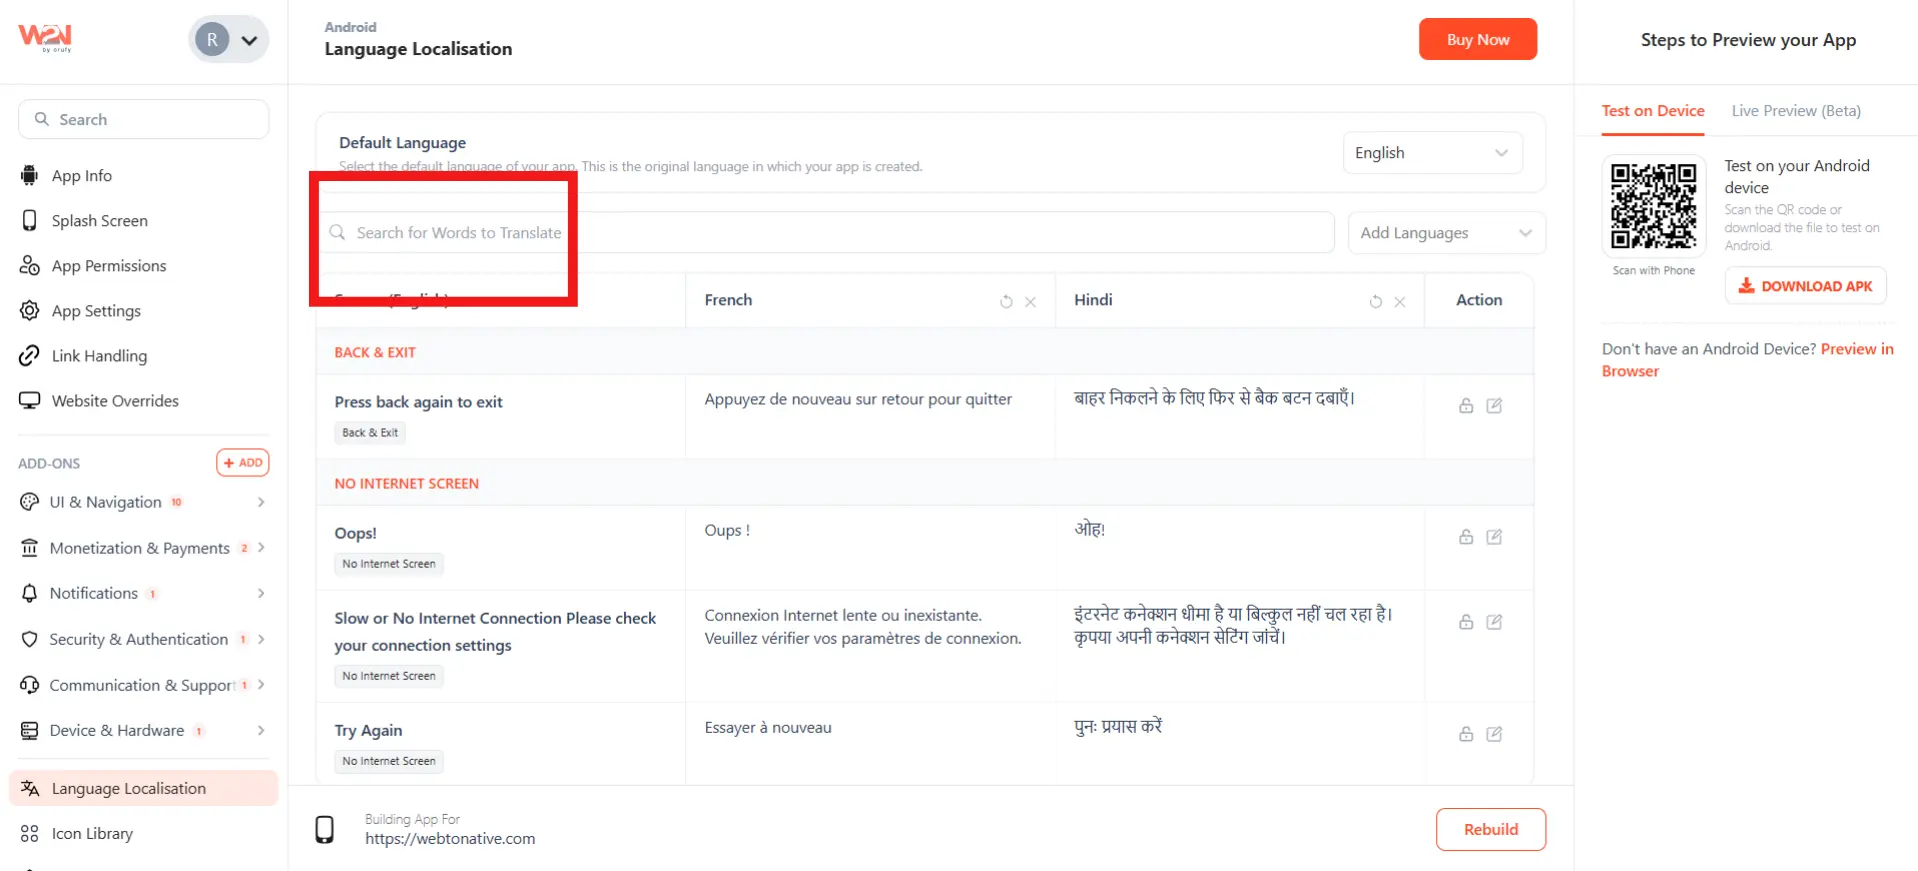
A table appears with your default language column next to every added language. Use the Search for Words to Translate bar to jump to a particular string instead of juggling content.
Reset or Remove a Language
Each language column header has two icons next to its name.
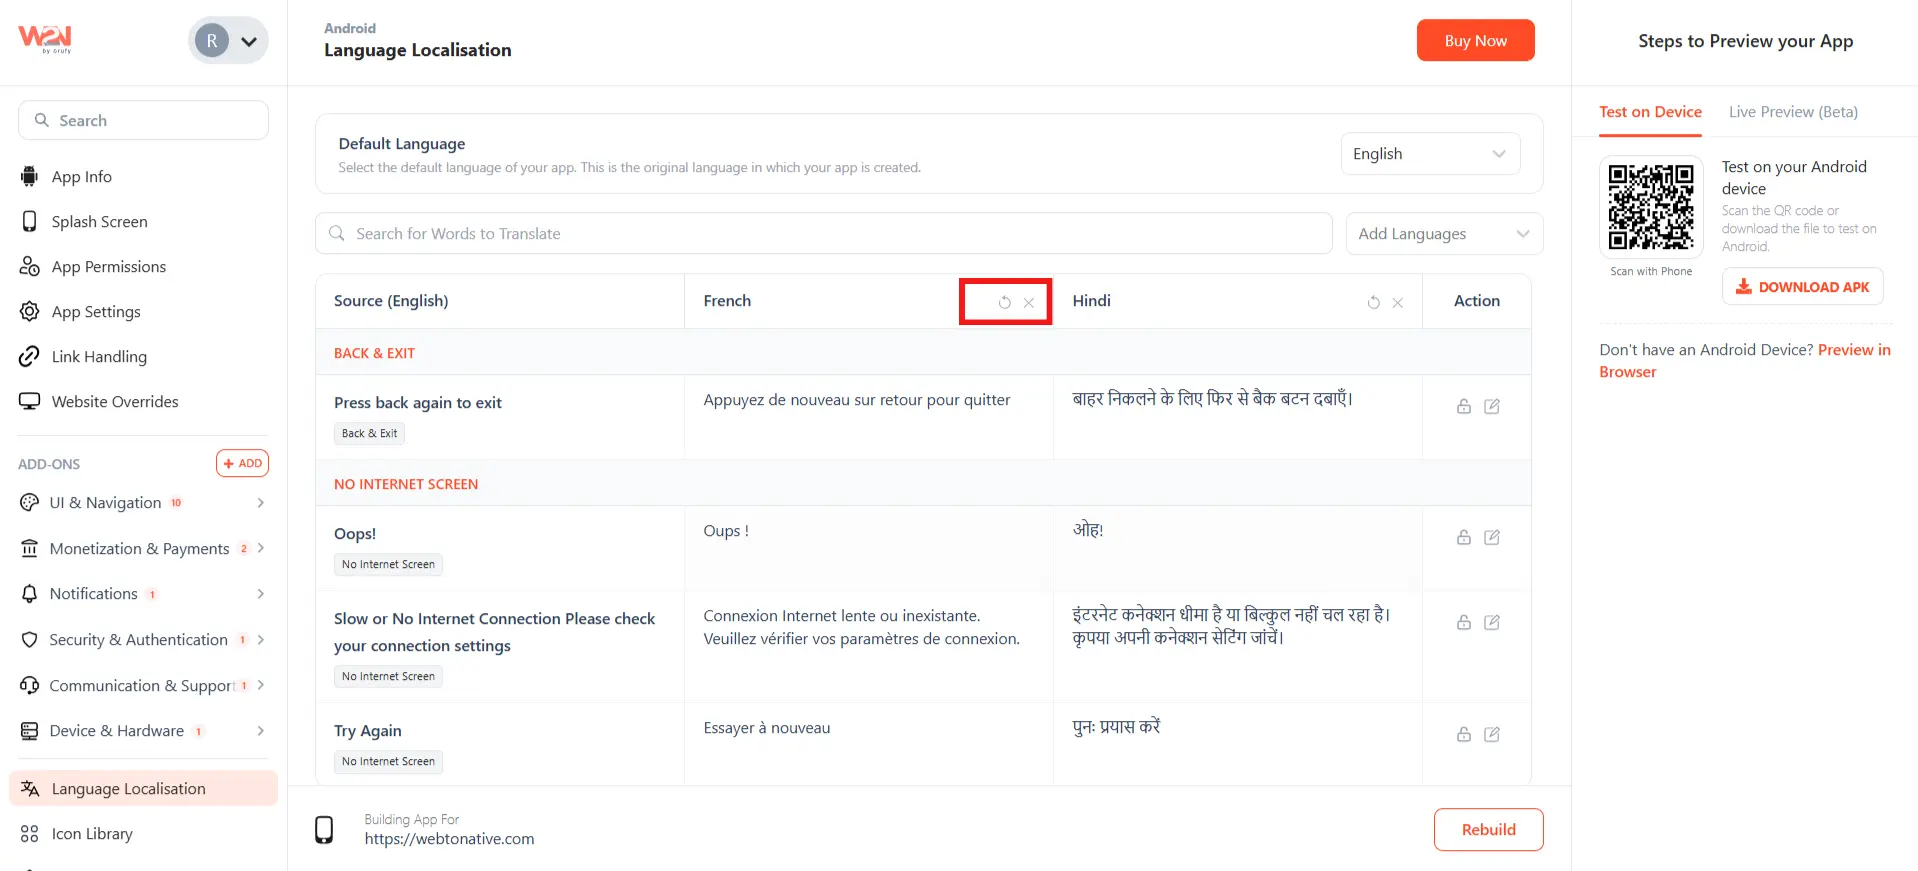

Reset
Regenerates each translation in that language automatically. A confirmation pop-up asks you to confirm first.

Remove
Removes the language with all its translations. A pop-up warns that this cannot be undone once confirmed.
Edit & Lock a Translation
Each row has an Action column with two icons.

Lock
Locks that specific translation so it’s not overwritten if you reset the language later.

Edit
Opens an Edit translation panel where you can update that string across every language. Then click on Save changes.
Rebuild
As your languages and translations are set up, click on Rebuild for the changes to apply to your app.
Language changes are baked into the build. So, a rebuild is required for them to reach your app.
Language Localisation only applies at the app level. It does not affect or show up on your website. It translates native app screens like onboarding, no internet, permission dialogs, and update prompts. Your website content stays translated by your own website logic.
Frequently Asked Questions
Q1. Do I need to manually translate every string myself?
A. No. Once you have added a language, its translations are generated automatically. You can still edit any string if you want to change the wording.
Q2. Will resetting a language impact the translations I locked?
A. No. Locked translations stay as they are even after a reset. Only the unlocked strings are regenerated.
Q3. Is this feature available on the free trial plan?
A. Yes. You can use Language Localisation during your free trial. On a paid plan, it is available on the Pro and Premium plans.
Q4. What happens if I remove a language by mistake?
A. All translations for that language are deleted once removed. You will need to add the language again and allow it to regenerate the translations from scratch.
Q5. Can I change the app’s default language after publishing?
A. Yes. You can update the Default language from the drop-down at any time. Rebuild your app for the change to apply.