


Facebook Login Configuration
This guide explains how to create a Facebook application and obtain the App ID and Client Token required for Facebook Login integration.
By the end of this guide you'll have two values to enter in your WebToNative dashboard, plus platform-specific credentials for iOS and Android:
- App ID
- Client Token
- Bundle ID + Shared Secret (iOS)
- Key Hash + Package Name (Android)
Step-by-step — Meta for Developers portal
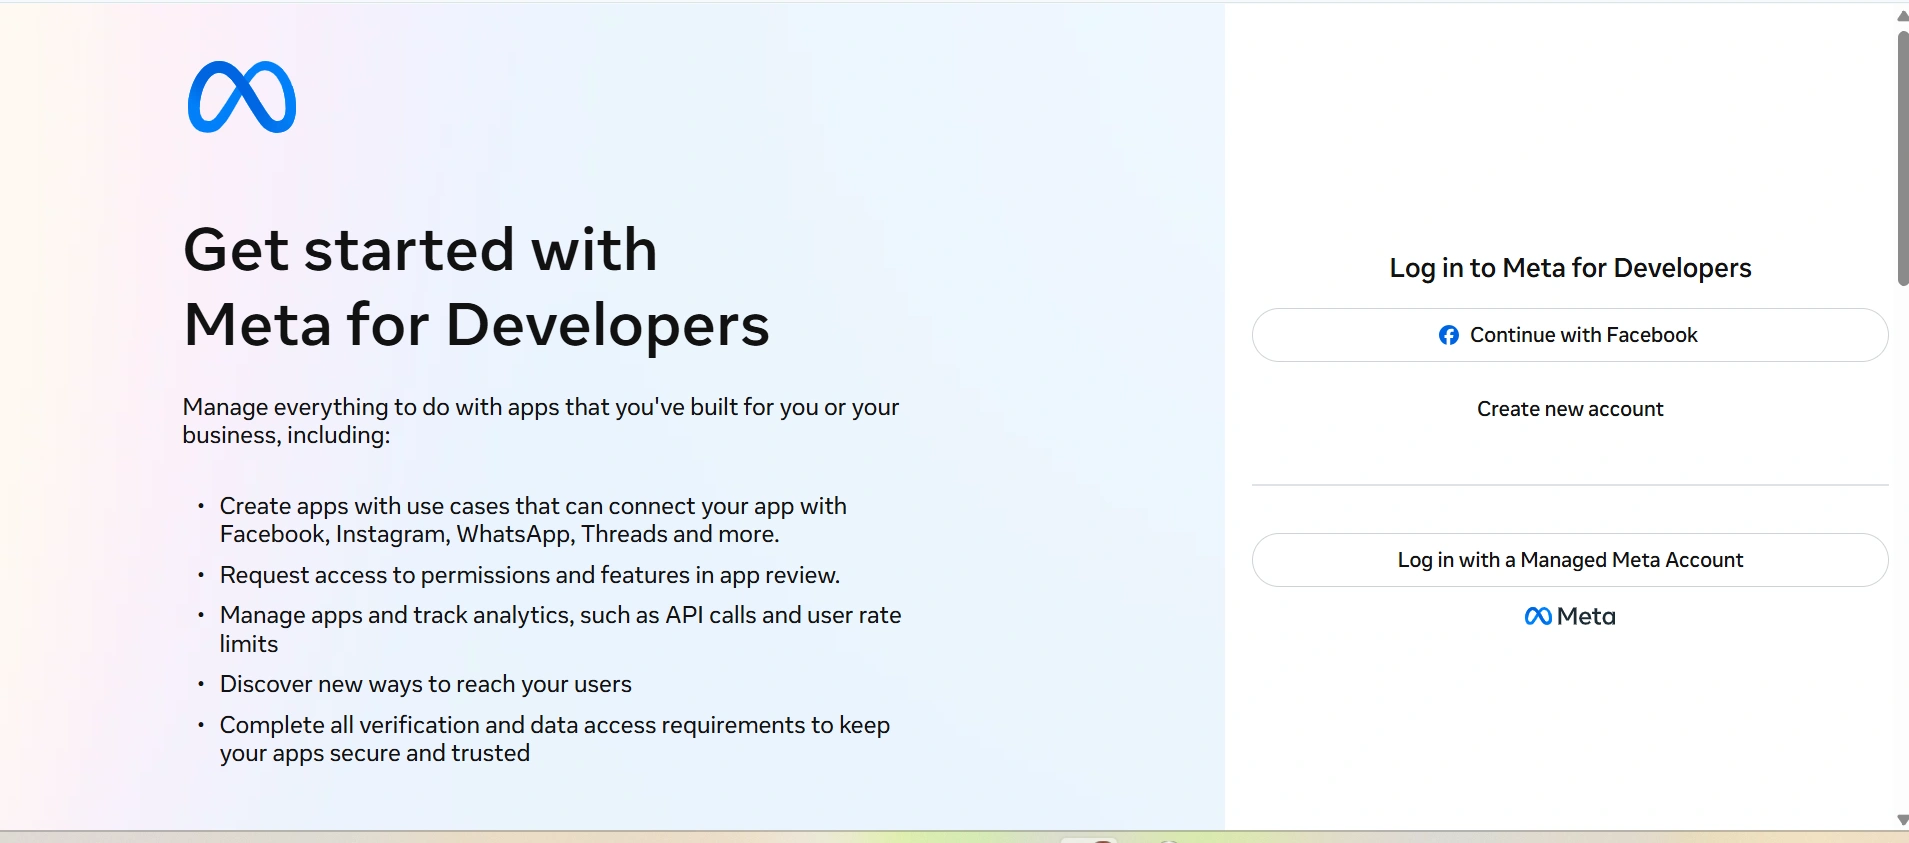
Go to developers.facebook.com and follow these steps. Create a developer account first if you don't have one.
Create or select your app
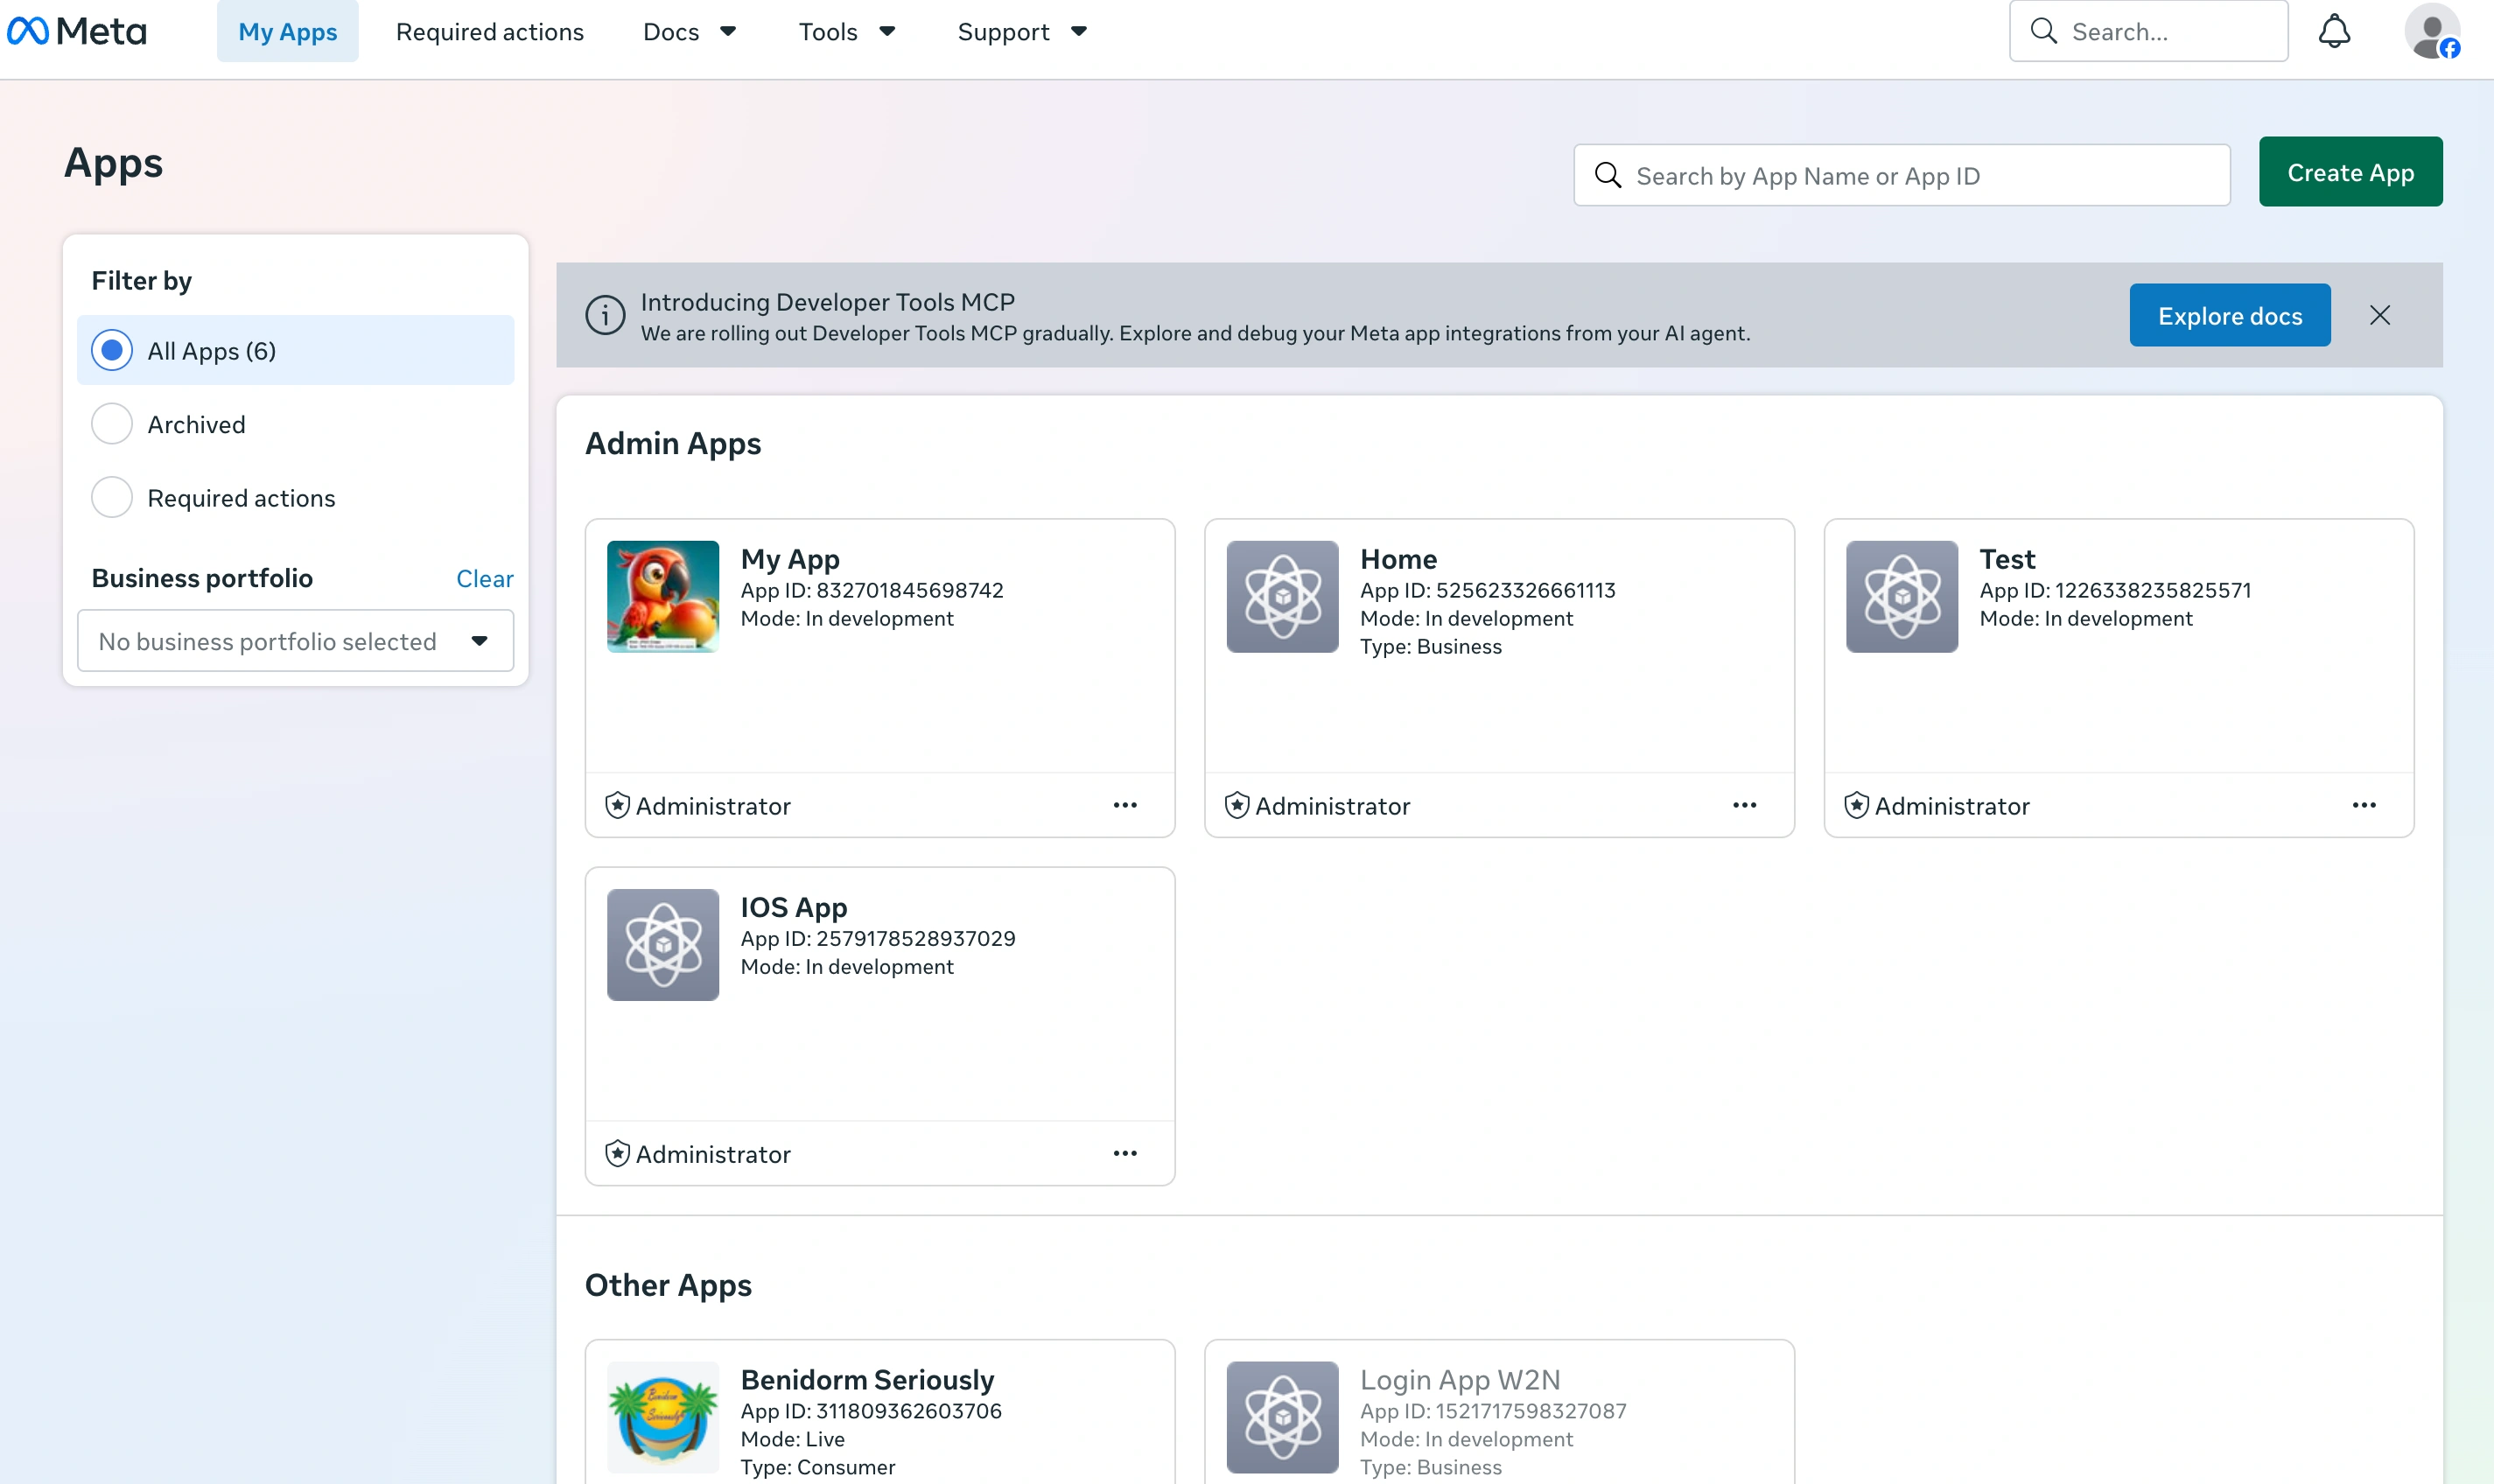
Click Create App if you haven't created one yet, or select an existing app from your dashboard.
Enter app details
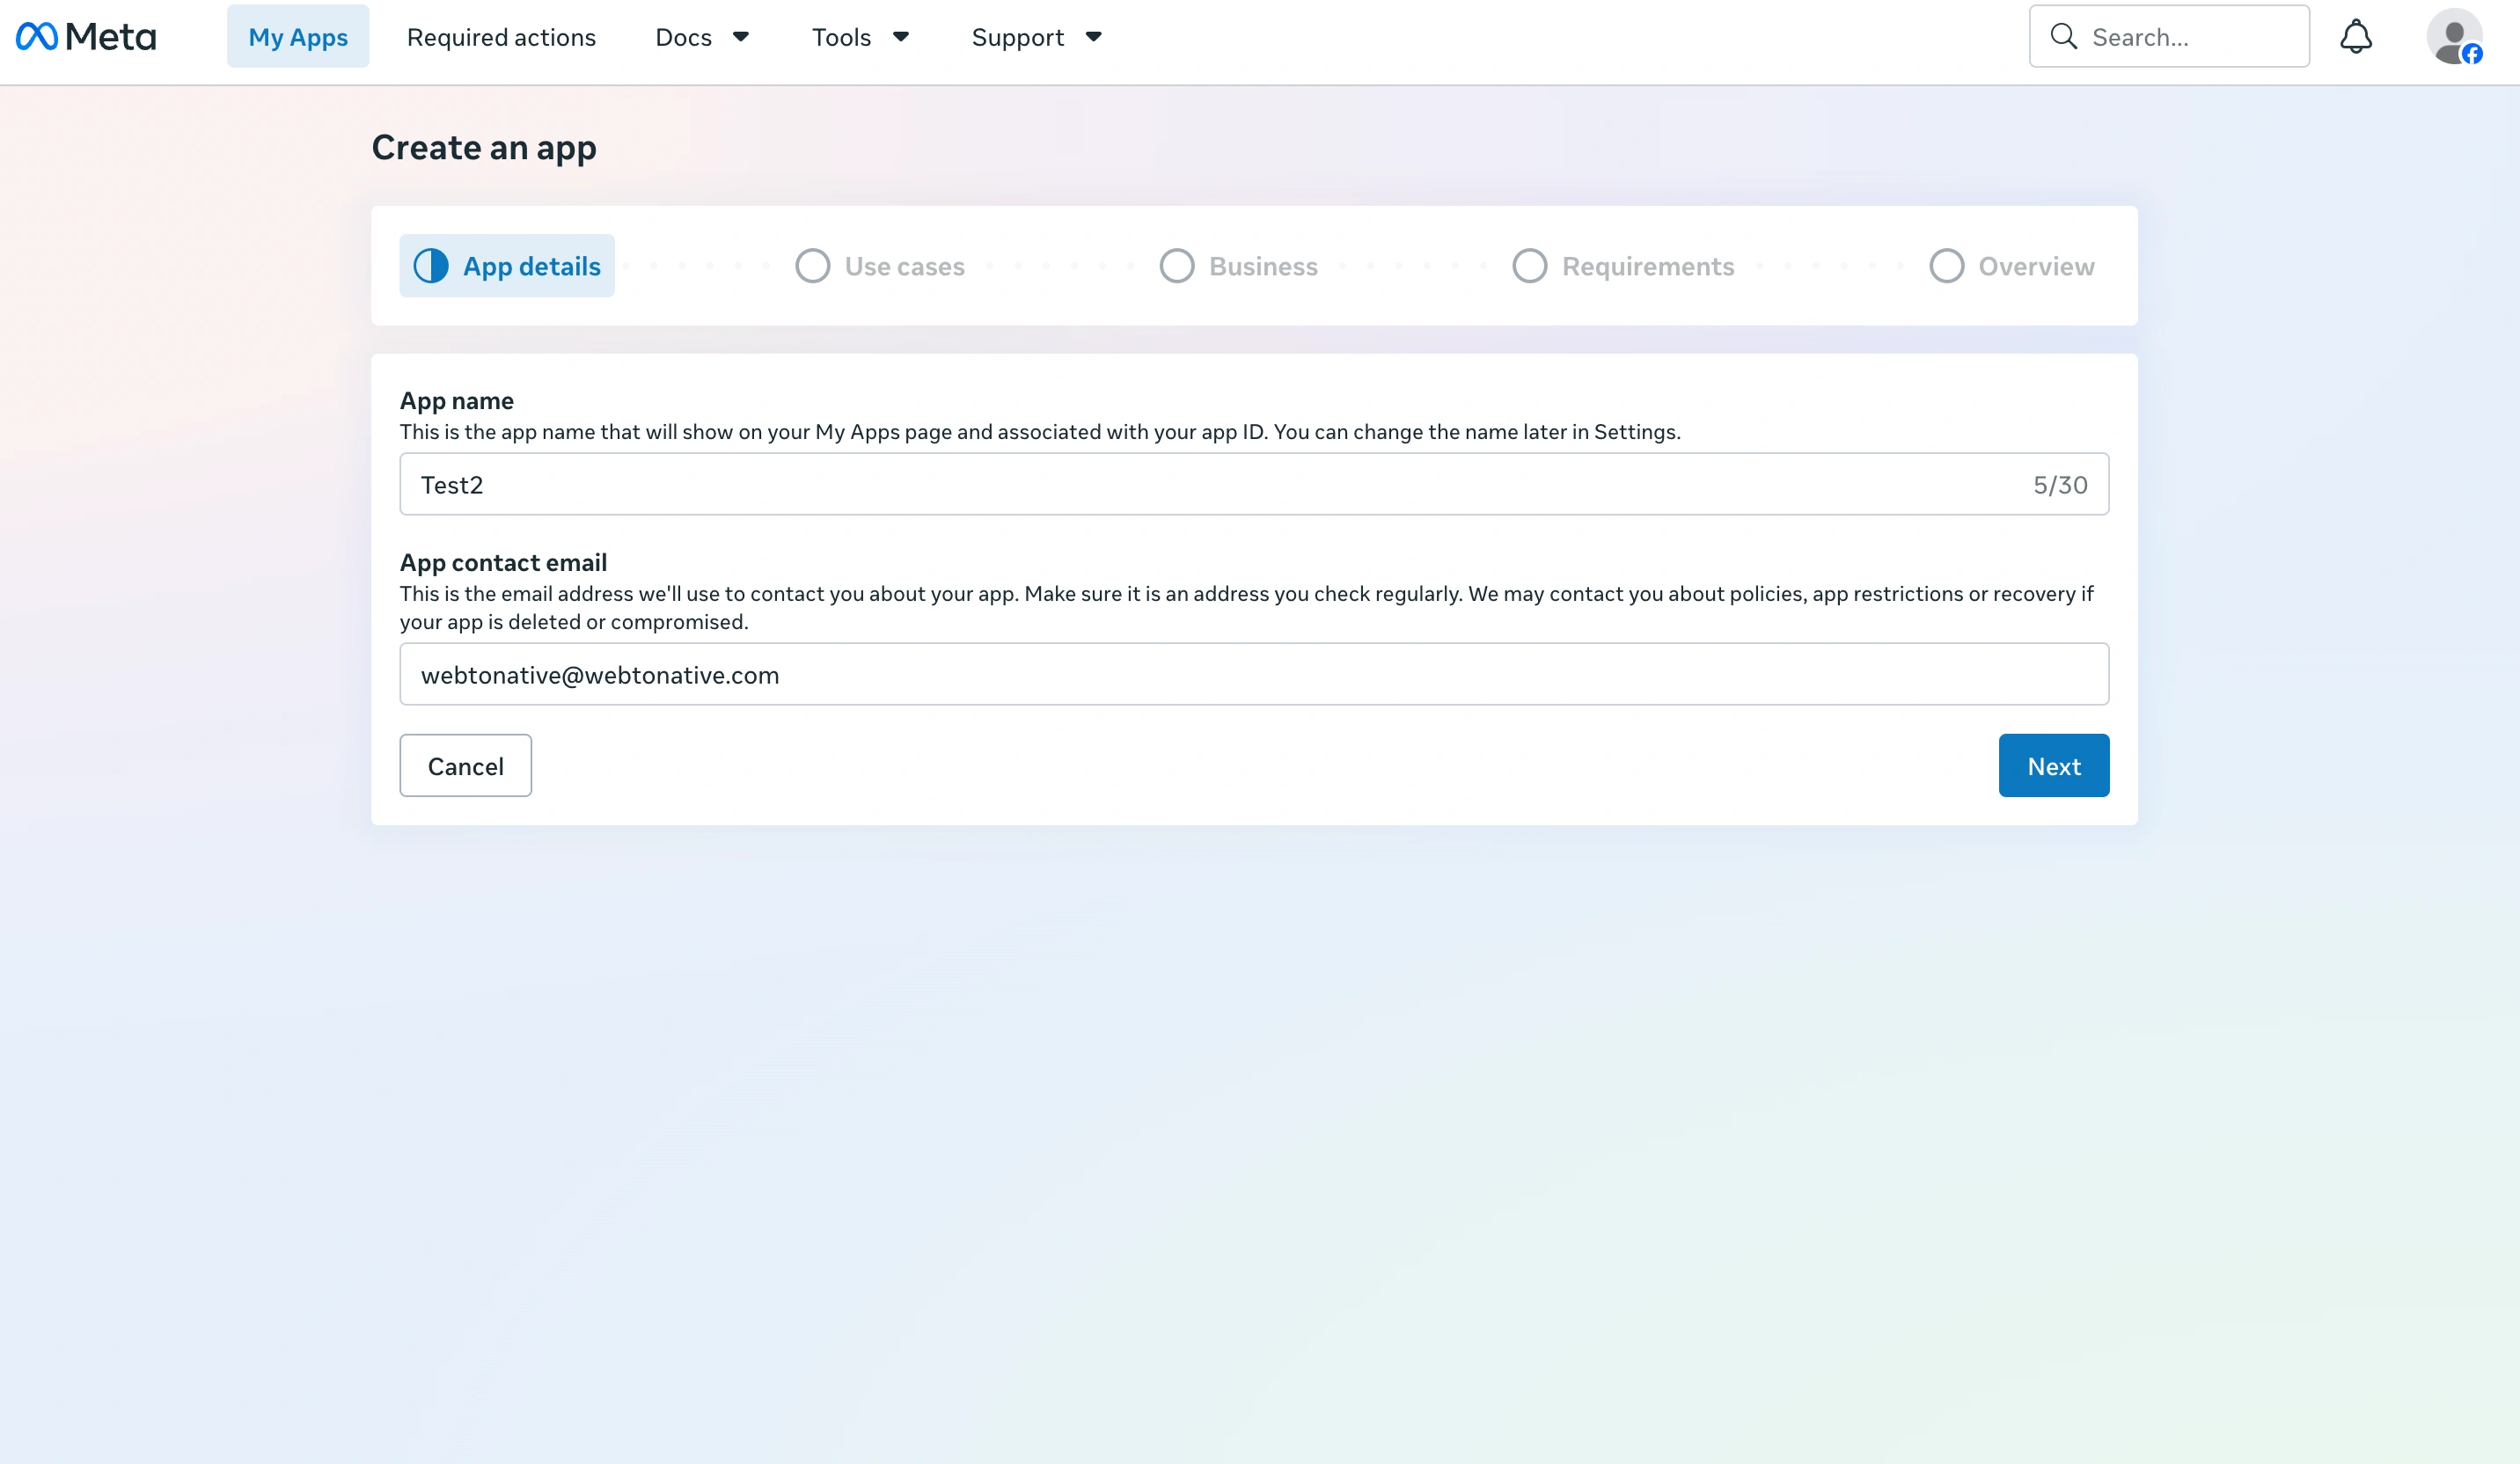
Enter your App Display Name (the name users see) and your App Contact Email.
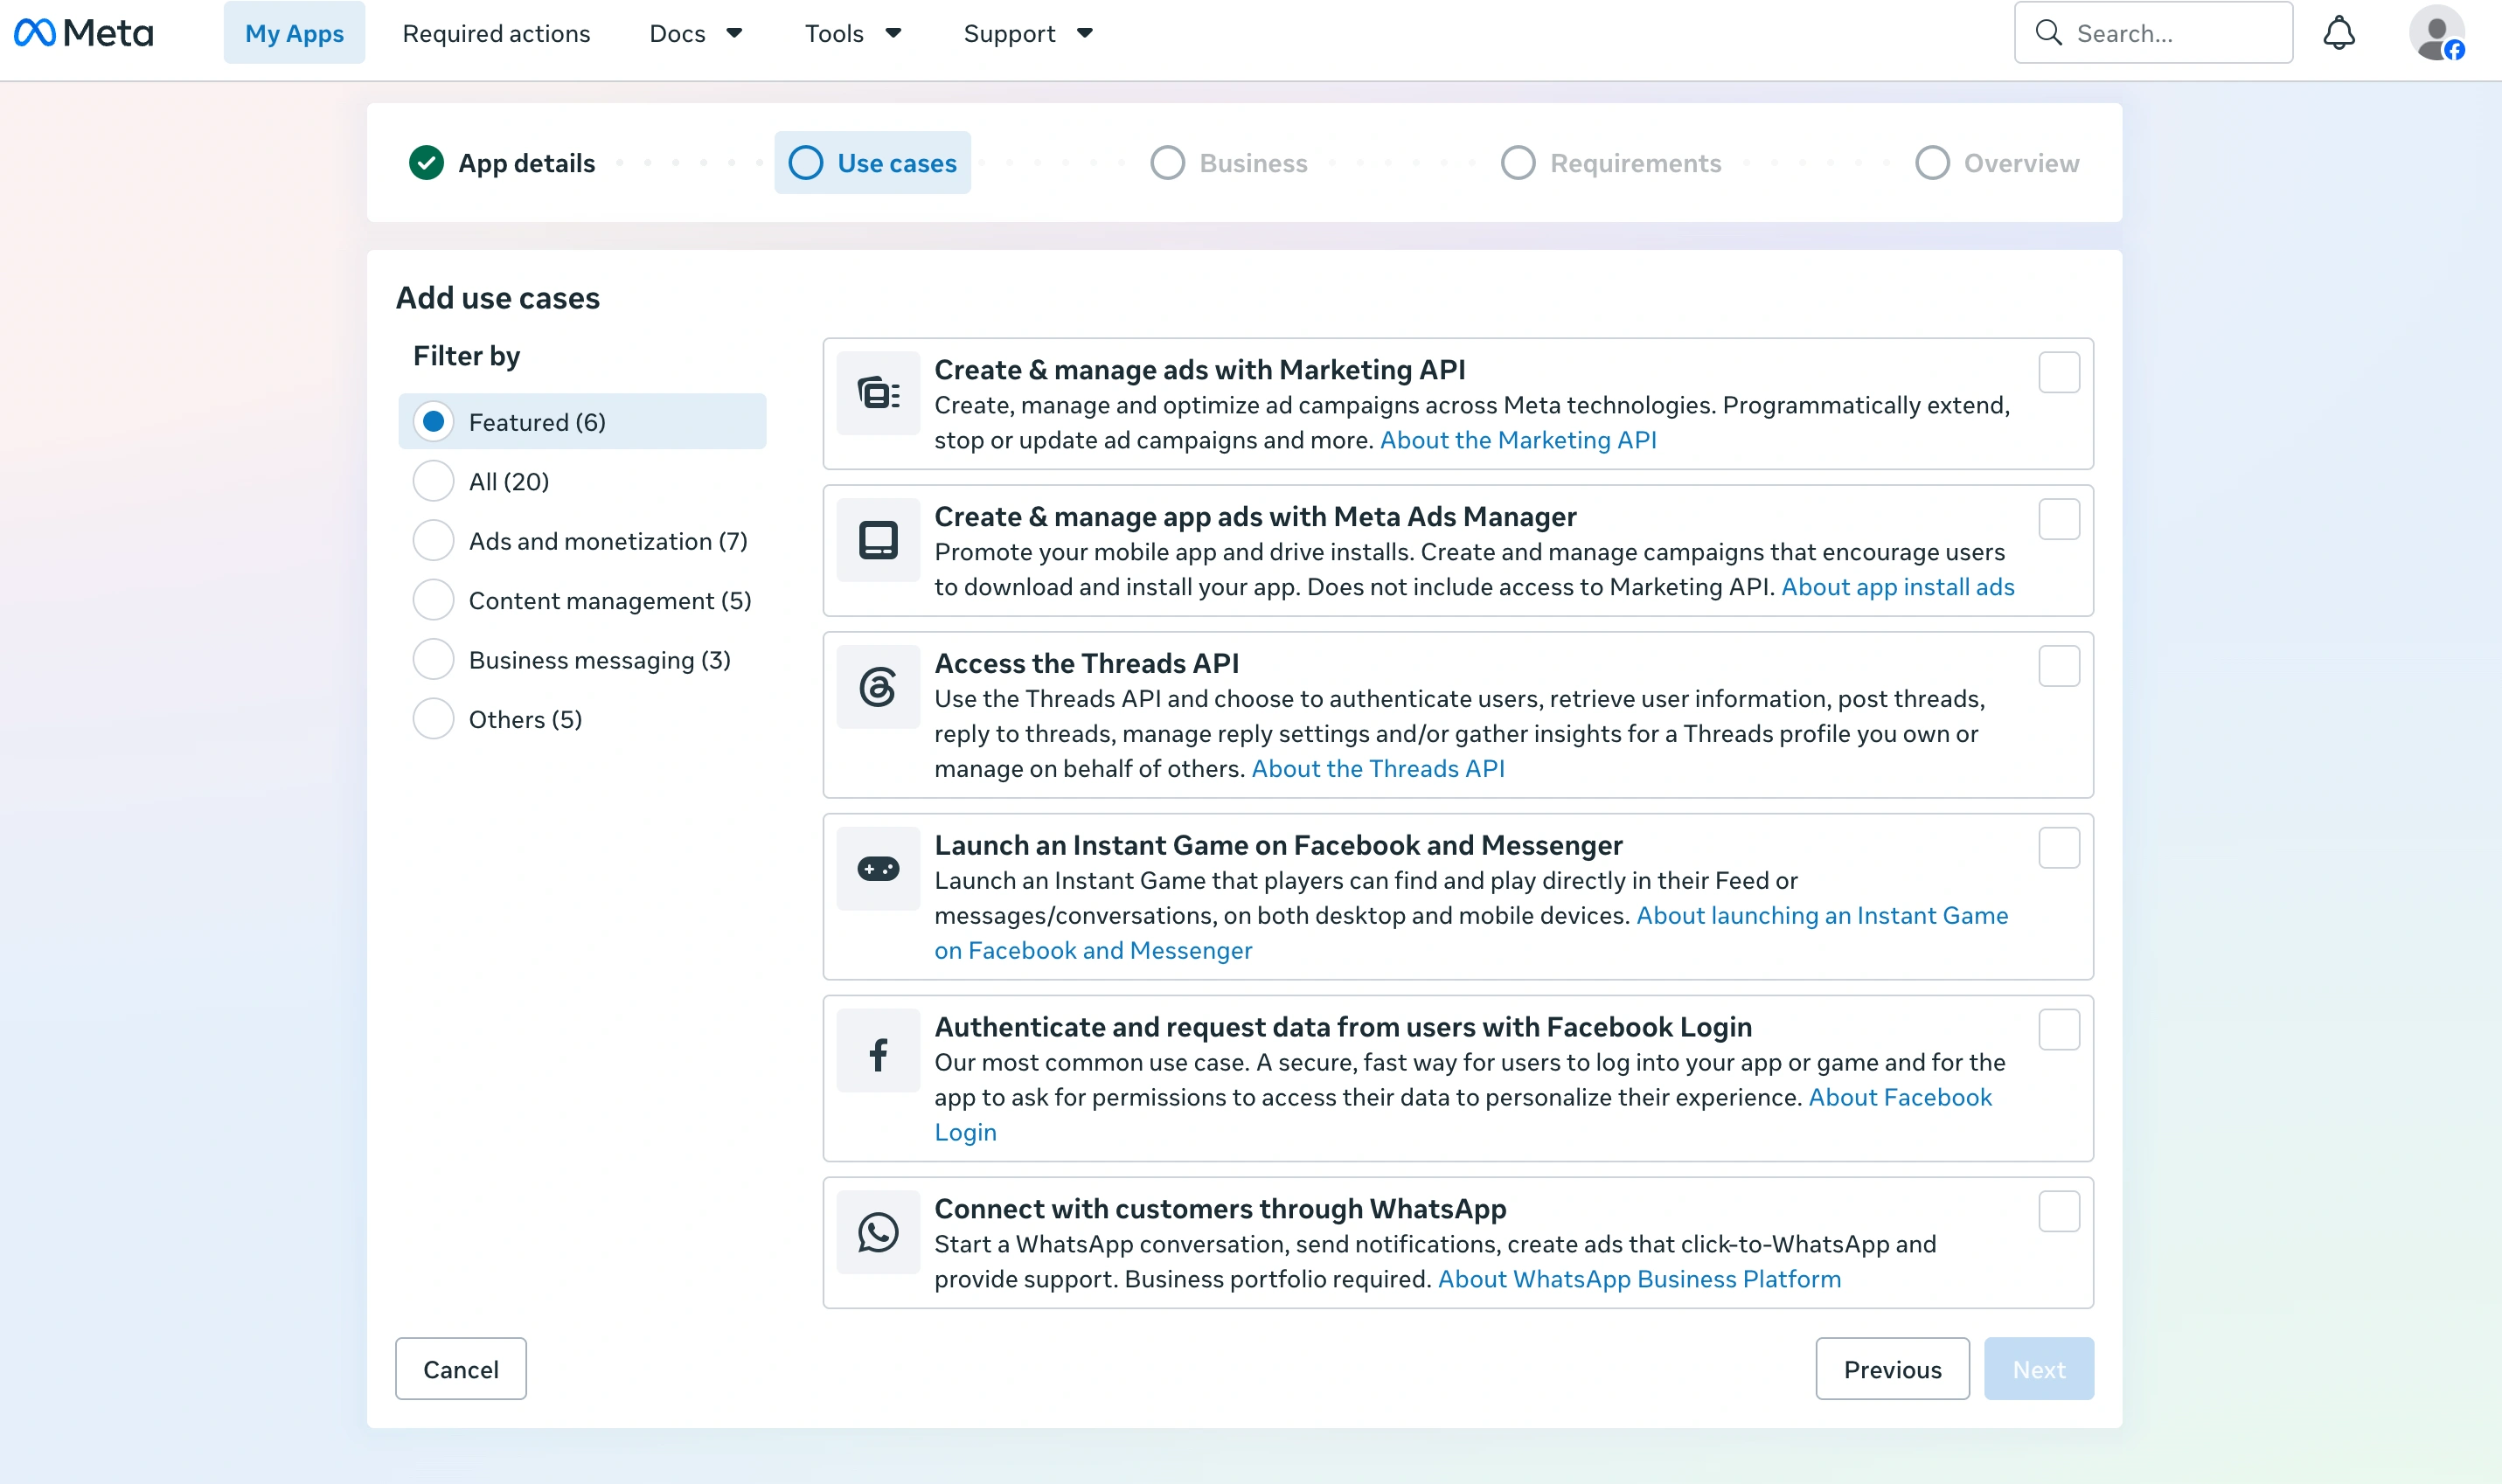
Choose the use case
When prompted to define a use case, select Authenticate and request data from users with Facebook Login. This is the option required for social login.
Some use cases cannot be combined on the same app. If you need additional use cases that are incompatible with Facebook Login, create a separate app.
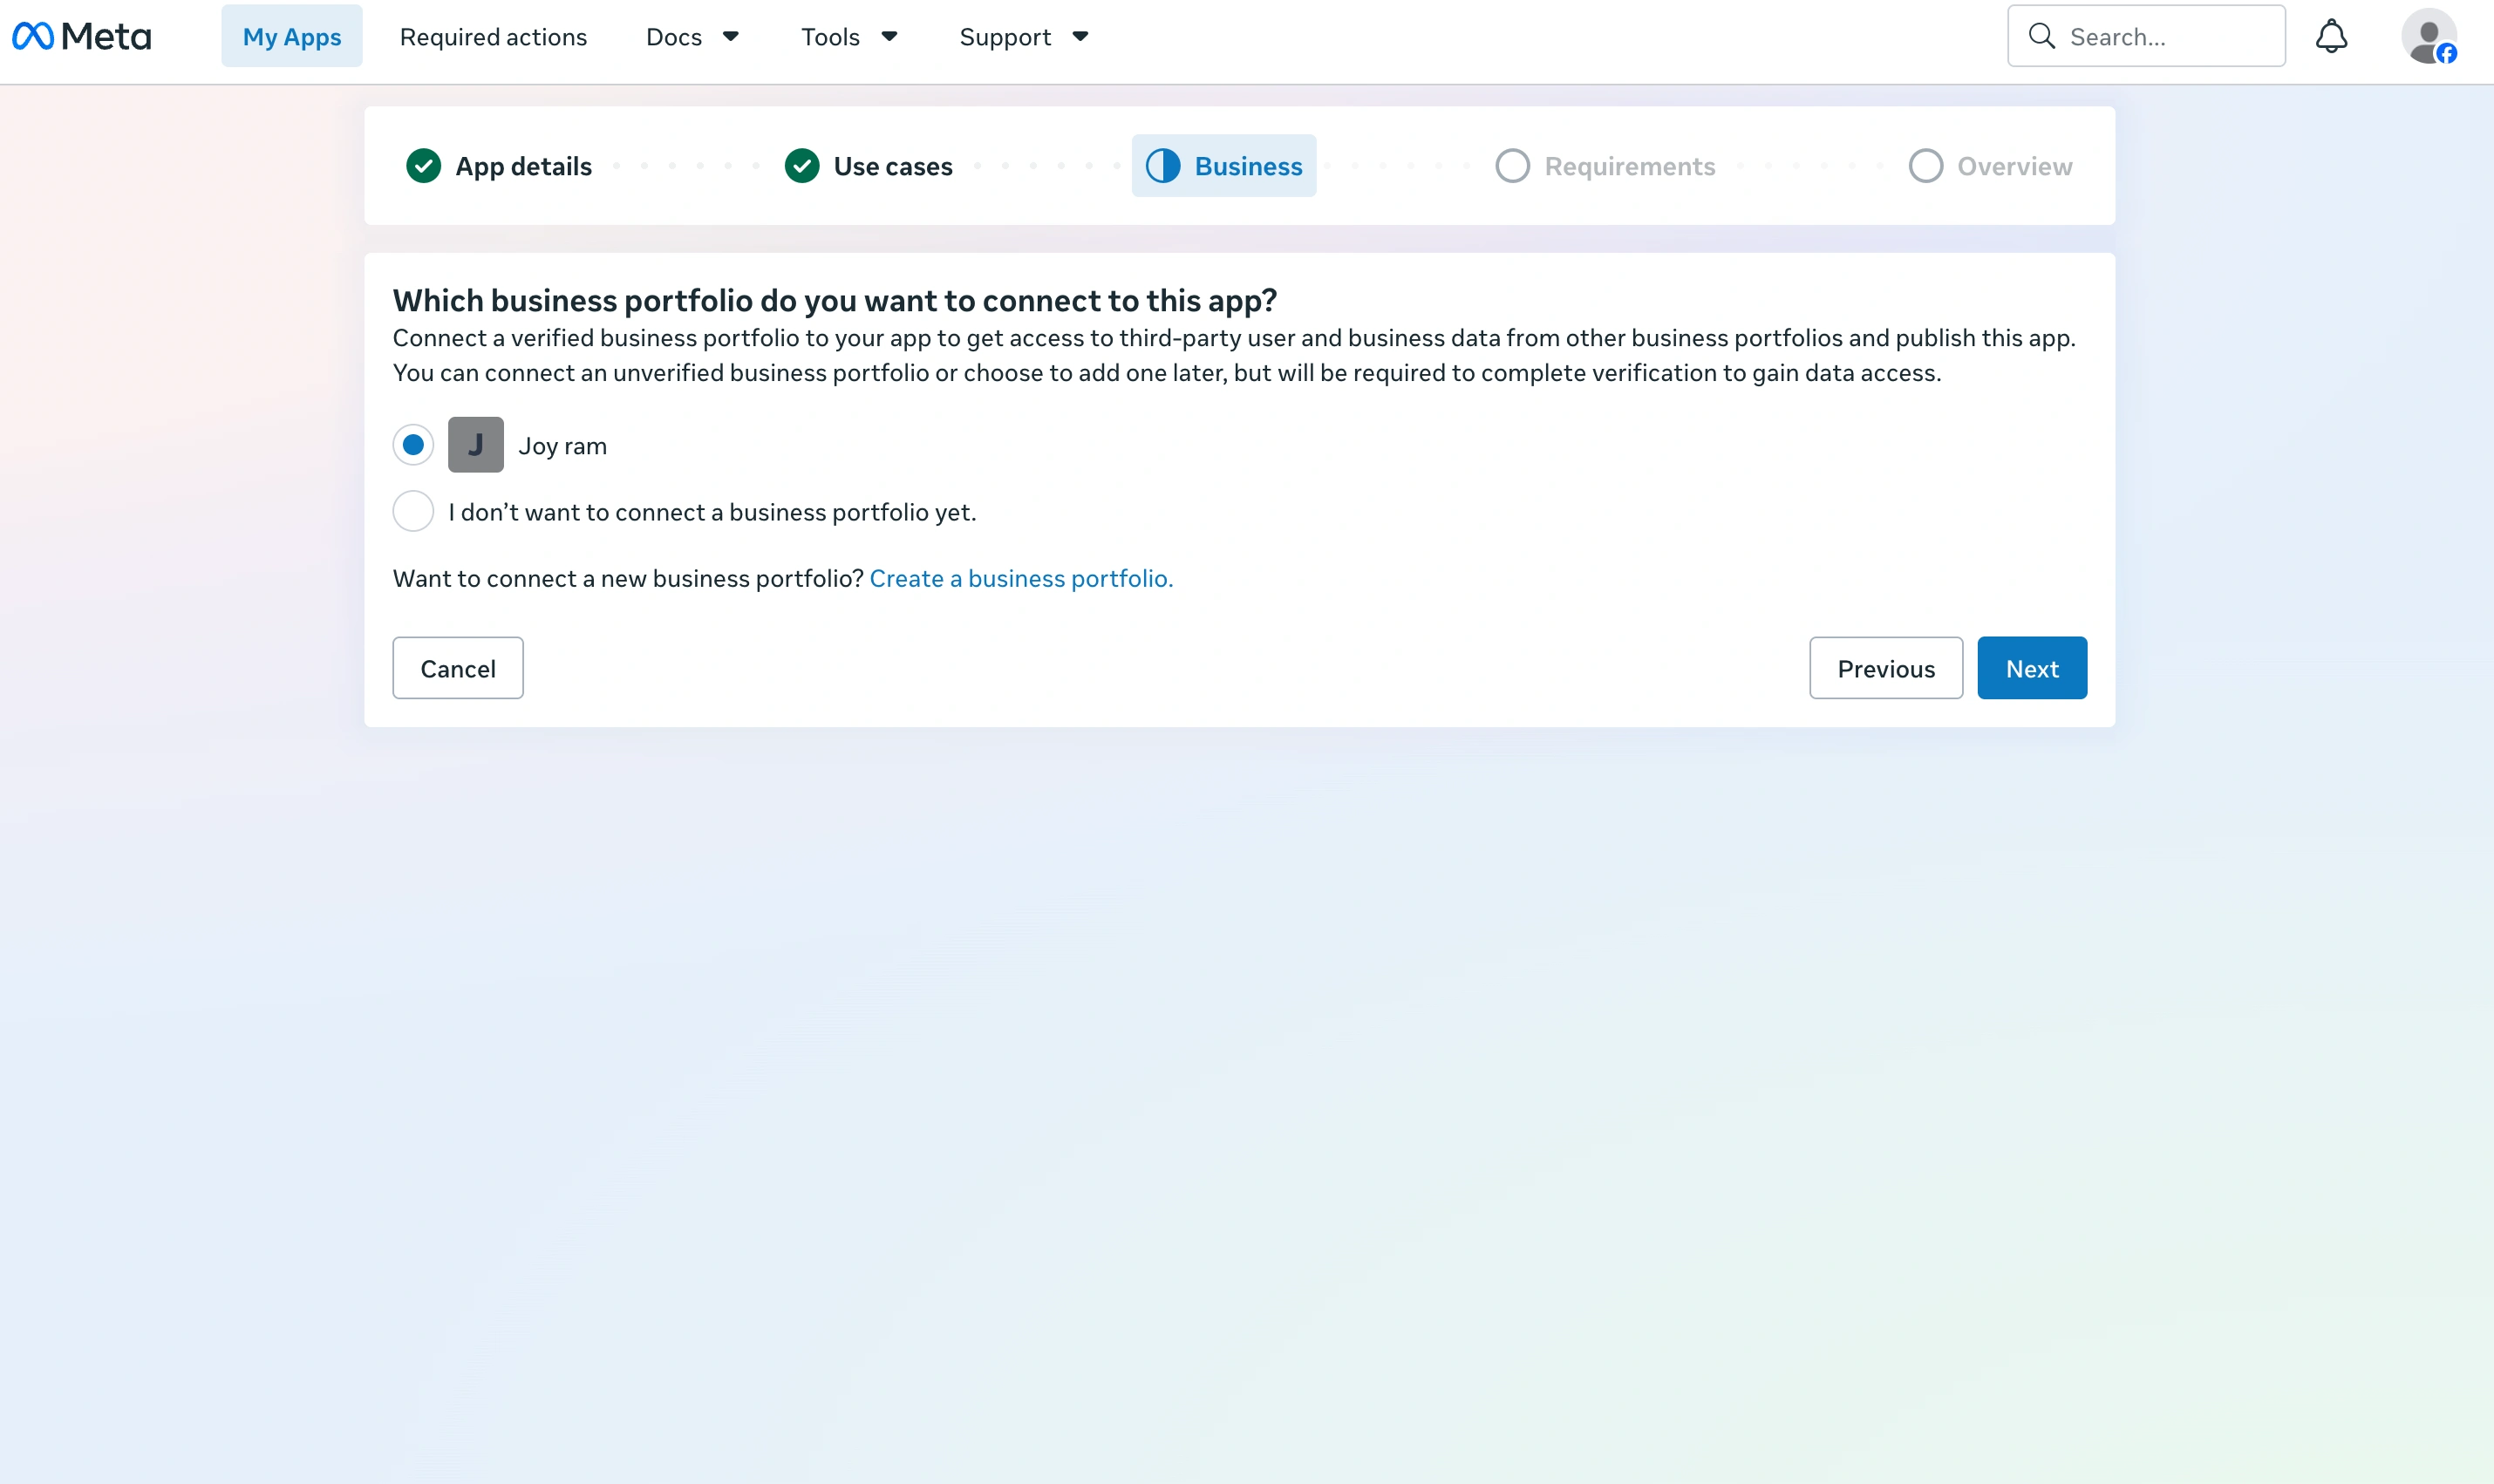
Connect a business portfolio
Connecting a verified business portfolio is required before your app can access third-party user data and be published publicly. You can skip this for now and connect later — but you must complete Business Verification before going live.
If you don't have a business portfolio, you can create one from Meta Business Suite. An unverified portfolio is accepted initially but blocks public publishing until verified.
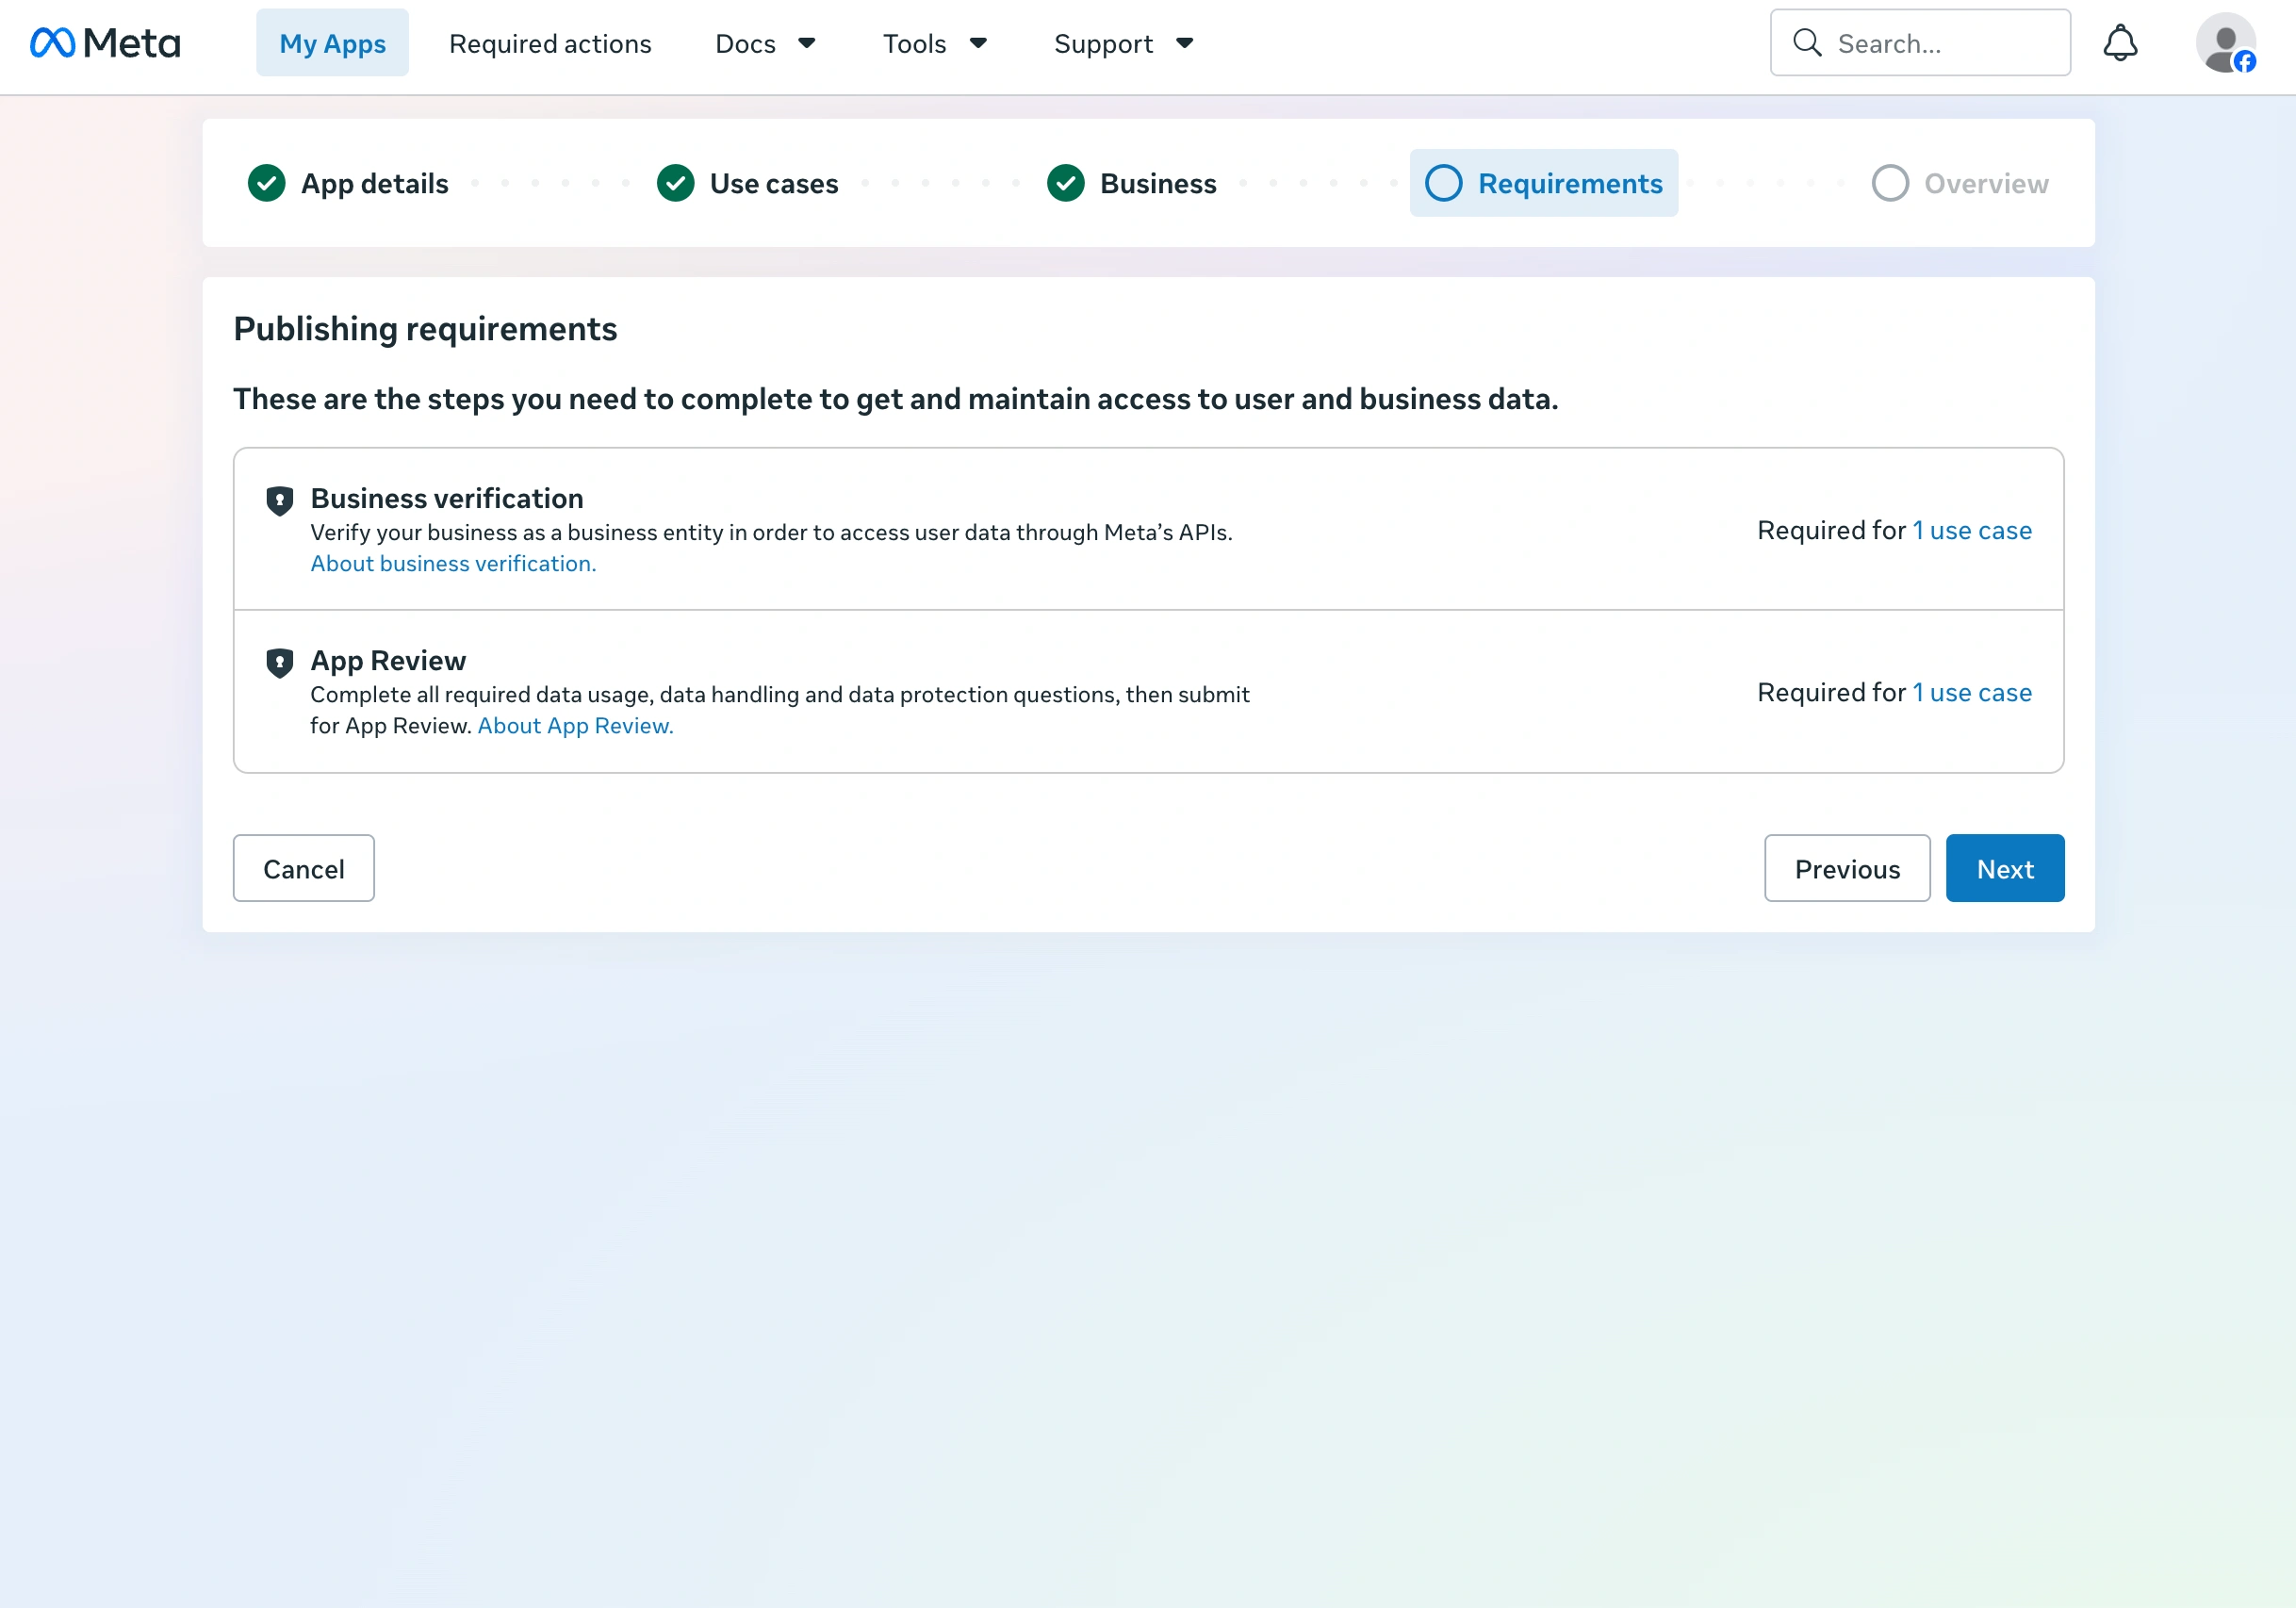
Facebook Requirements
Before publishing your app publicly, you must also complete two additional Facebook requirements:
-
Business Verification (opens in a new tab) — verify your organisation as a business entity to access user data through Meta's API.
-
App Review (opens in a new tab) — complete all data usage, data handling, and data protection questions and submit for review.
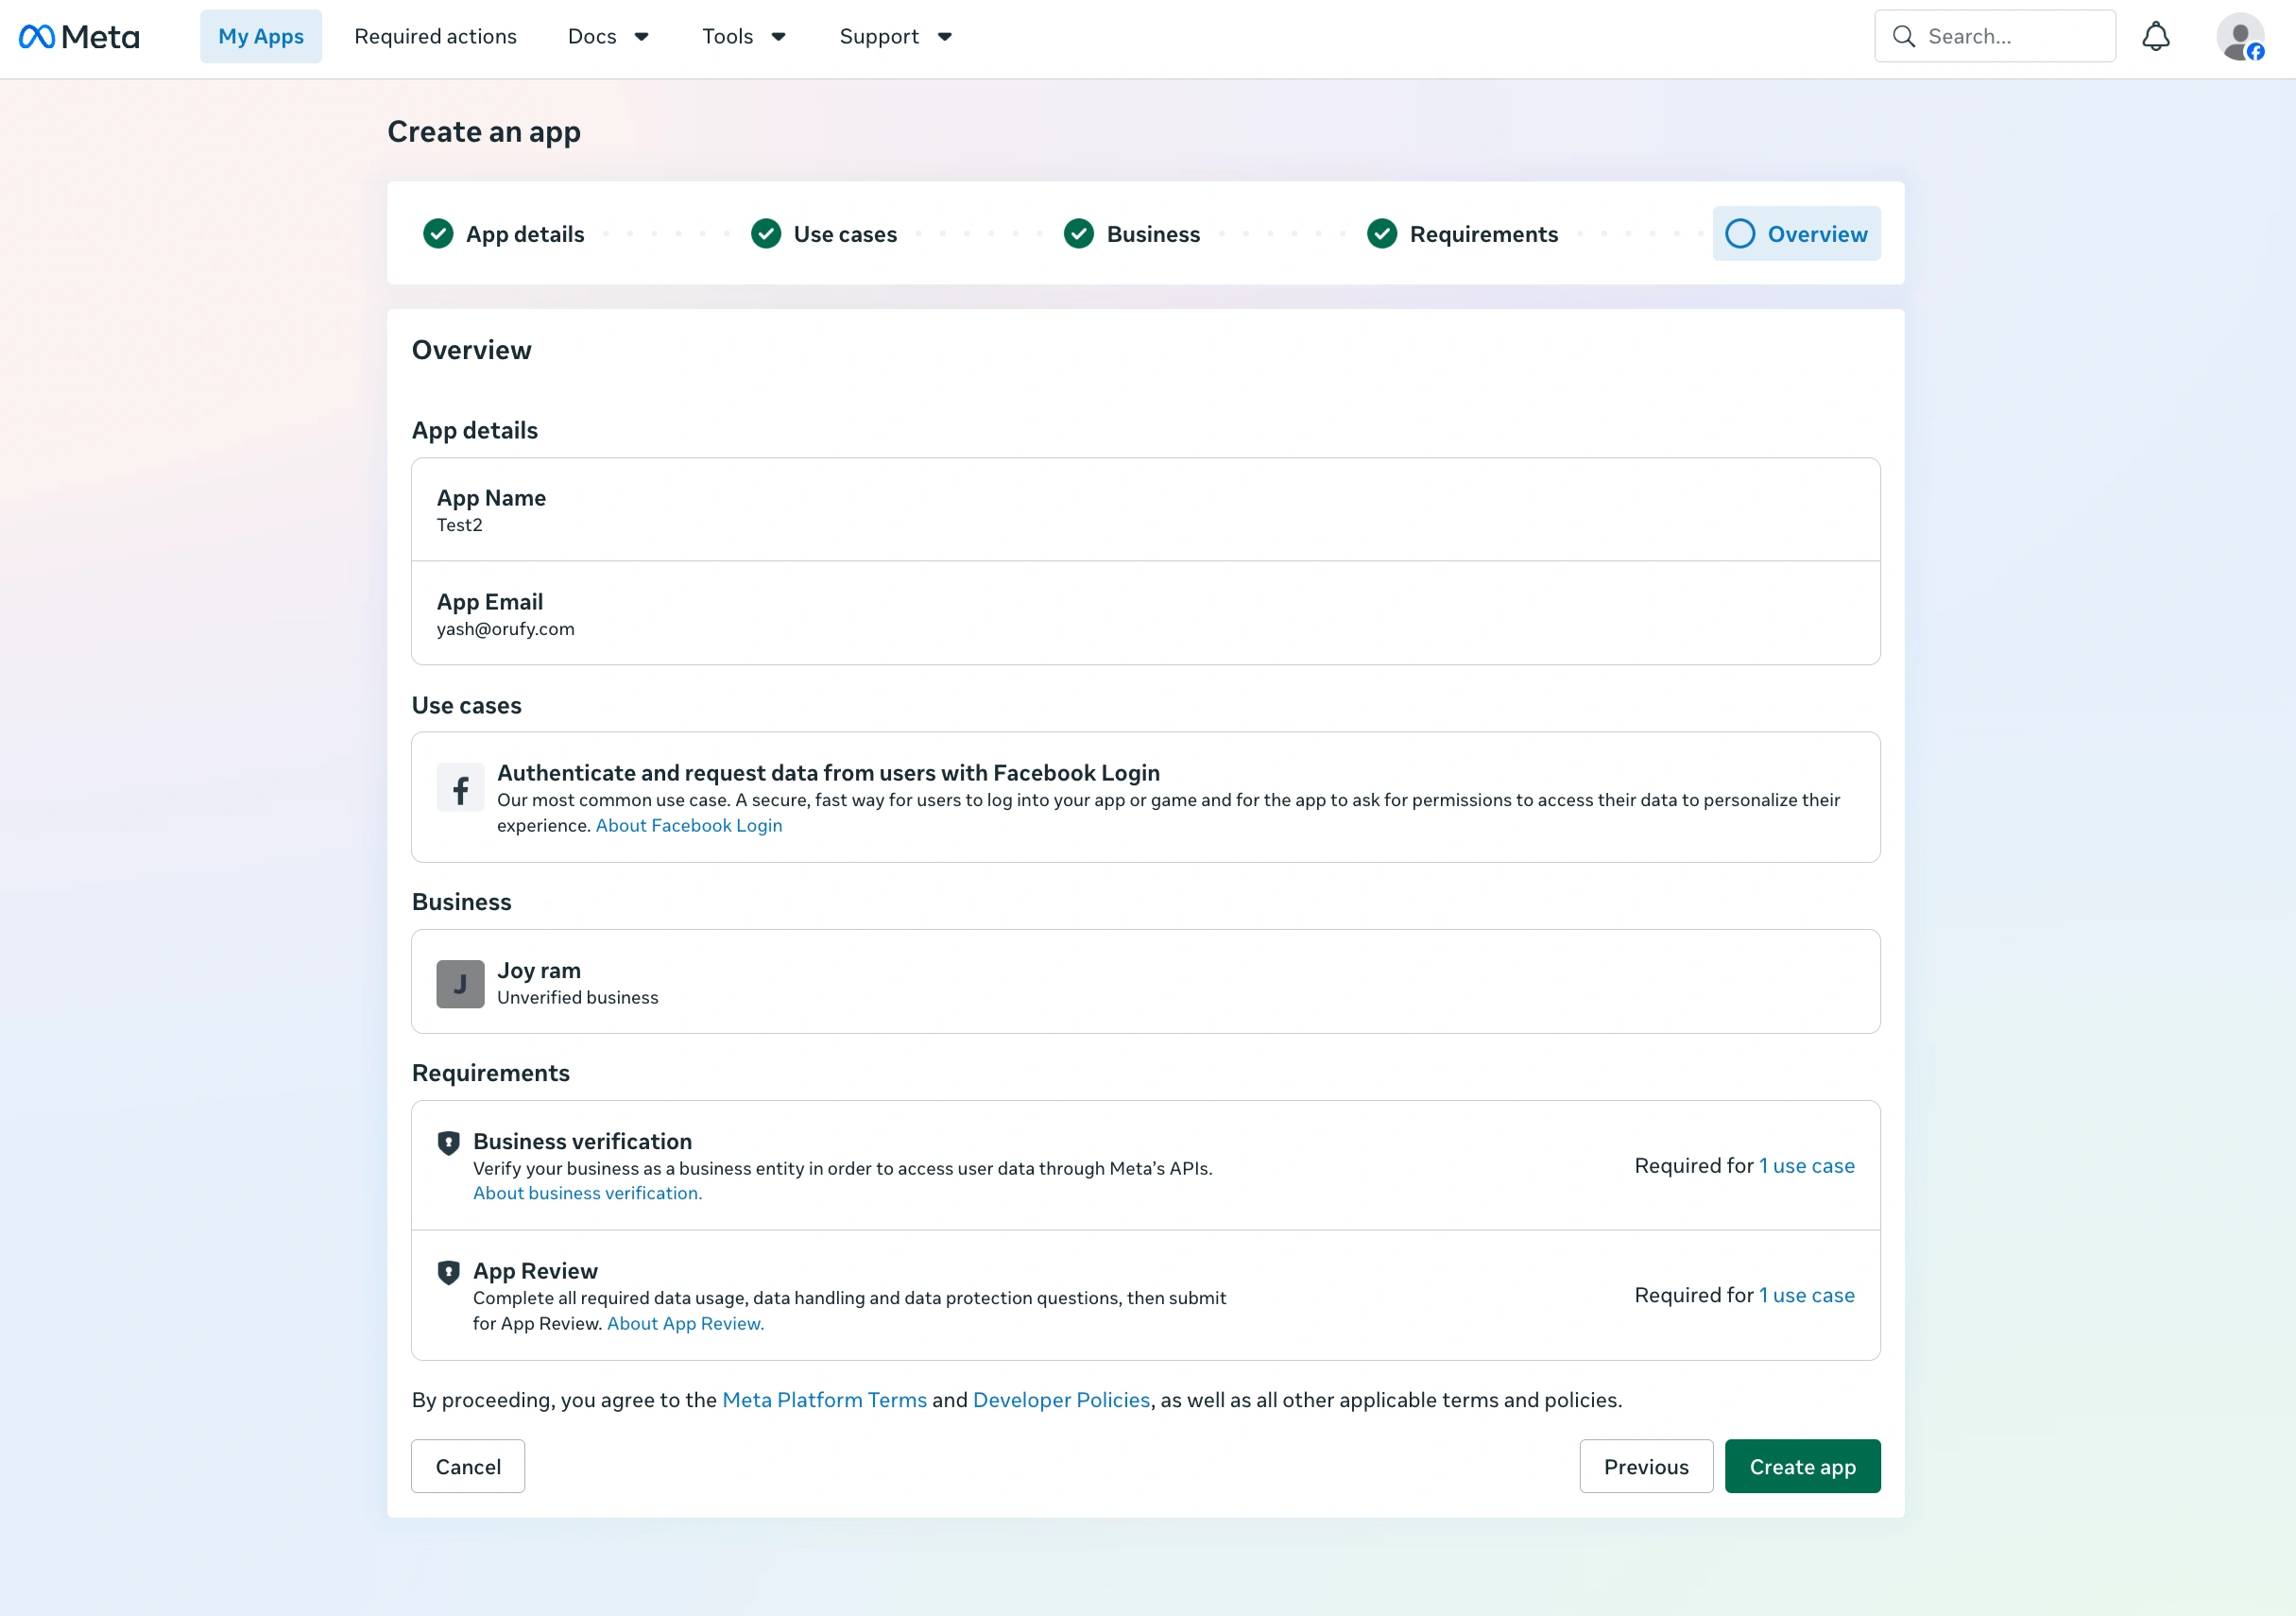
Create the app
Click Create App to proceed. Facebook generates your app and takes you to the app dashboard.
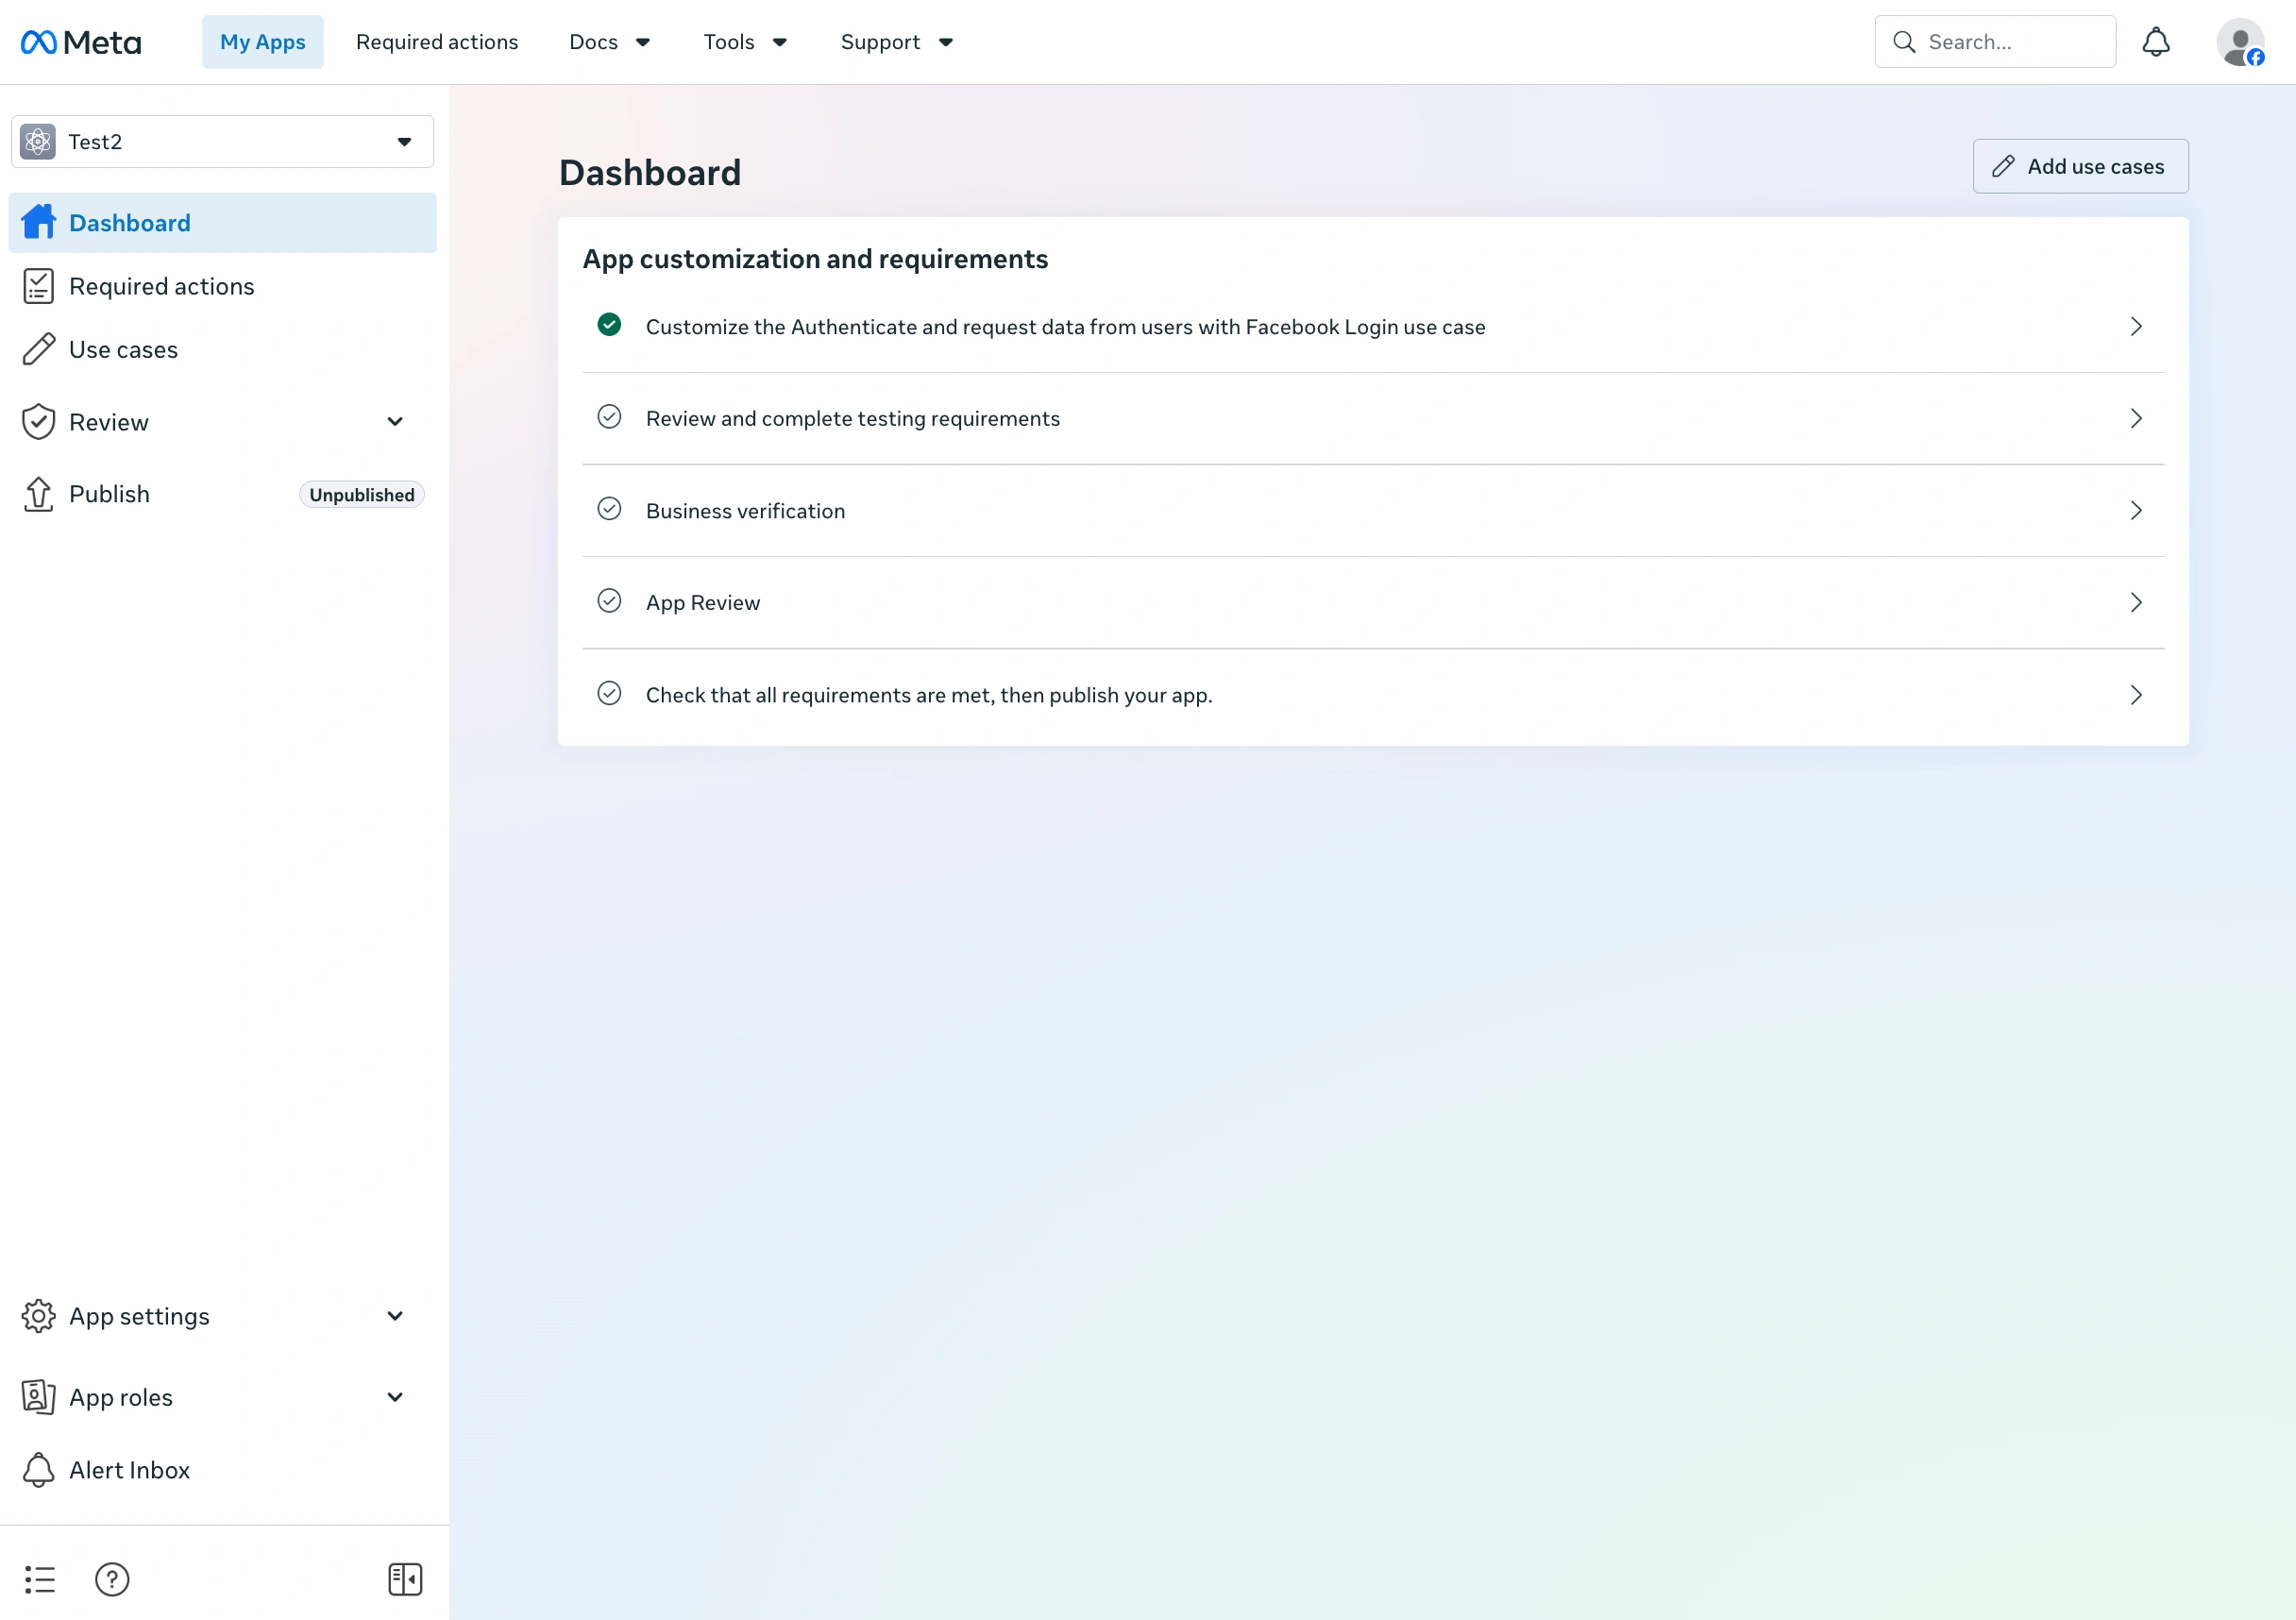
Customise the login use case
From the app dashboard, click Customise on the Facebook Login use case to configure how the login works.
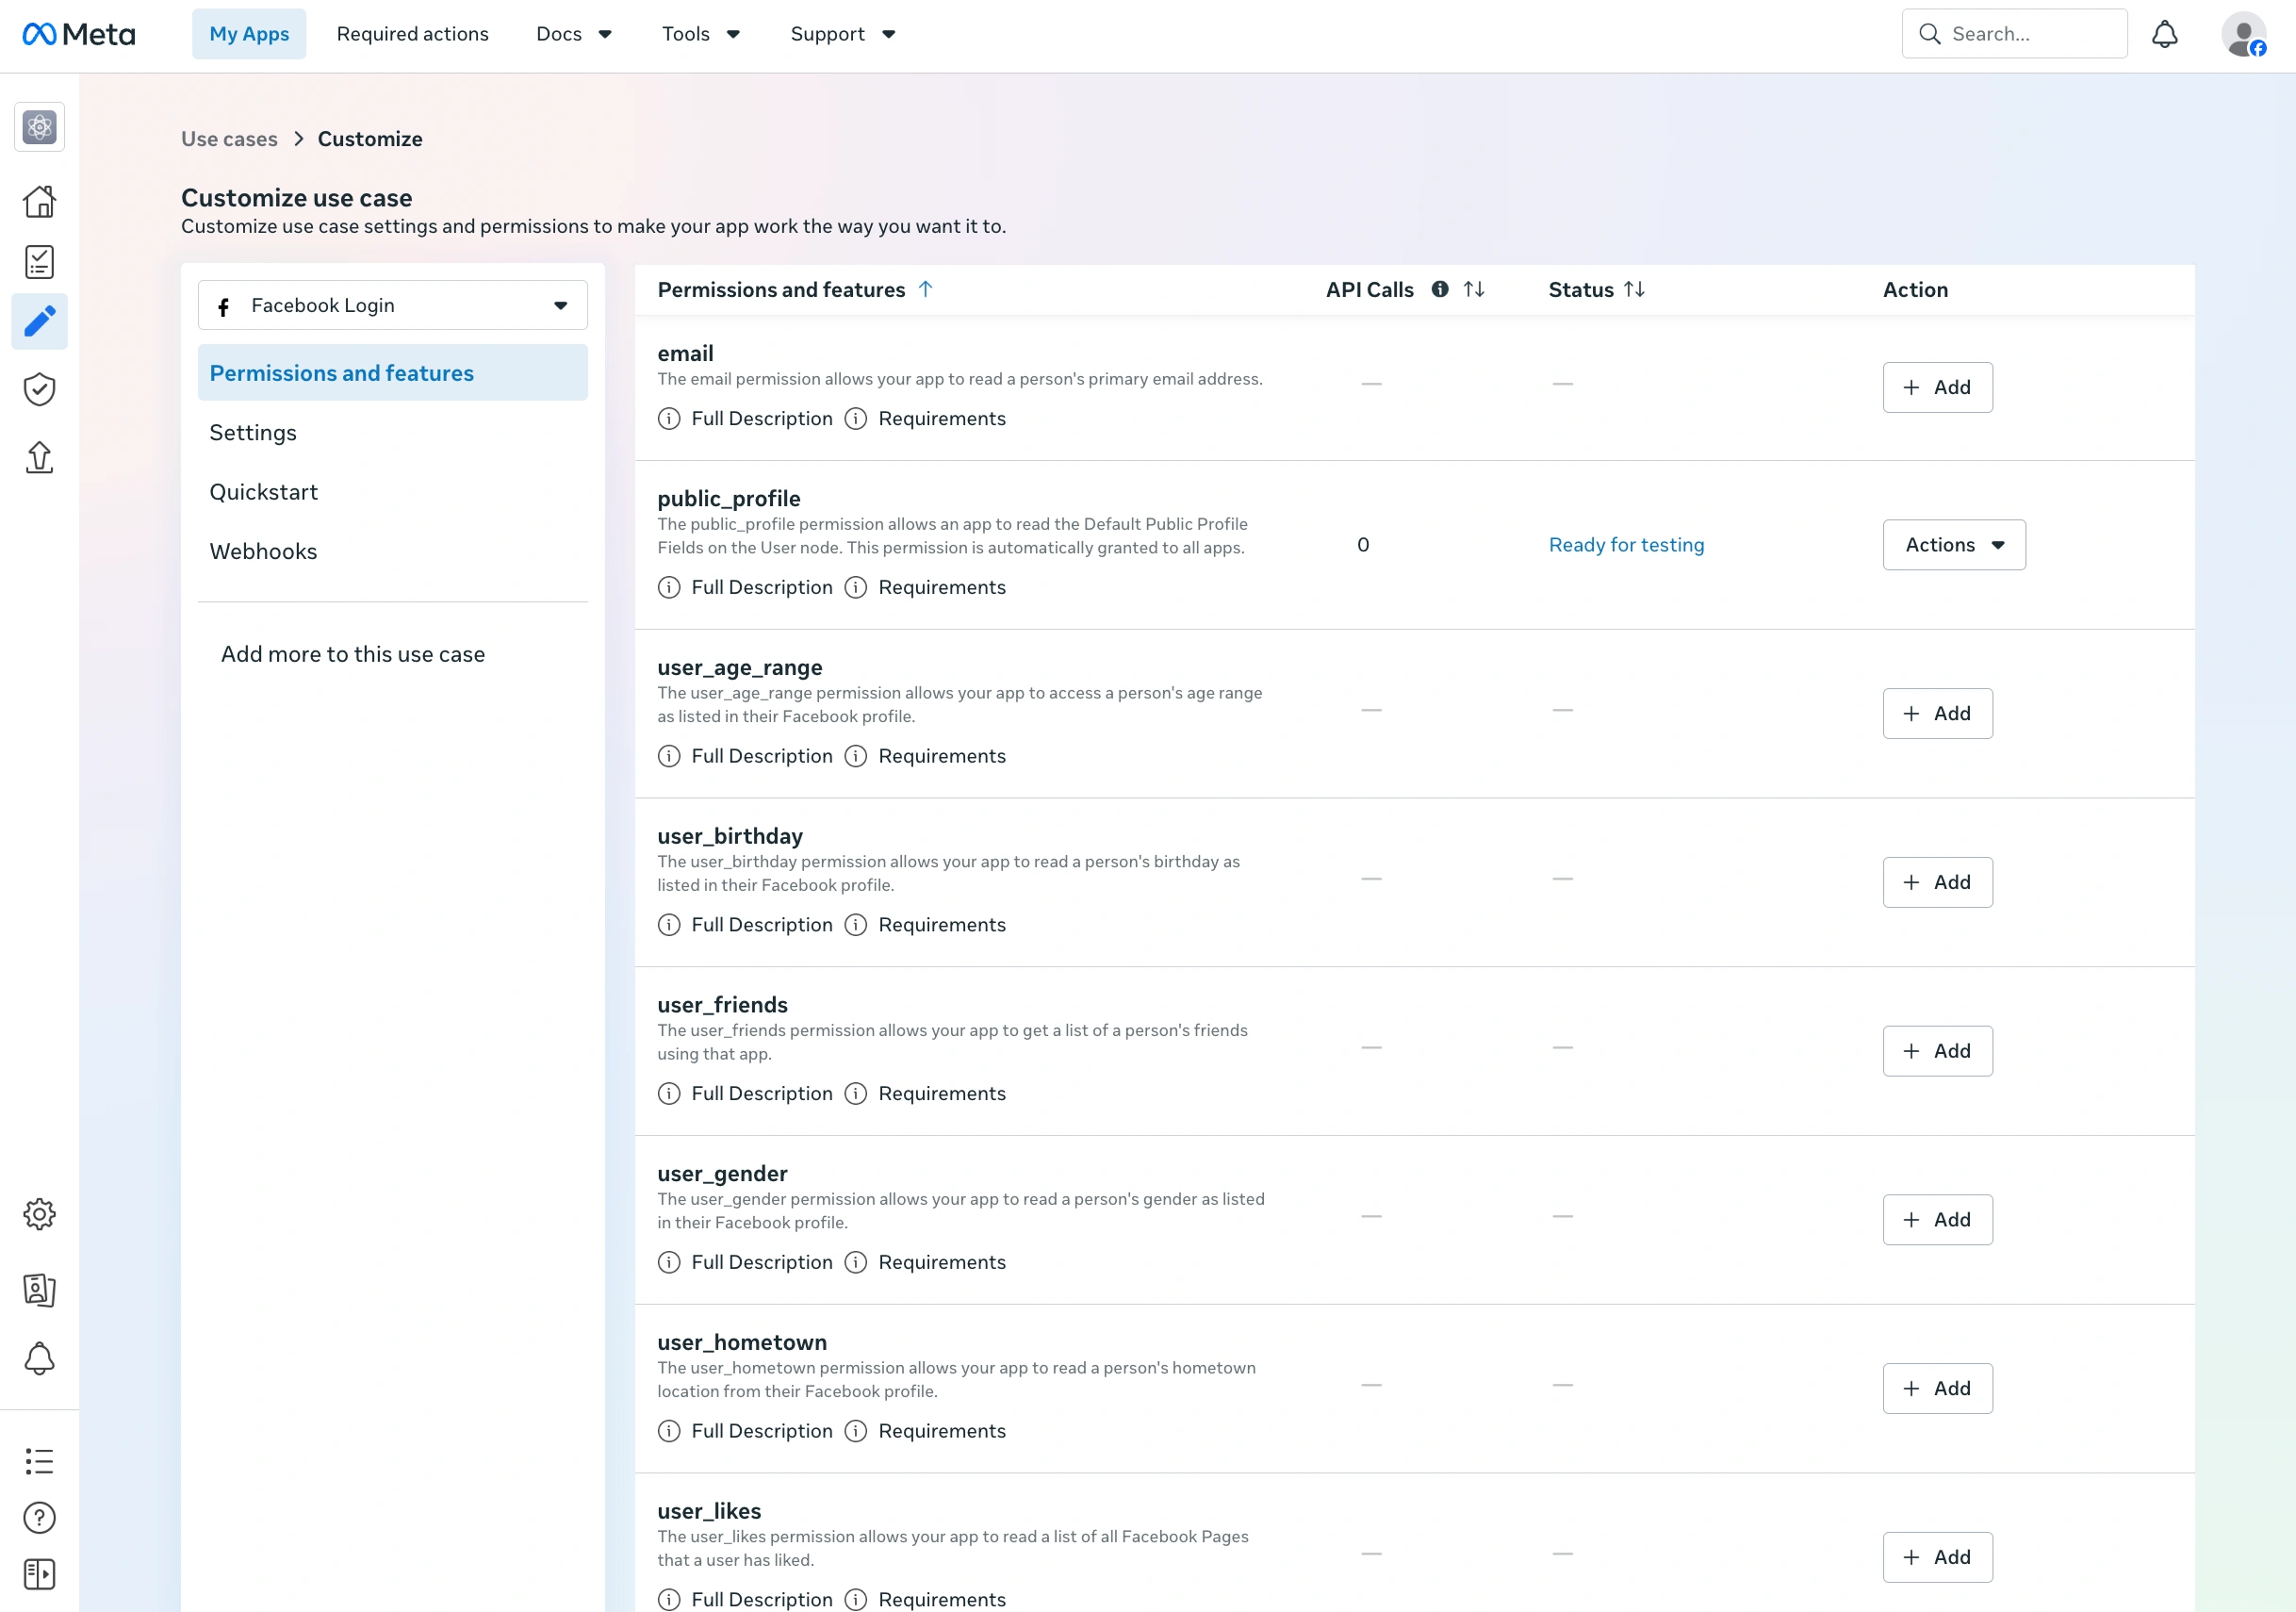
Set permissions — email and public profile
Under Permissions and Features, add at minimum email and public_profile. These are mandatory for login to work — email is needed to identify the user and public_profile provides the user's name. Add any additional permissions your app requires.
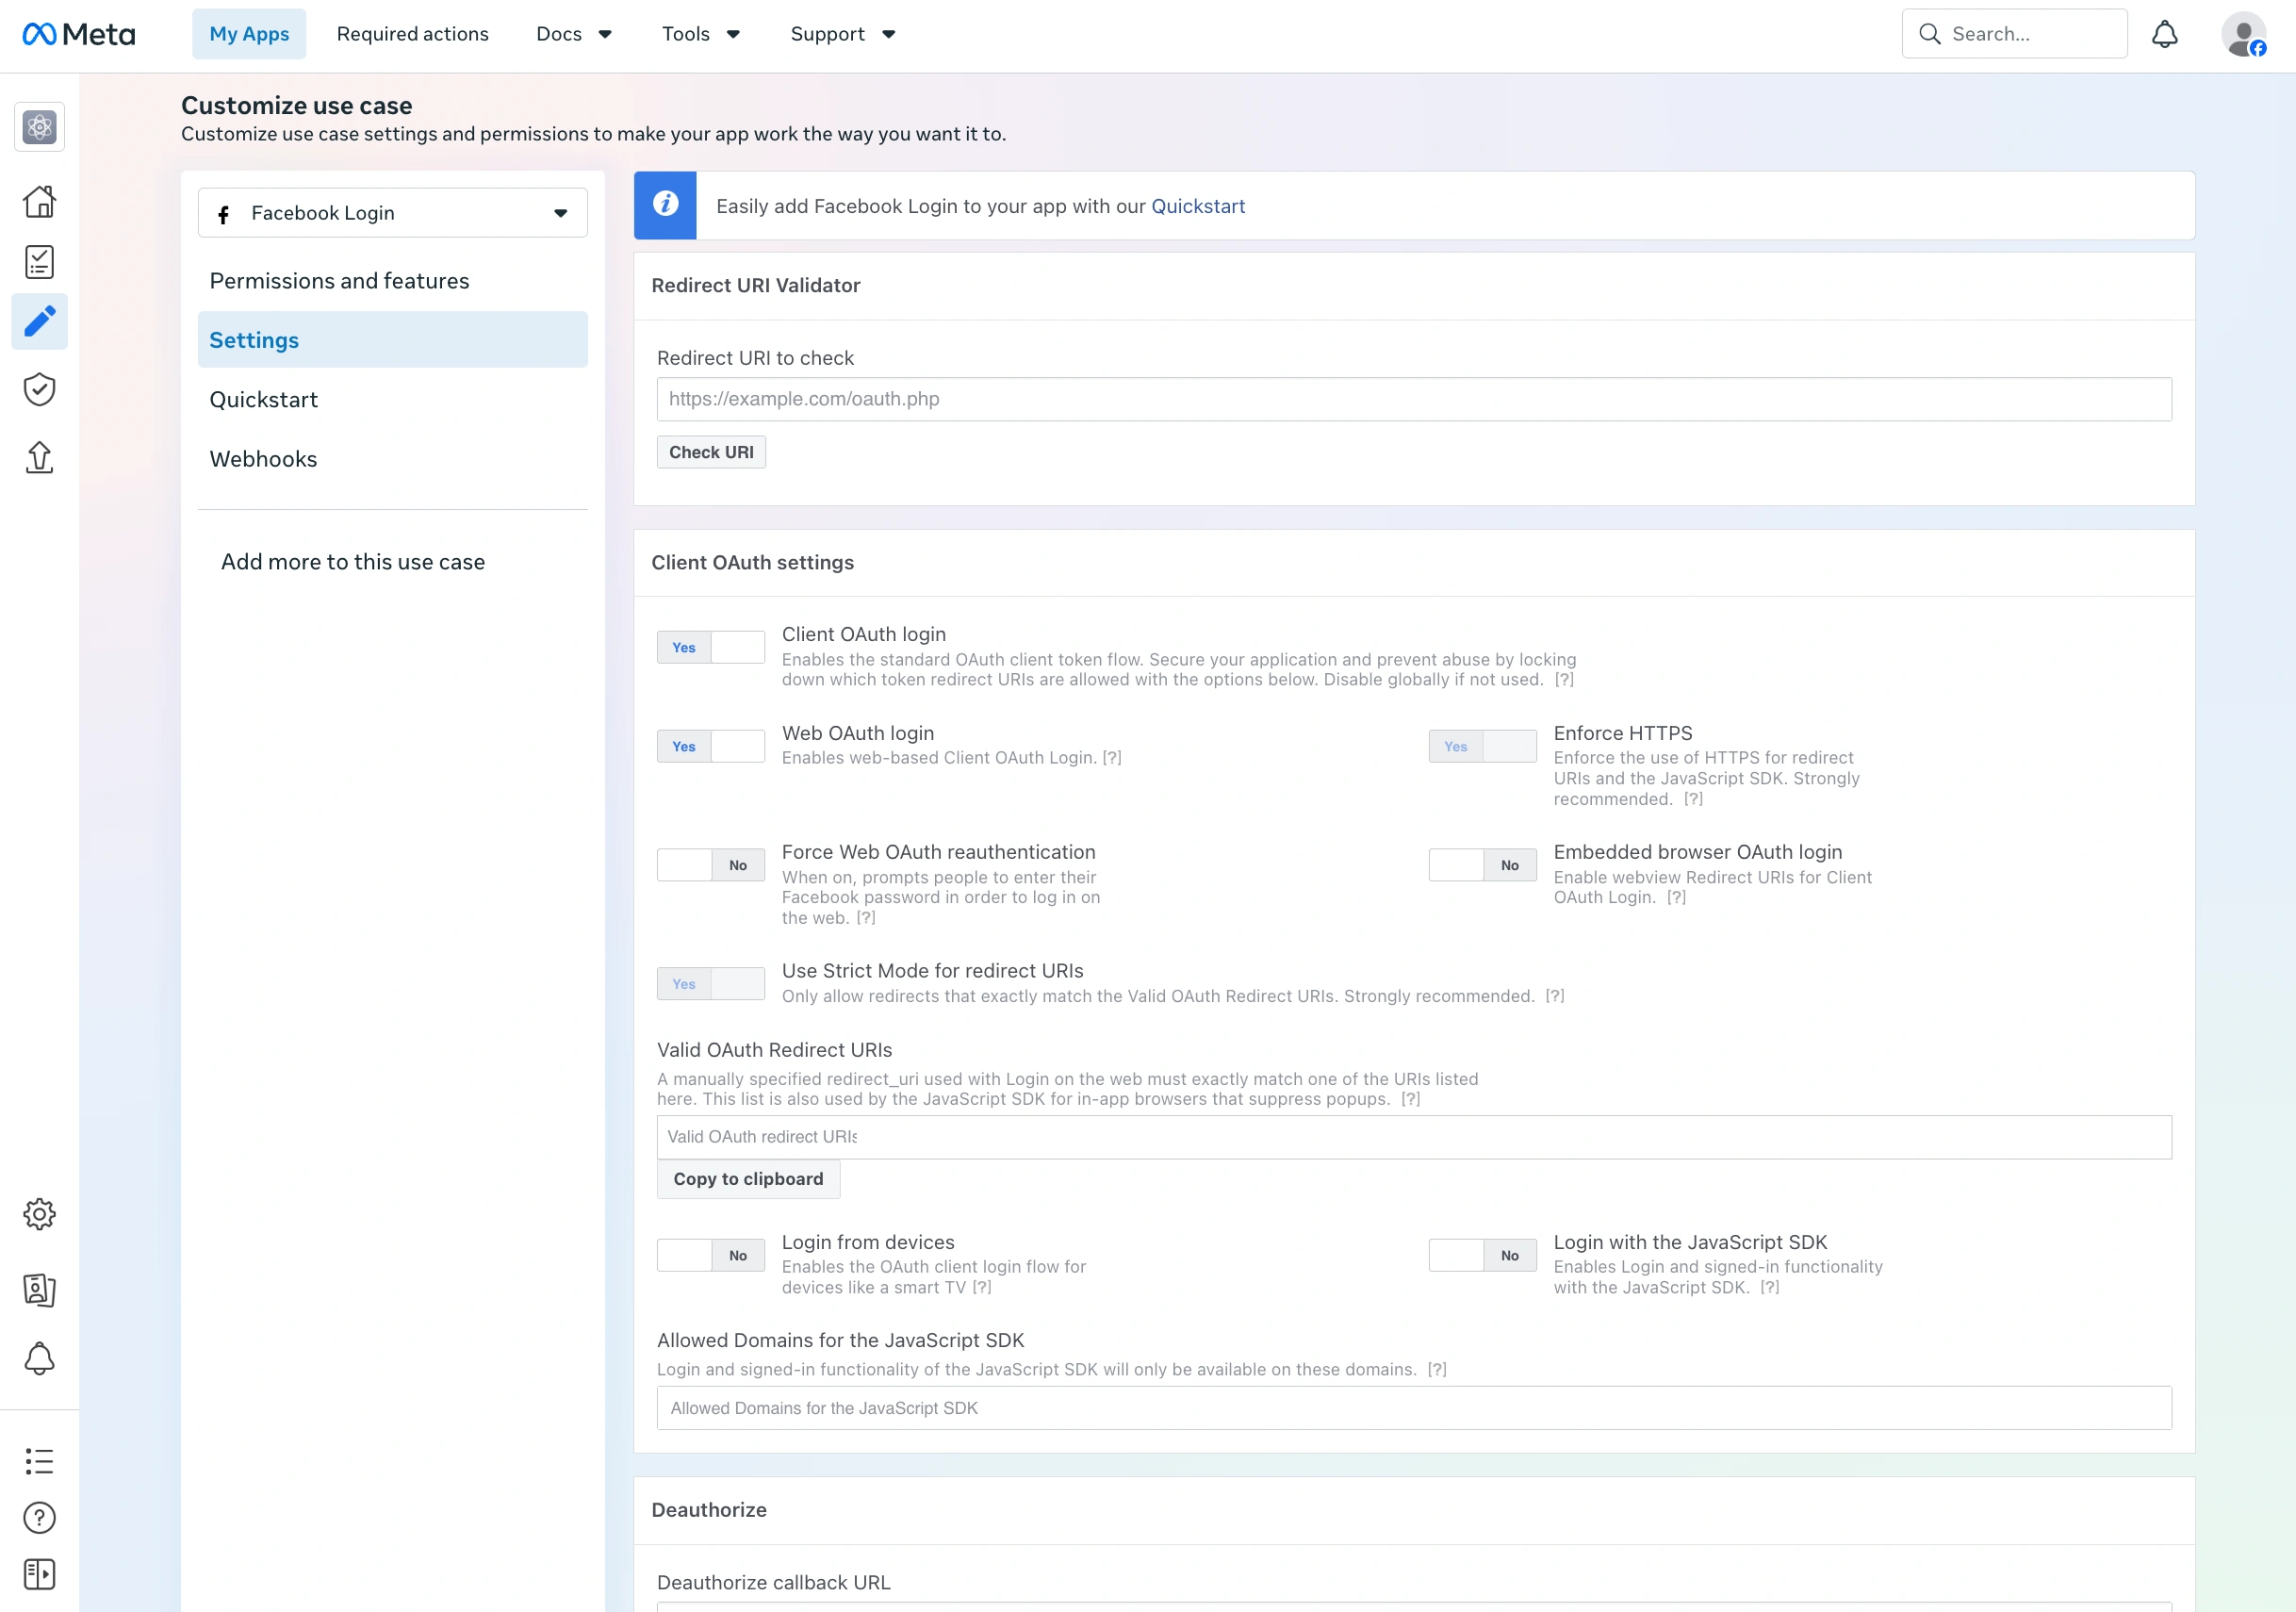
Add a valid OAuth redirect URL
In the login settings, find Valid OAuth Redirect URIs. Enter the full callback URL — the page users are sent to after a successful or failed login. This should be a page on your website that handles the Facebook login callback.
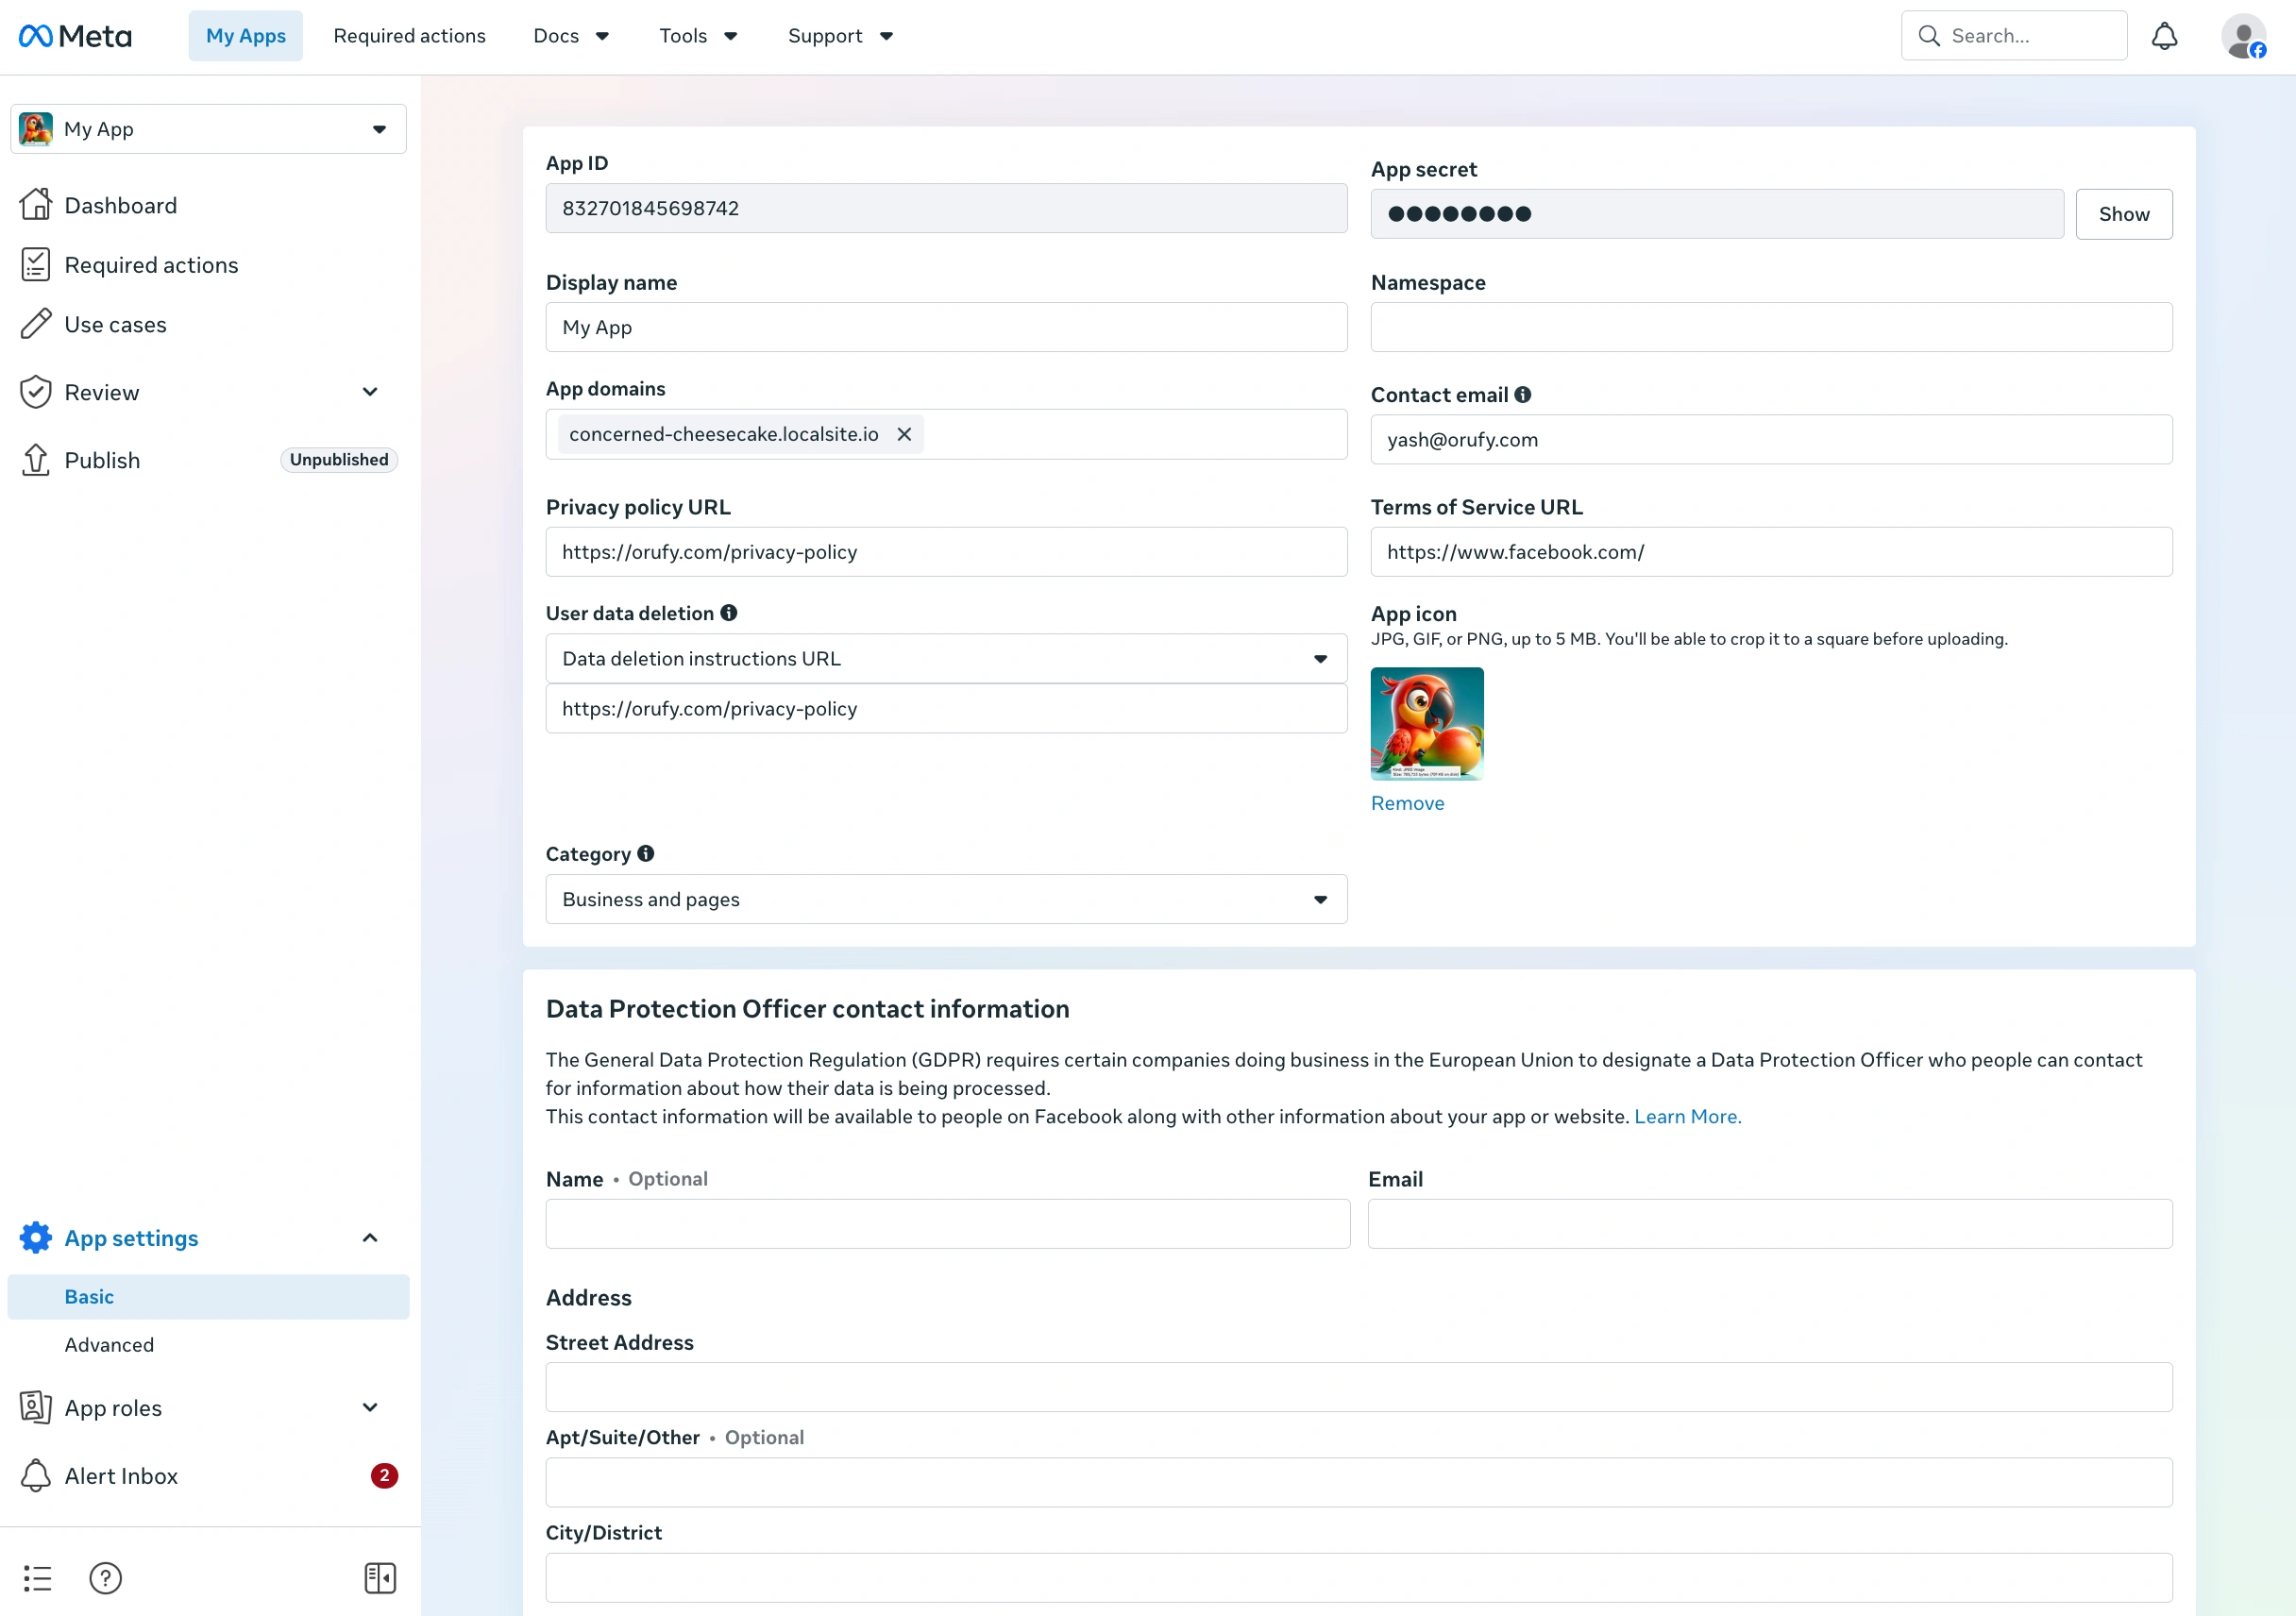
Get your App ID
Go to App Settings → Basic. Your App ID is displayed at the top of the page. Copy it — you'll enter this in the WebToNative dashboard.
Get your Client Token
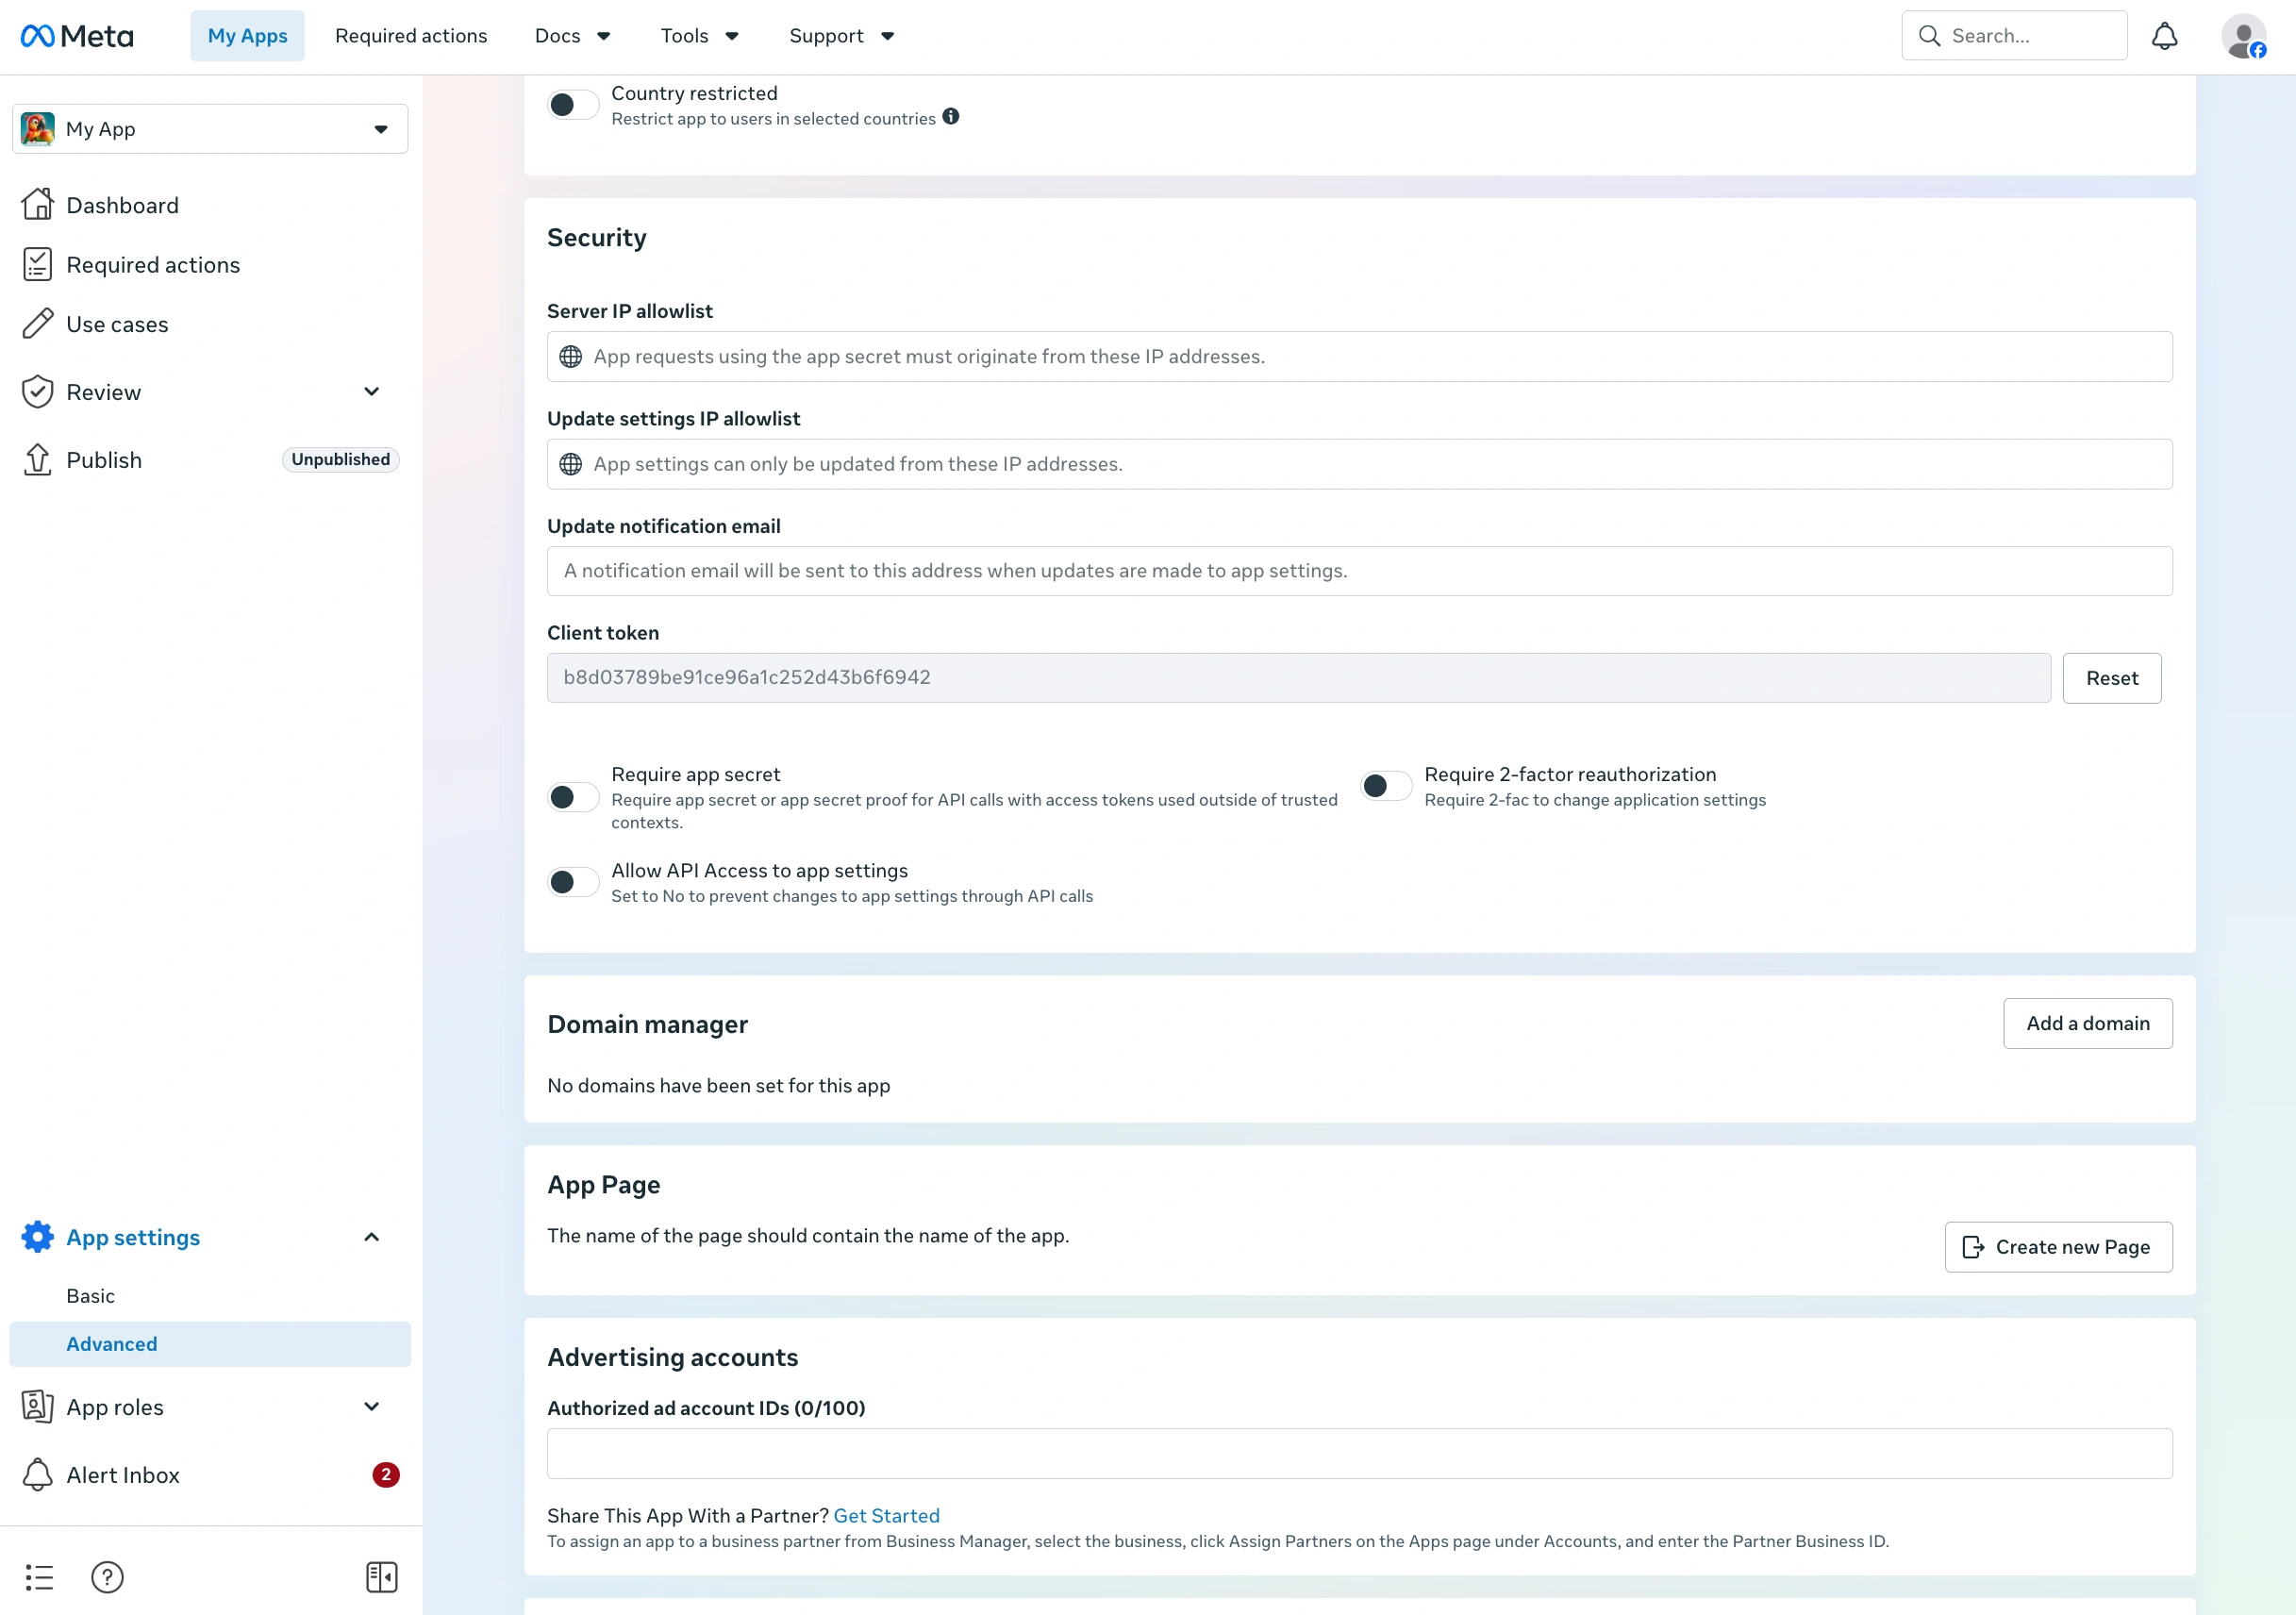
Go to App Settings → Advanced. Scroll to the Security section to find your Client Token. Copy it — you'll enter this in the WebToNative dashboard alongside the App ID.
Platform-specific setup
After getting your App ID and Client Token, add platform credentials in the Facebook Developers portal so Facebook recognises requests from your iOS and Android builds.
iOS setup in Facebook
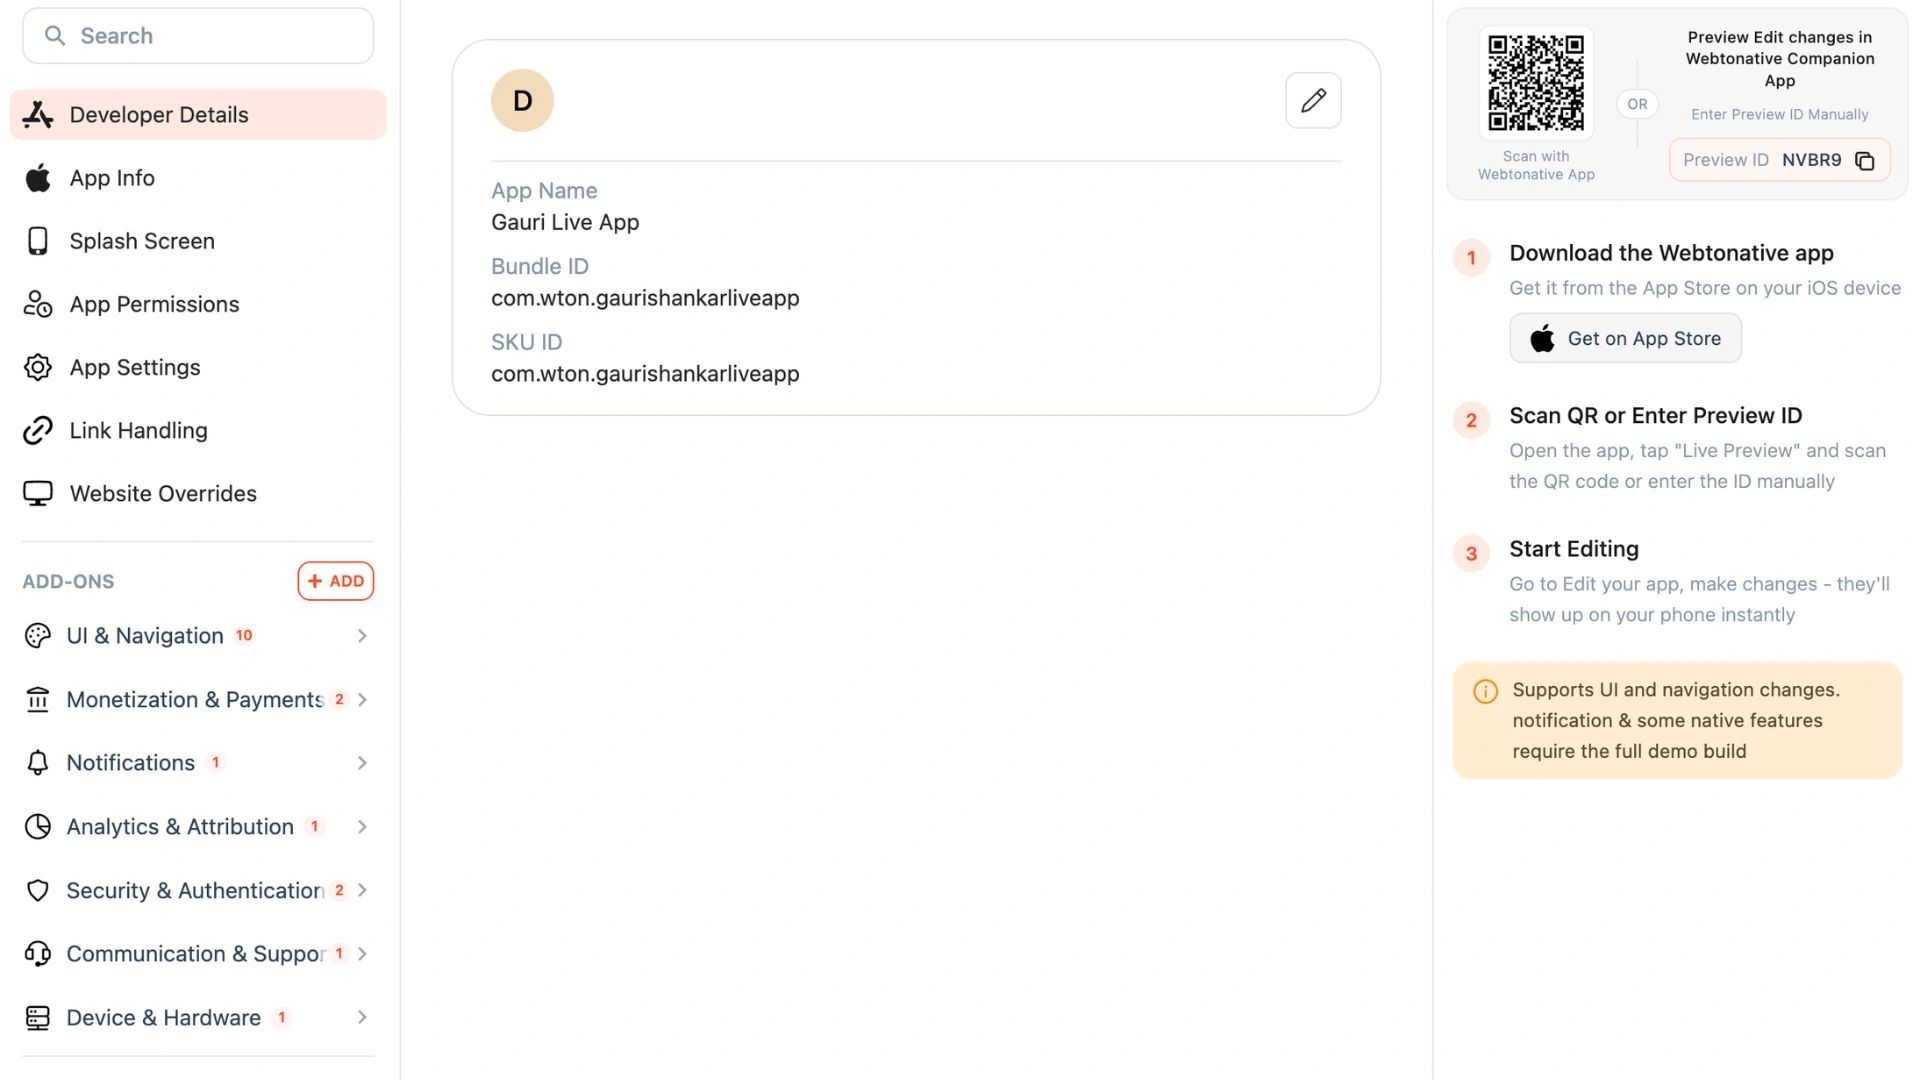
- Bundle ID — enter your app's Bundle ID to tell Facebook which iOS app is making requests. Find it: WebToNative Dashboard ➡️ App Info ➡️ Bundle ID
This step requires a paid Apple Developer account and your app must be connected to the App Store.
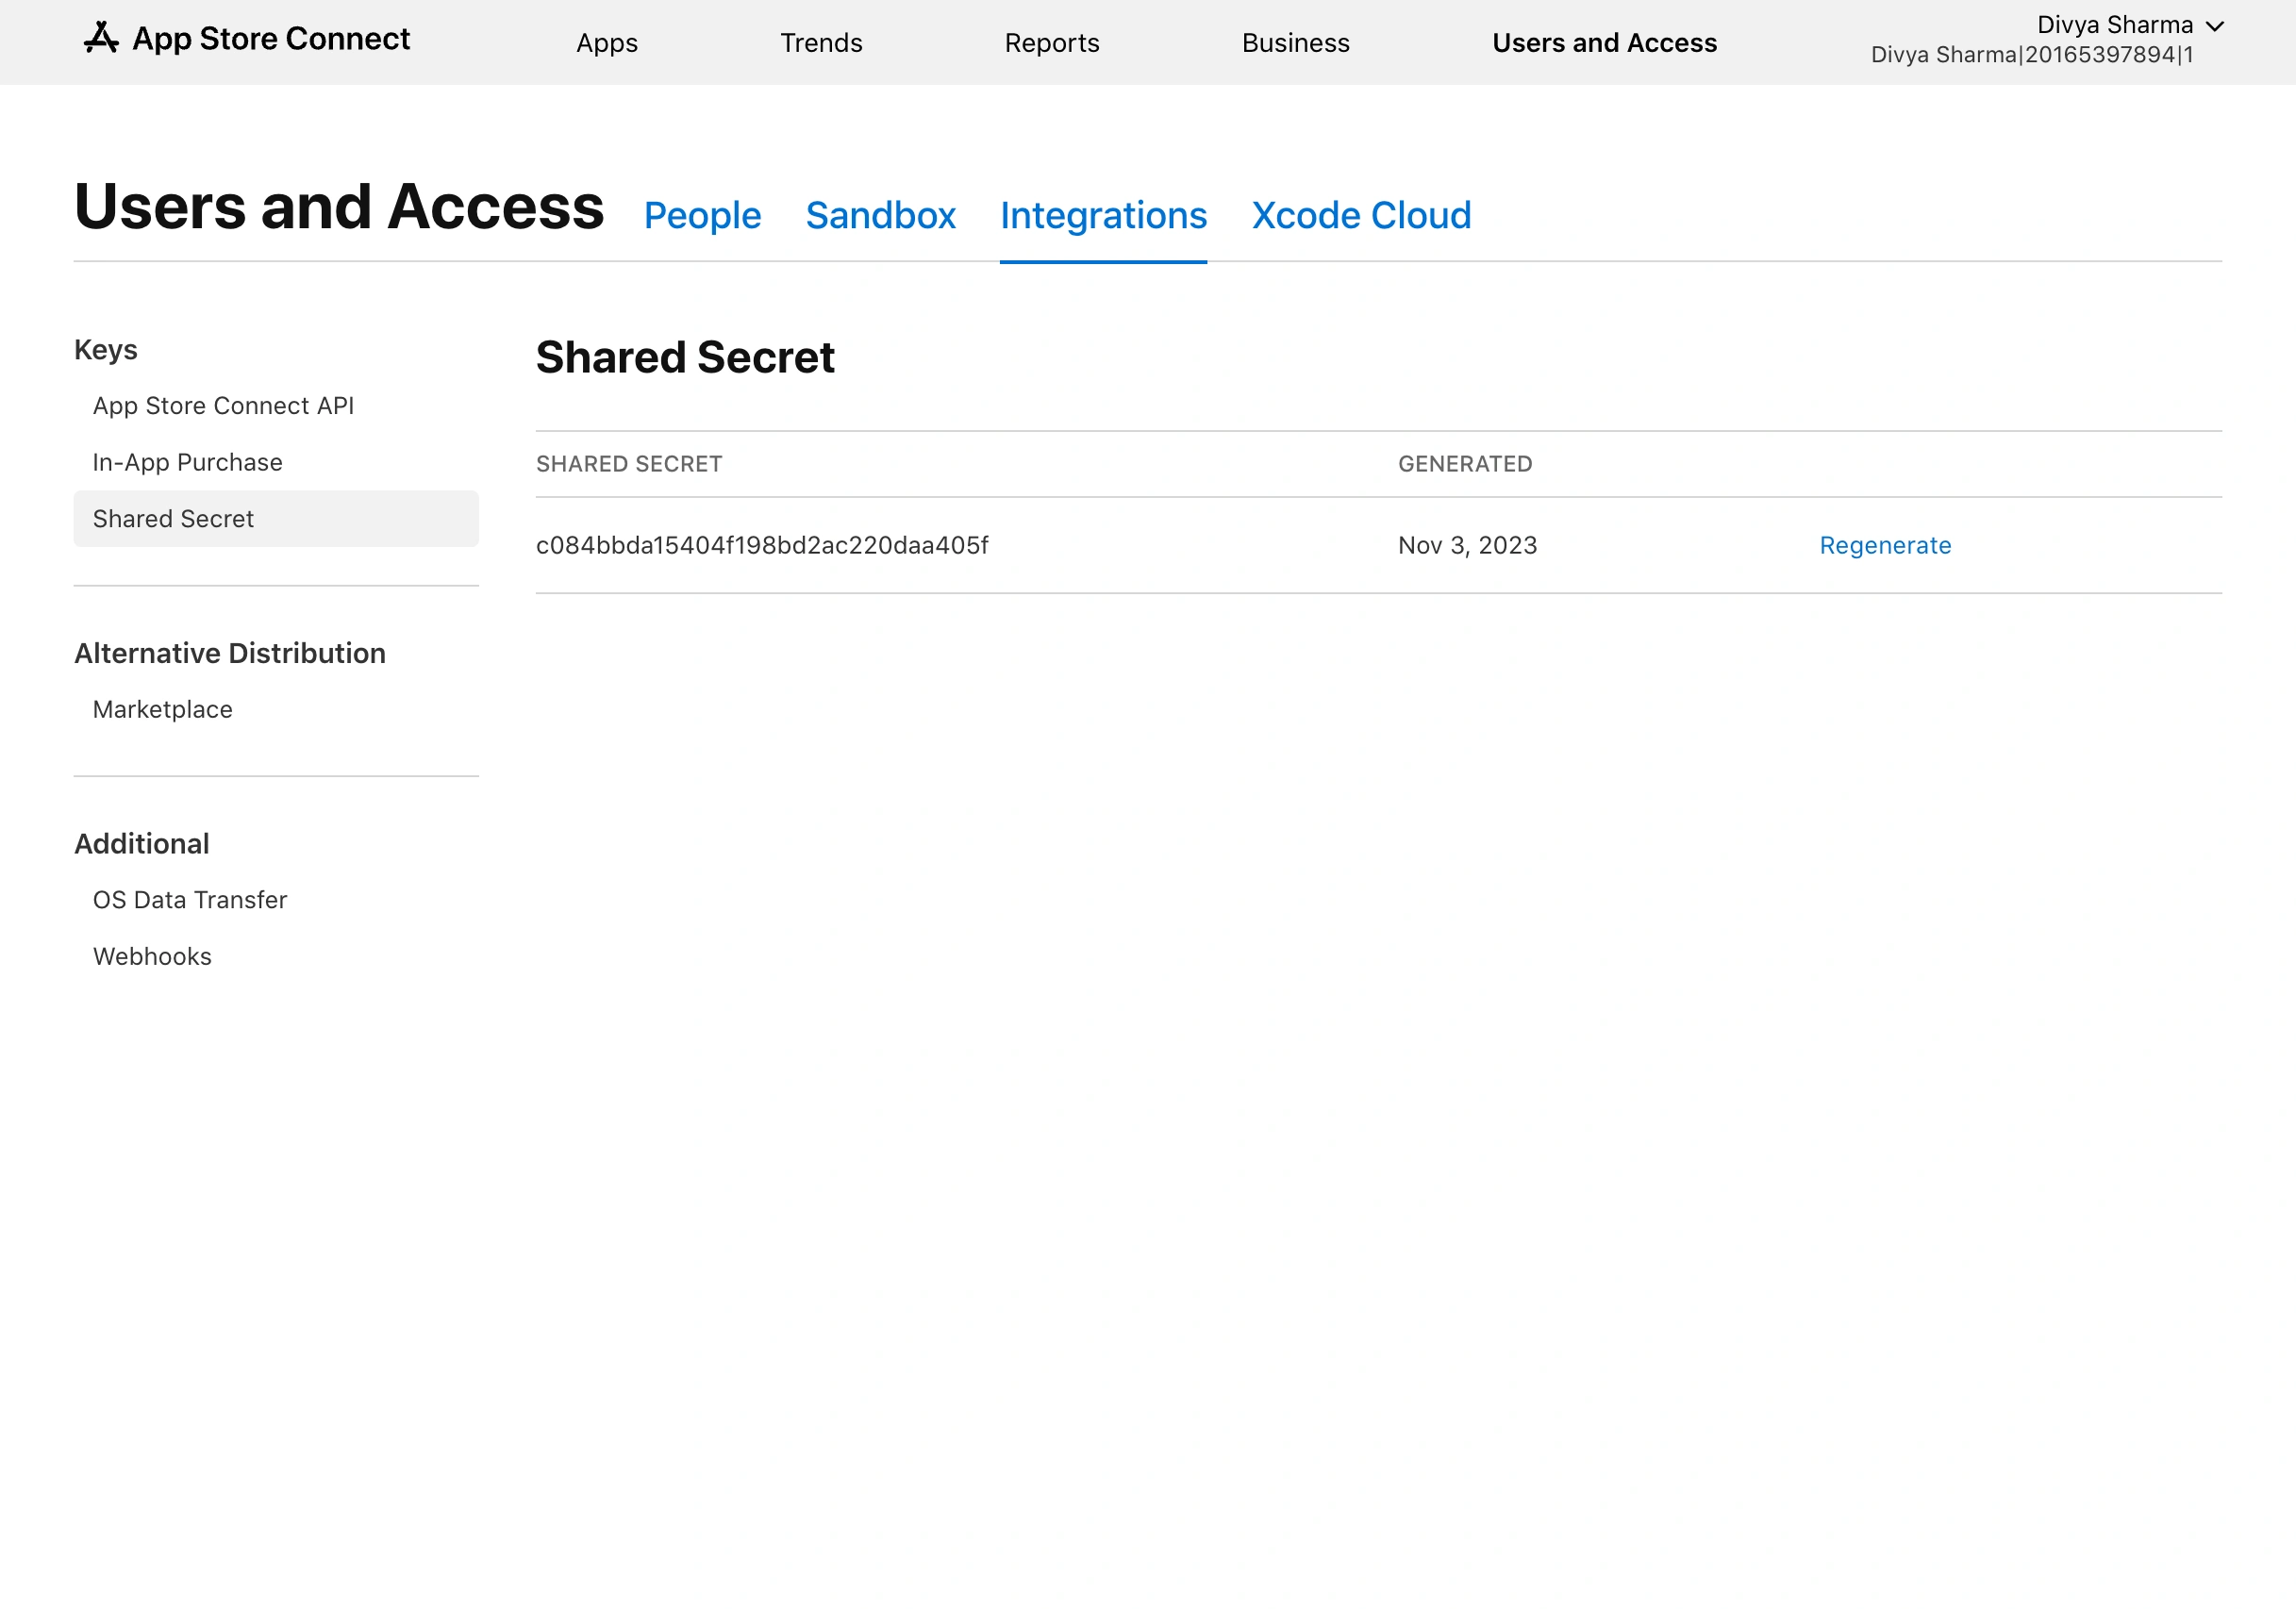
- Shared Secret — Apple's shared secret for your app, used to authenticate Facebook's connection with Apple Sign-In.
Find it: Apple Developer Account ➡️ Users and Access ➡️ Integrations ➡️ Shared Secret
Android setup in Facebook
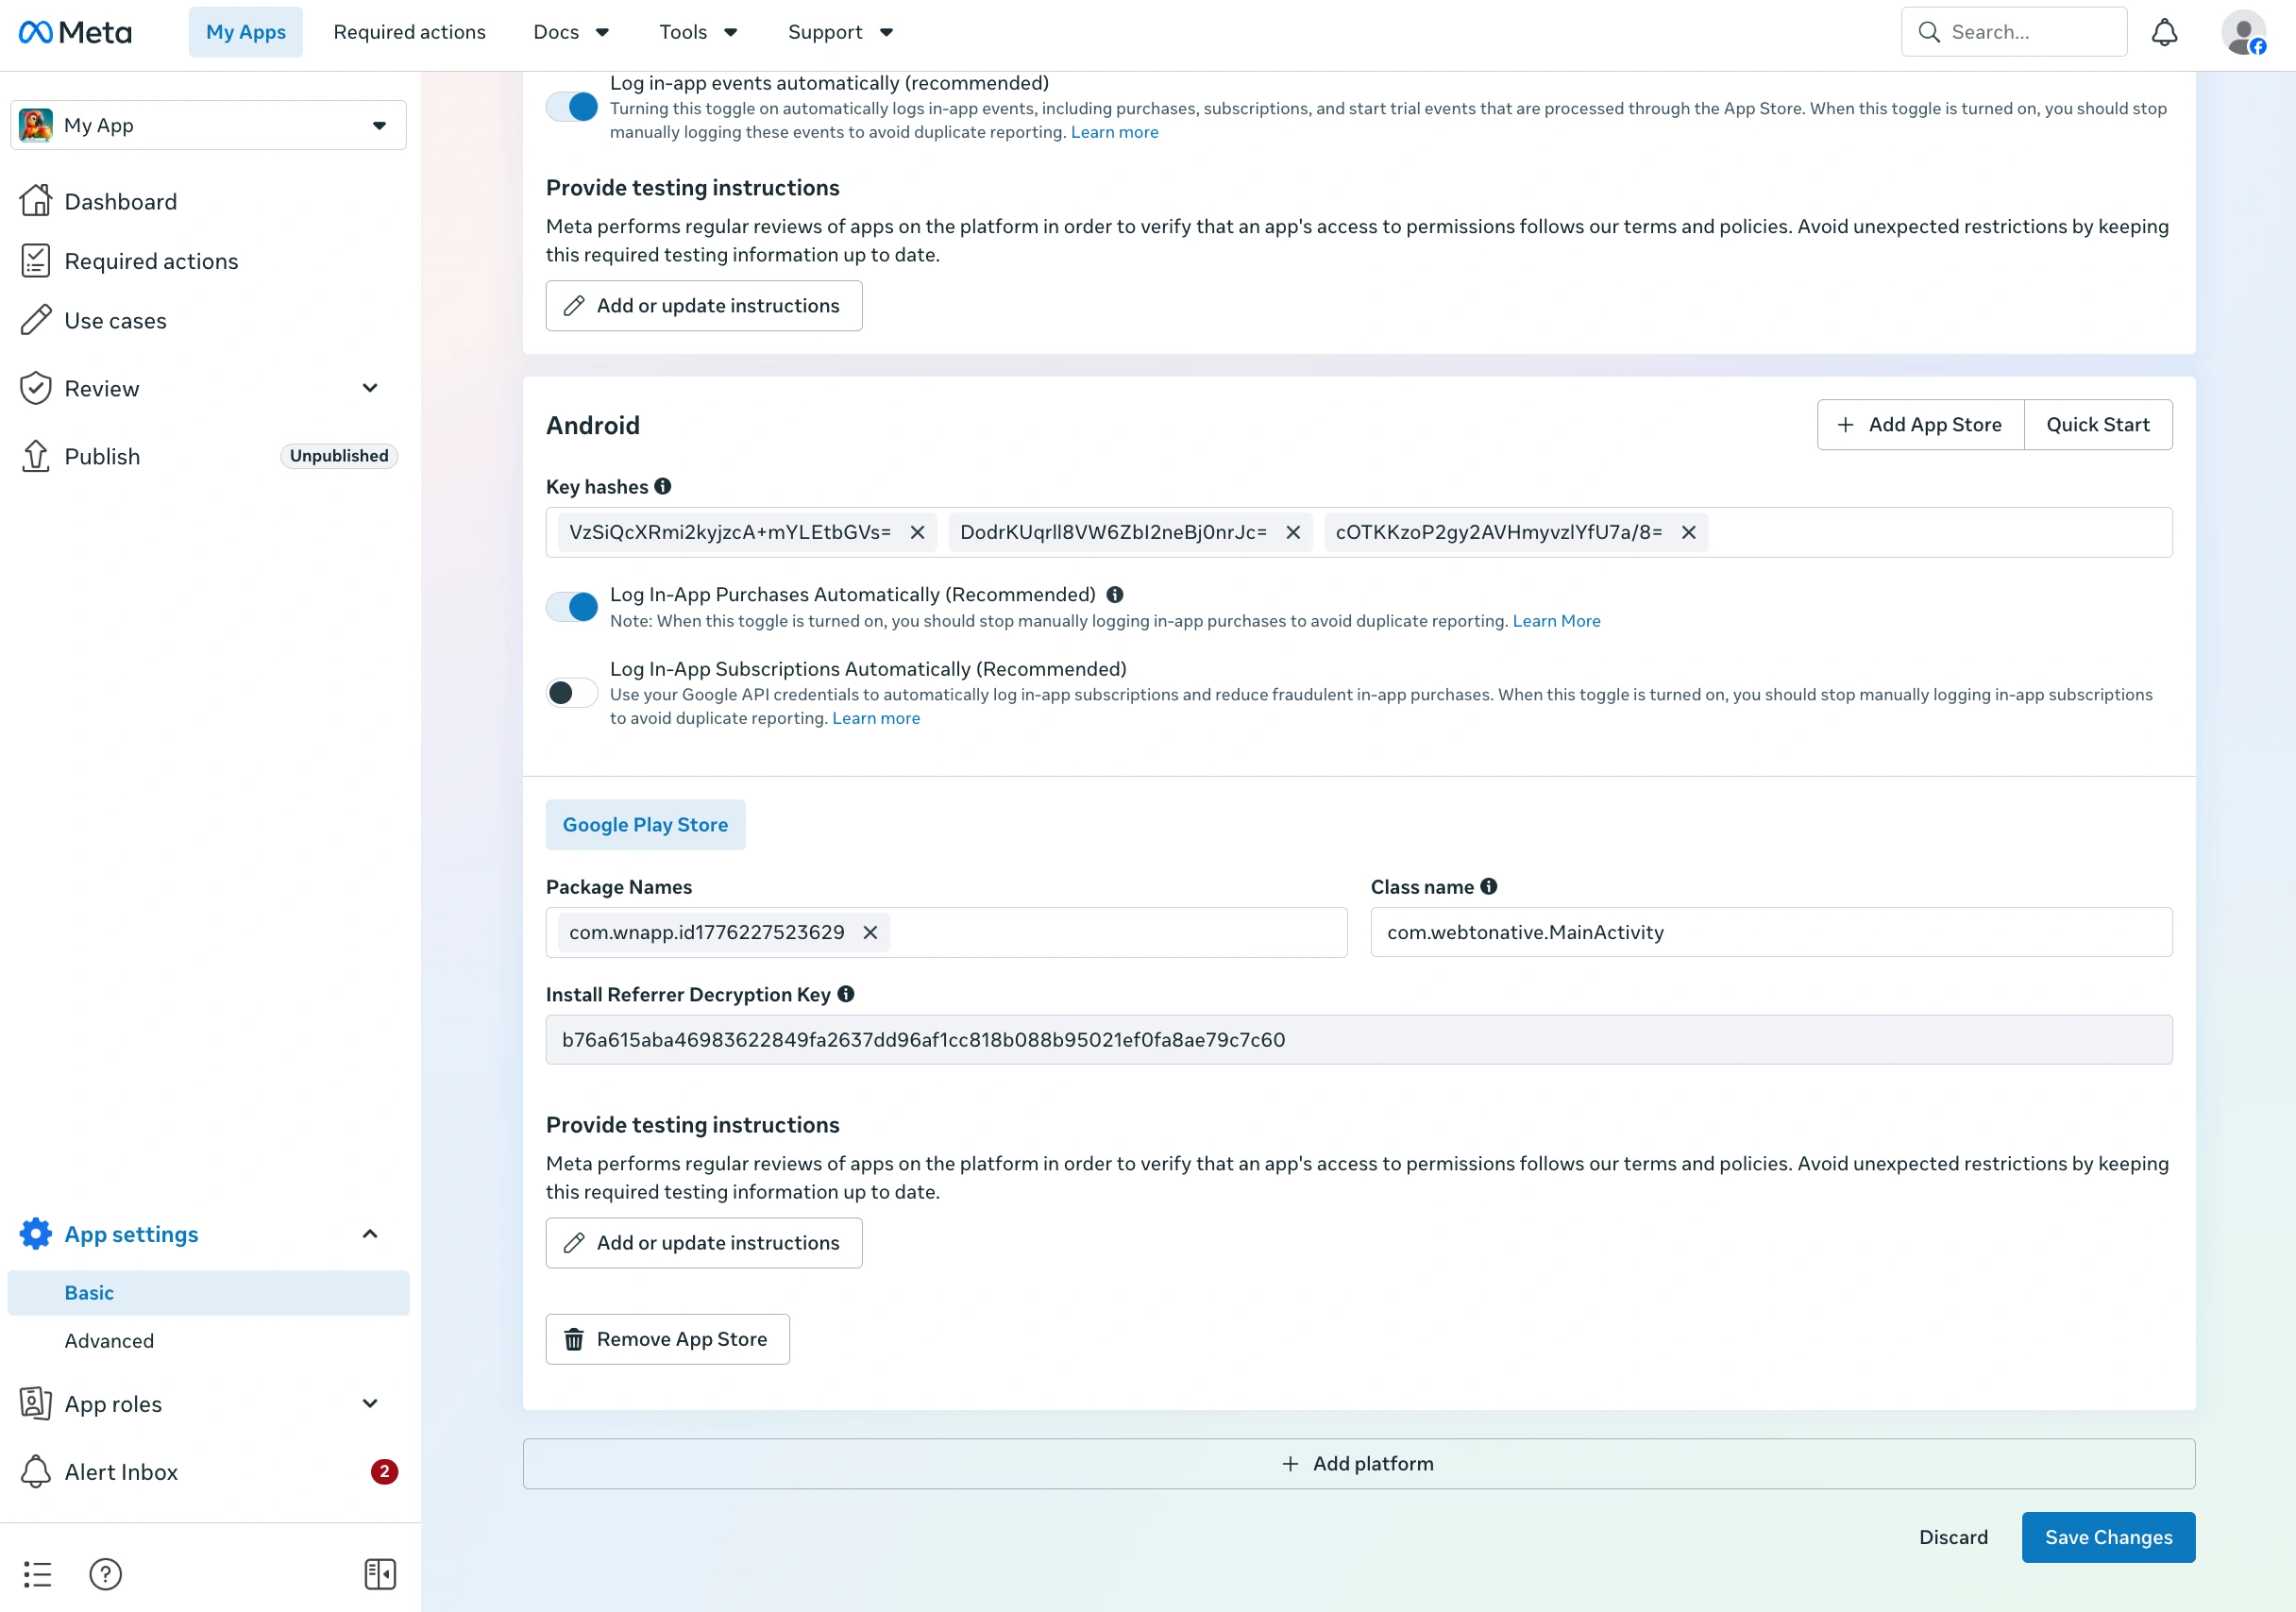
- Key Hashes— a 28-character hash that verifies your Android app with Facebook.
Find it: WebToNative Dashboard ➡️ Add-Ons ➡️ Social Login ➡️ Facebook Configuration ➡️ Key Hashes
- Package Name — your app's unique Android identifier.
Find it: WebToNative Dashboard ➡️ App Info ➡️ Package Name
- Class Name — enter exactly as shown below:
com.webtonative.MainActivity
Frequently Asked Questions
Where do I find Key Hashes for Android?
You don't need to generate them yourself. WebToNative provides your Key Hashes directly — go to Add-Ons → Social Login → Facebook Configuration in your WebToNative dashboard. Copy the Key Hash shown there and paste it into the Android section of your Facebook app settings.
Do I need to complete Business Verification before testing?
No — Business Verification is required before publishing your app publicly so that anyone can log in. During development and testing, you can use Facebook login with test users or users added to your app's developer roles without completing verification. You also need to complete App Review before going live.
What is the OAuth Redirect URL?
It's the page on your website that handles the result of a Facebook login attempt — the URL Facebook sends the user back to after they approve or deny the login request. This page receives the login callback from Facebook (success or failure) and your website then processes it and logs the user into your app. Enter the full URL including https://.
What is the Class Name for Android and where does it come from?
The Class Name tells Facebook which activity in your Android app should handle the login intent. For all WebToNative apps this is always com.webtonative.MainActivity. Enter it exactly as written — it does not change per app.
Facebook Login is opening with a limited.facebook.com screen instead of the normal login — why?
This happens when your iOS app hasn't declared a tracking usage description. When iOS can't find a valid tracking permission entry in your app's settings, Facebook falls back to Limited Login mode and opens limited.facebook.com instead of the standard Facebook authentication flow.
To fix it, enable the Tracking Usage Description in your WebToNative iOS permissions settings and provide a clear description of why your app uses tracking. Once that's in place and the app is rebuilt, Facebook will open the proper authentication screen.
Note: Limited Login mode also returns a different type of token than standard Facebook Login — a signed JWT instead of a standard access token. If your backend is set up to handle regular Facebook access tokens, this different token format will break your login flow. Fixing the tracking permission resolves both the UI and the token issue at once.