


Sidebar Navigation
Sidebar Navigation lets you arrange your app’s content into a menu, enhancing navigation flow and usability. Also, it helps you maintain your app’s structure easily and quickly.
Benefits of Sidebar Navigation
Easy Navigation: Helps users to find and access different contents of the app without confusion.
Better User Engagement: Provides a clear layout that enhances overall navigation.
Customizable Menu: Allows you to customize the design of the menu that aligns with your app structure and users.
Step-by-Step Process to Enable Sidebar Navigation
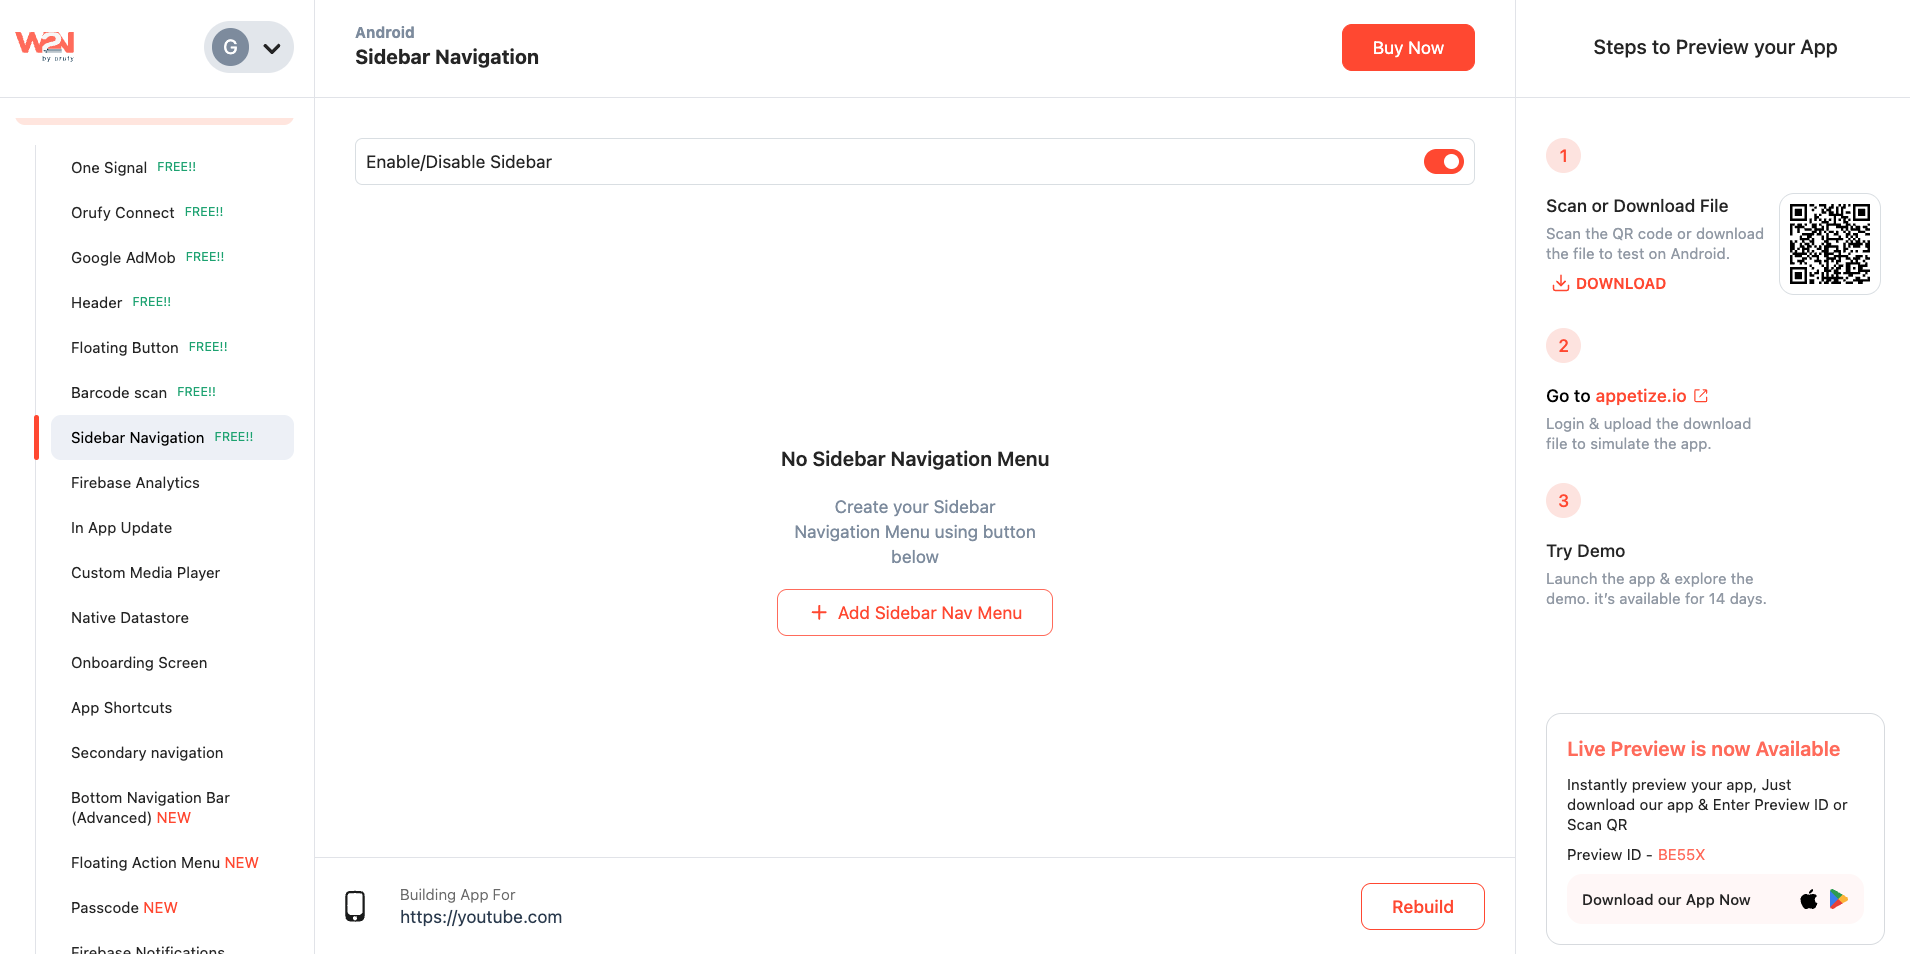
1. Add Sidebar Navigation from Add-ons Click on “Sidebar Navigation” from the sidebar menu of your WebToNative dashboard.
![]()
2. Enable Sidebar Navigation Tap on “+Add Sidebar Nav Menu” to proceed with setup.
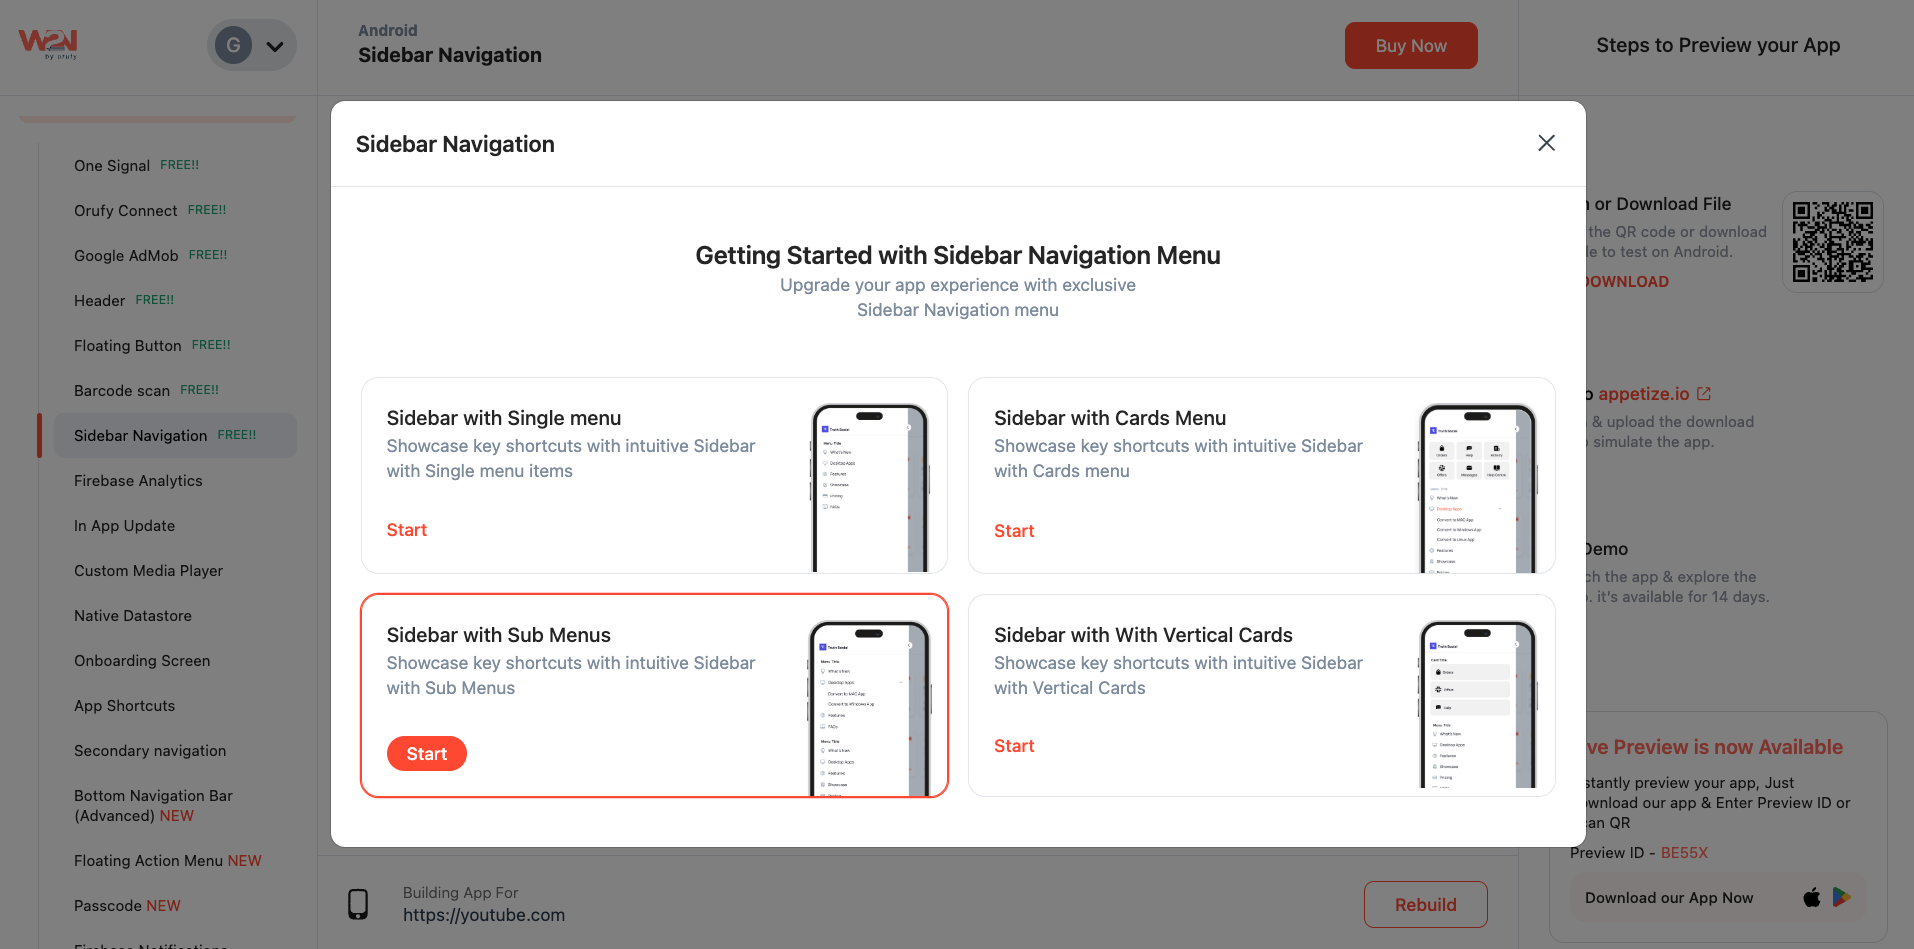
3. Select Your Plan
-
Clicking on the “+Add Sidebar Nav Menu” will lead you to the customization.
-
This section offers some options based on your preference for how you want your menu to look and function.
-
Choose your plan and start customizing the app’s menu bar.
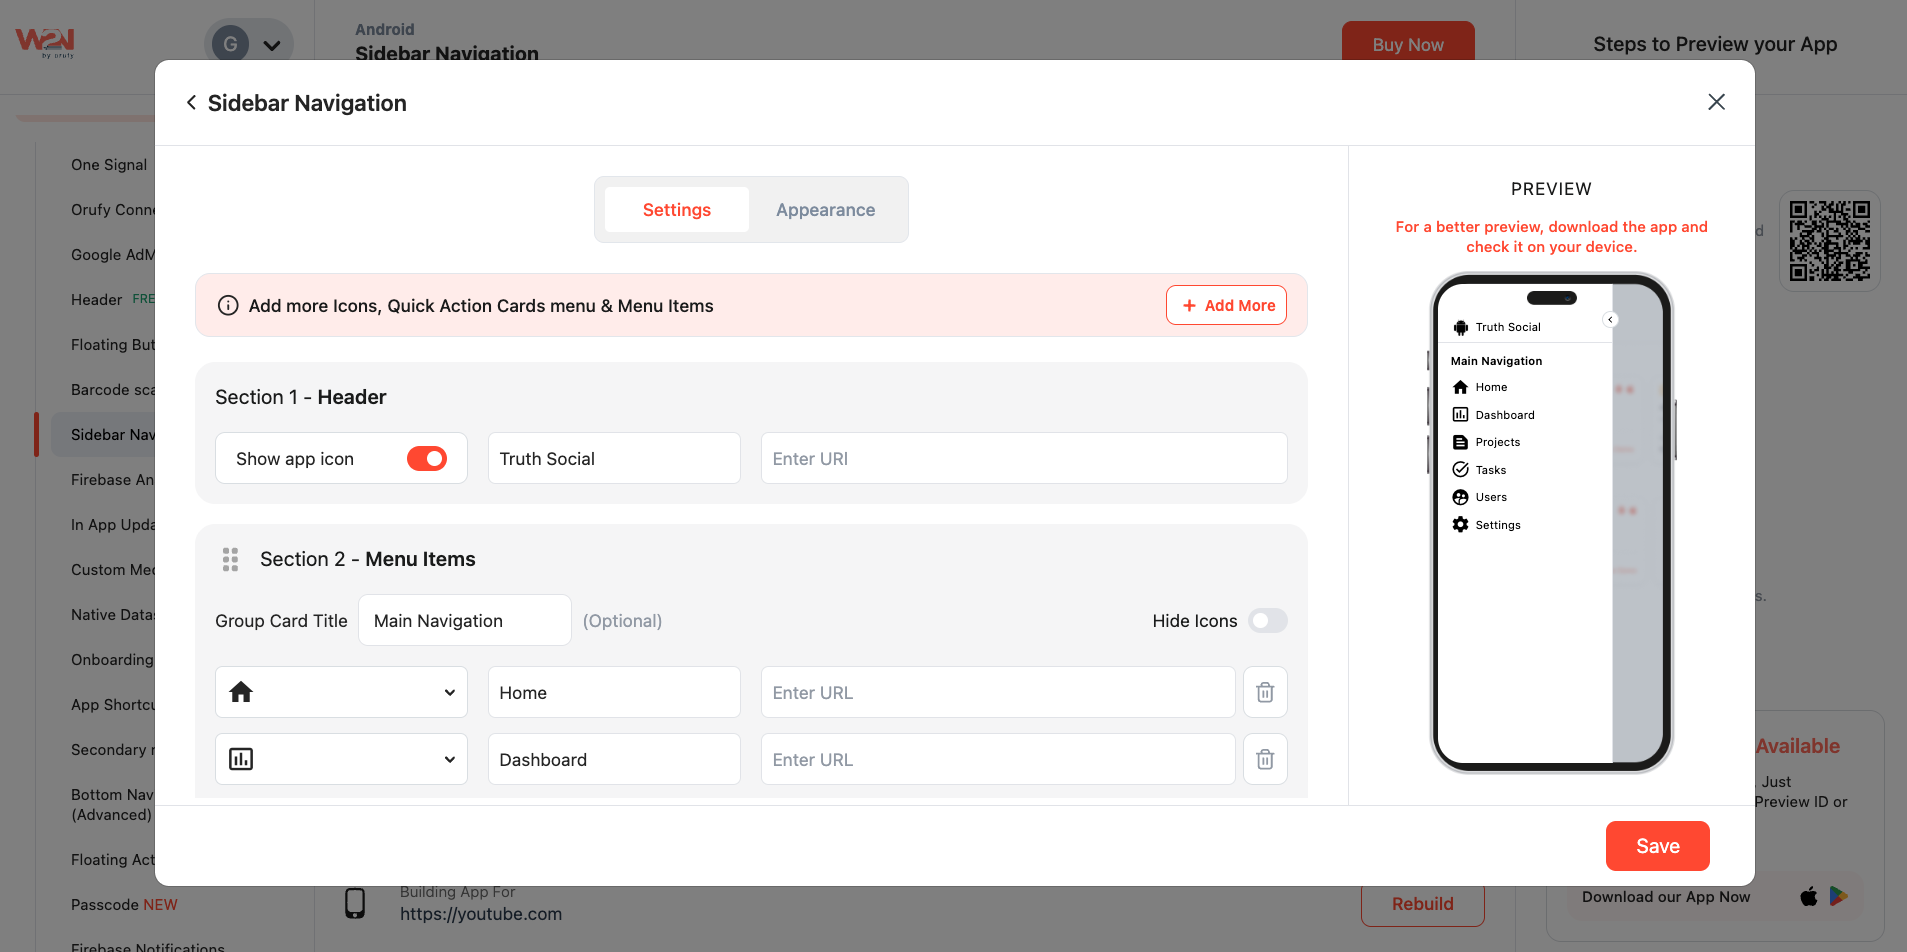
4. Start Designing
-
After selecting your specific plan, you can start customizing your Sidebar Navigation Menu.
-
It includes header, menu items, icons, appearance, and more.
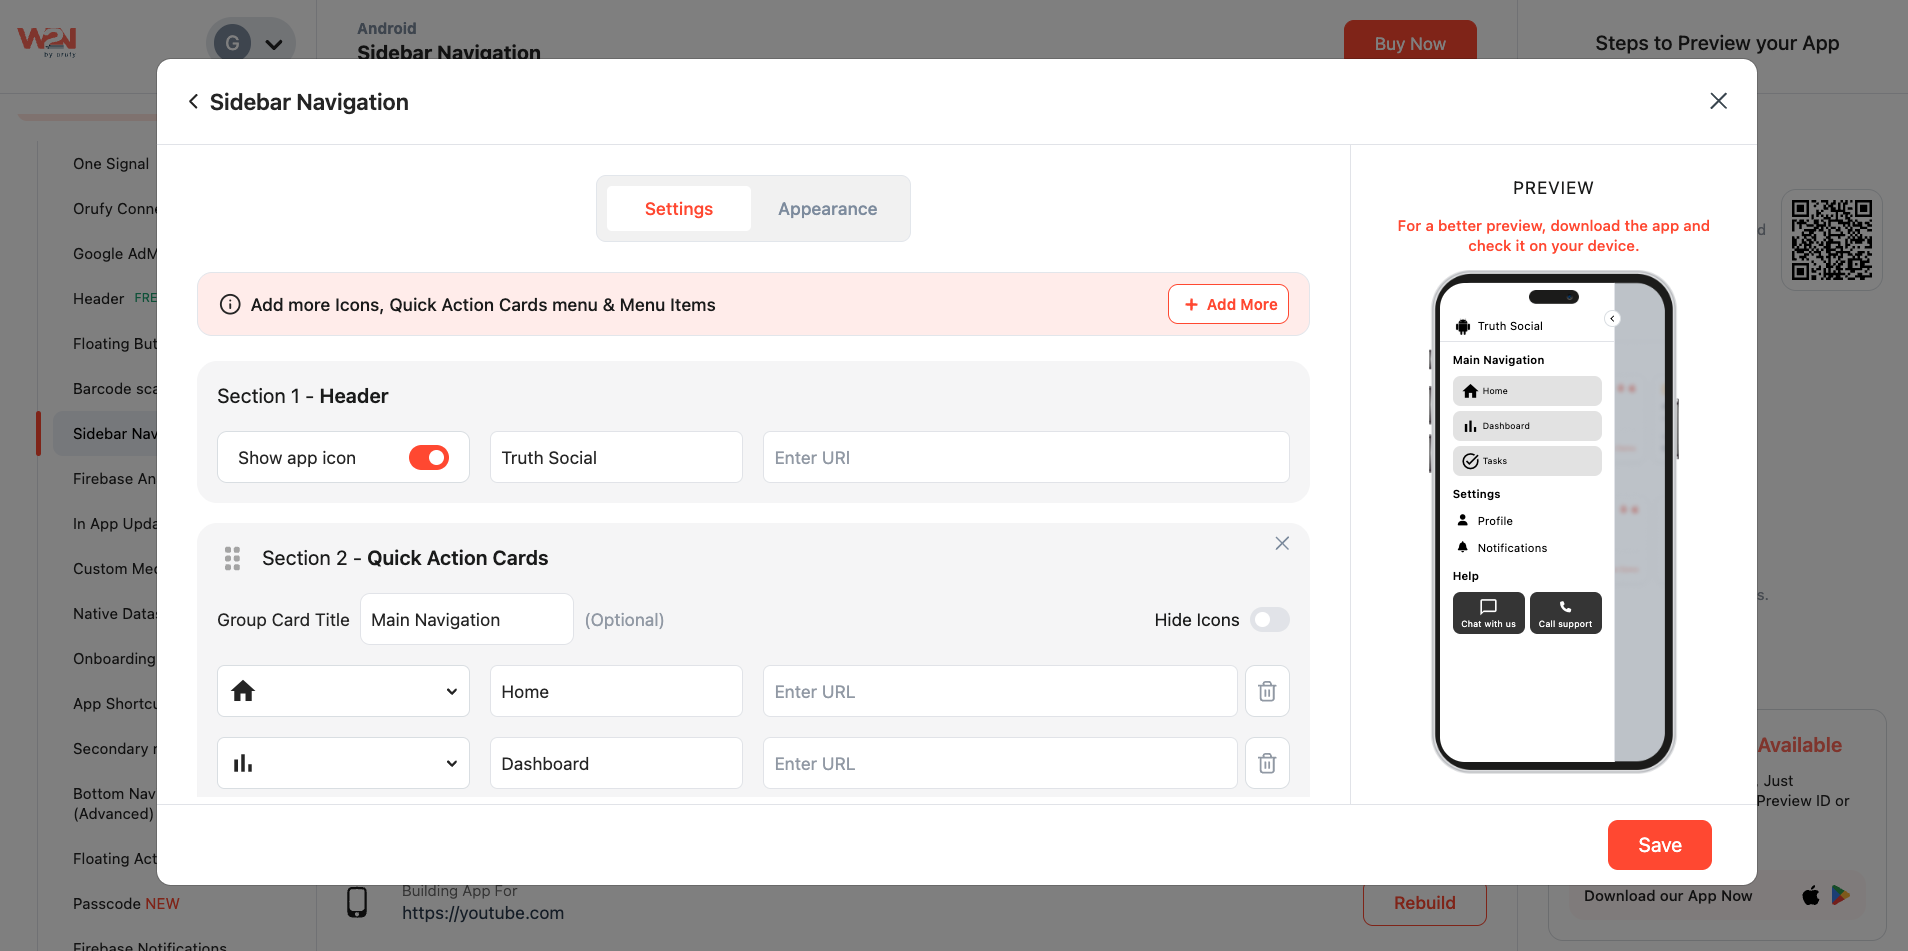
5. Add Quick Action Cards (Pro & Premium Plans)
-
If you want to go with the advanced plan, then upgrade to a specific pro/premium plan.
-
This way, you can add shortcuts to your sidebar and customize the icons, labels, and links.
5. Preview and Save After setting your menu’s items and Quick Action Cards, save the changes and preview them in order to make sure that everything is working as expected.
6. Rebuild Your App Now, click on rebuild to apply the Sidebar Navigation changes. You just have to wait for a few minutes.